
Measurement method
A clear explanation of how I am trying to measure breakdown voltage can be found on this page, Measuring the dielectric strength of dielectrics by Zoltan Losonc. You basically place a 3mm thick piece of dielectric material between a brass cylinder and a brass disk both of specific dimensions. Note that the dimensions of my brass disk differ from that on the above webpage in that its diameter is 77mm instead of 75mm.
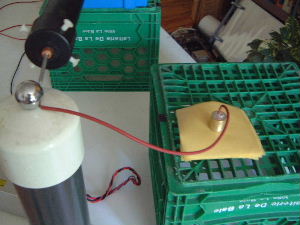
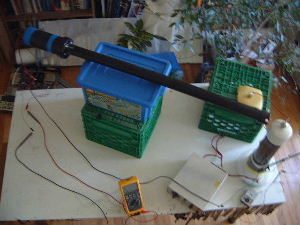
The following are pictures of my setup.
|
| ||
|
|
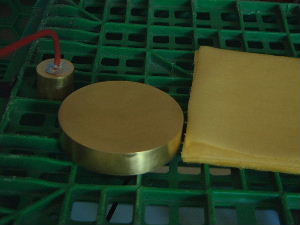
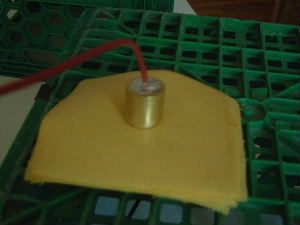
The dielectric is the same varnished cotton talked about here.
Results
The following are the results of a sequence of tests. Note that in all tests 8 sheets of varnished cotton were stacked for a thickness of 3mm.
| Test No. | Voltage at breakdown | Breakdown voltage |
|---|---|---|
| 1 | 28,300V | 9.43MV/m or 240V/mil* |
| 2 | 27,500V | 9.17MV/m or 233V/mil |
* A mil is 1000th of an inch.
I slowly turned up the voltage until it reached just below the breakdown voltage. I couldn't turn it up any further because the varnished cotton has a low resistance and is actually conducting a little. In the videos of the DMM readout as the tests were being done the voltage fluctuates by about 200 volts just below the breakdown voltage for a while as I turn the voltage up and then reachs the values recorded in the table above and drops from there. It droped to around 26,000V and then the DMM started acting up. The dielectric made a cracking sound and a purple corona appeared between the bottom of the cylinder and the top of the dielectric (i.e. it had punctured). There is now a small brown hole in a part of the dielectric which was under the edge of the cylinder.
A lot of hissing was heard during the tests. The ammeter connected in series with ground was maxed out throughout.
Note that in correspondance with Zoltan, he suggested I test to see if the voltage was being drained by the dielectric or by the air. He suggested using another material for the dielectric and seeing if something similar happens. I tried a 5mm thick piece of ceramic tile with about the same face area as the varnished cotton (see picture below). I was able to bring the voltage all the way to about 50kV before the ceramic dielectric broke down. While increasing voltage there was the occasional clicking sound (not sure from where) but the ammeter showed no significant current flow. That is, until the breakdown occured. This means that with the varnished cotton, the voltage was being drained by the dielectric and not by the air.
|

