DIY Can solar air heater - Guy's
The following is a can solar air heater made by Guy Sperry
( )
in northern Michigan. As of this writing he's run it for two seasons
and used an hour meter to get an idea of whether it helped or not
(it did.) His results and a summary about his heater are given below.
Thanks to Guy for sharing this.
)
in northern Michigan. As of this writing he's run it for two seasons
and used an hour meter to get an idea of whether it helped or not
(it did.) His results and a summary about his heater are given below.
Thanks to Guy for sharing this.
I have a small collector (7 feet by 42 inches) which has been running for 2 seasons now. It's a 240 can collector and has a 100 CFM fan pushing from the bottom. I get 88 CFM out the top.
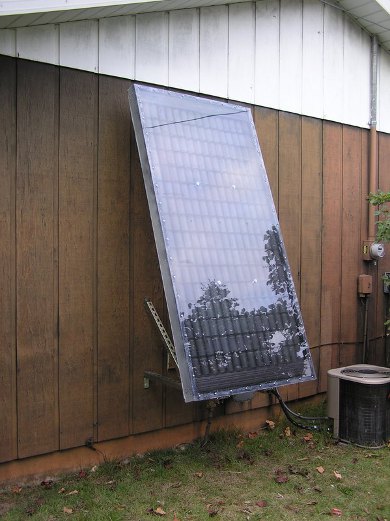
The glazing is polycarbonate and has 4 standoffs to keep it from sagging in the middle of the panel.
Below are a few photos taken during construction.
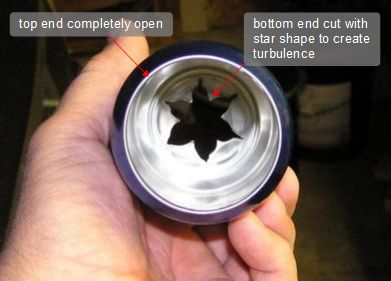
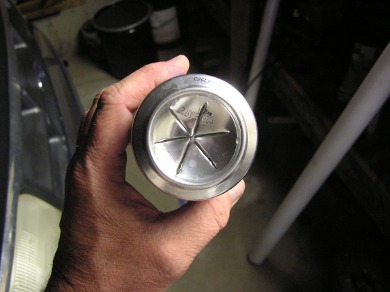
The star pattern on the bottom of the can was cut with a punch I made from utility knife blades. Not only does it create turbulence, it also draws heat from the side of the cans to the center so the fast moving air can pick up the heat.
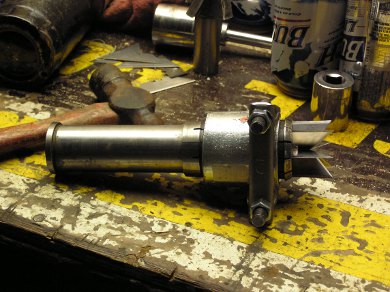
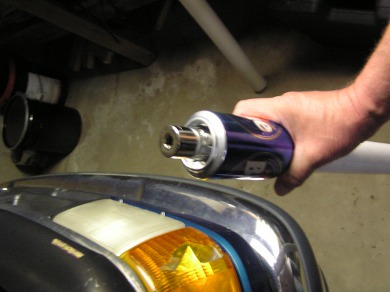
The punch (see photos below) is made from a tool holding collet from a milling machine with utility blades and a muffler clamp holding it all together. The sides of the blades are sharpened.
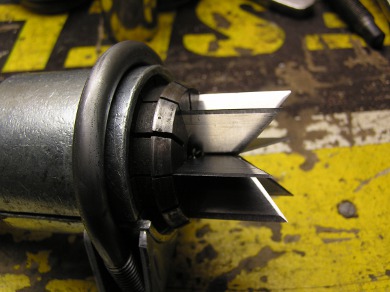
Once I cut the fins I slip the can over a piece of 11/2" pvc pipe (photo on the right below) and open the fins up to whatever size I want. I think I used a 30mm socket.
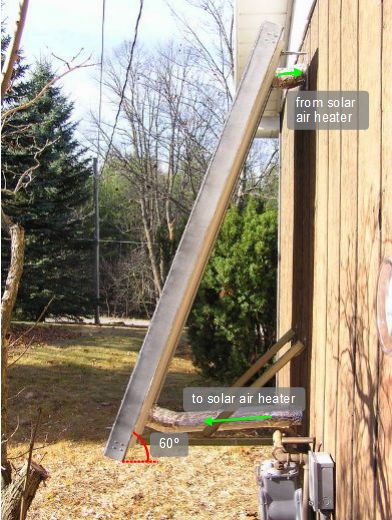
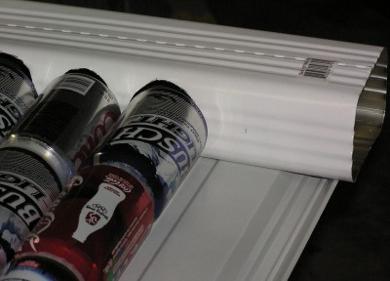
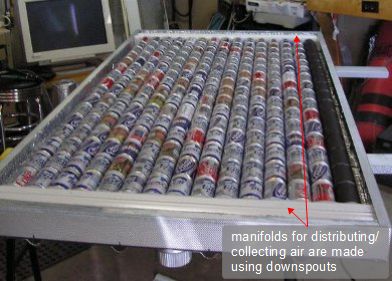
The solar air heater box has steel siding for the back and aluminum 2x4s for the walls; no wood. Downspouts were used for the manifolds on either end.
It has only 1/4 inch of that bubble wrap and foil covered insulation yet it starts up fast even in the coldest weather (coldest day was in Jan. 2010 - it started at 4F outside and heated up to 172F).

The cans were glued together with silicone and the end of each stack of cans were also sealed into the holes in the downspout using silicone. The gap where the cans meet the downspout was smaller that in the photo below when it was all pushed together.
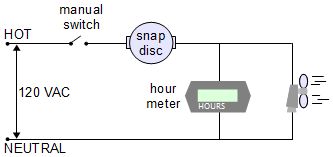
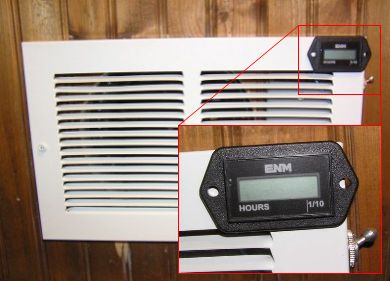
A snap disc switch is located inside the solar air heater in the top downspout. It turns on when the temperature in the solar air heater reaches a minimum threshold and off again when the temperature goes back below another lower threshold. An hour meter (Grainger part no. 2PAW9, $23.77) was mounted in parallel with the fan to keep track of how long the fan was running, which really amounts to the length of time the solar air heater was in use. For more on these circuits see this page on electronic temperature control used in solar air heaters.
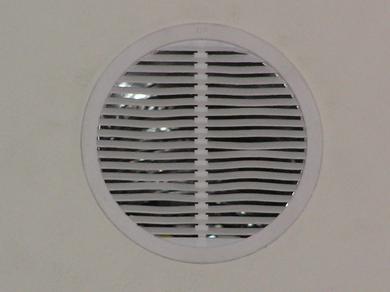
The solar air input was mounted near the bottom of the wall.
Results
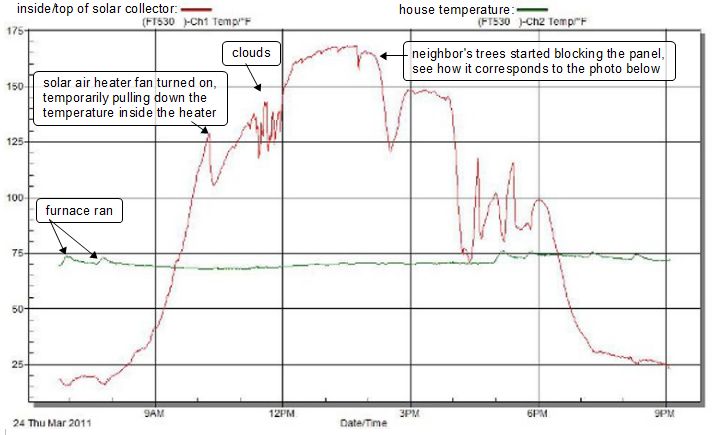
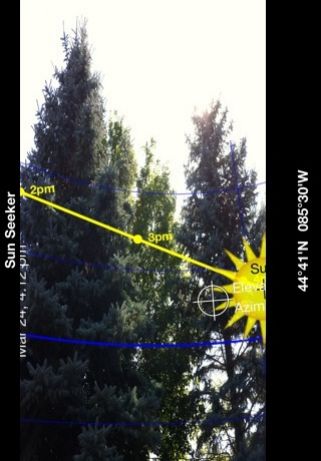
I have a small house (970 square feet) but it heats the whole thing; my furnace does not run when the collector is running. I live in northern Michigan in a lake effect snow belt area (5 miles from lake Michigan.) I have really bad southern exposure since the neighbor's spruce trees cut me off around 2:00 pm most of the winter but by March I can get as much as 8 hours run time.
I compared monthly gas bills from 2008 - 2009 season to the 2009 - 2010 season. My best month was March when I saved 18%. I have an hour meter hooked in with the snap disc switch (see circuit drawing above.) It ran 419 hours the first season (11-7-09 to 5-16-10) and 605 hours the second season (9-14-10 to 5-21-11). I'm very happy with its performance.
In addition to using the hour meters to know how long it runs for, I also bought a dual channel temperature logger last year and have over 100 days of logs for the collector. It's a Dickson FT 530 two channel temperature logger. Two sample daily logs are provided below.
The house temperature never rises much because it's just barely enough collector for the house; we leave all the room doors open in the house so it has to heat the whole 970 square feet.

|
Do you have a project you'd like to share on rimstar.org too? You're more than welcome to. Click here for details. |
|

