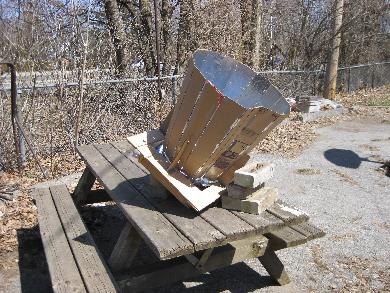
My first solar cooker was this cone solar cooker. Some might call it a
funnel solar cooker but there seems to be a specific design to most
of these on the web that looks quite different so I tend to refer to
it as a cone solar cooker. You can find
complete videos on the design and construction of this solar cooker
here.
My cone solar cooker.
 |
|
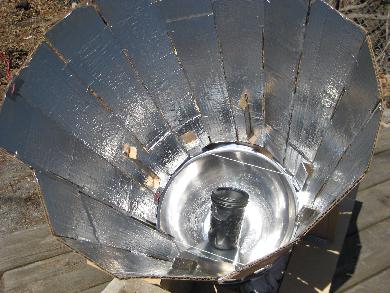
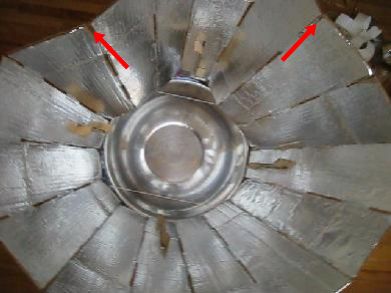
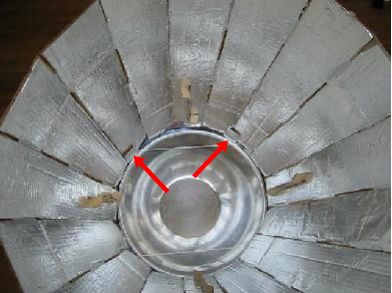
Looking down the cone.
 |
|
Look at the above photos and you'll see that I specifically chose
the width of each cone segment to be around the width of the cooking
jar. That way all the light gets directed to the jar and not passed it.
Each segment is simply cardboard with aluminium foil glued to it.
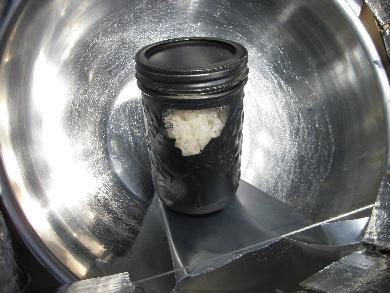
The first thing I cooked was long grain brown rice. I put
1/4 cup rice in 1 1/4 cup water. It was 3C (38F) outside. I watched it
every 10 minutes up to the first hour. Then I checked it after one
and a half hours cooking time and then at two hours. Sometime in
between one and a half and two hours of cooking time it had started
boiling and became fluffy like in the photo below.
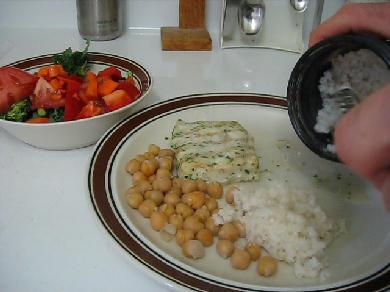
Note the well known trick of leaving a portion of the glass unpainted
so you can see inside.
Long grain brown rice - cooked in between 1.5 and 2 hours with no insulation.
 |
|
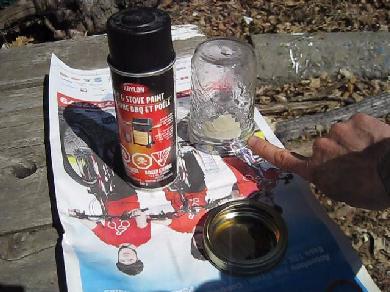
Painting the jar using BBQ & Stove paint. Note the masking
tape on the jar where I want the window to be.
 |
|
The end result - a dinner fit for a king!
 |
|
The design and the assembly of the cone/funnel solar cooker
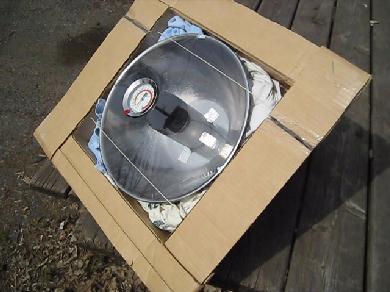
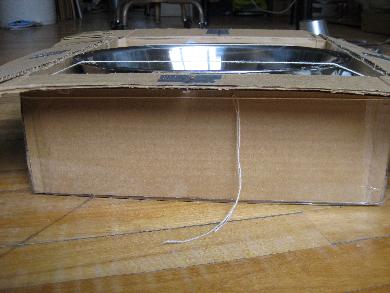
This cooker started out as a big bowl in a box (see photo below.)
I did some testing with that and on a slightly hazey day, after two hours
the water got up to only 70C (158F).
Initial testing with just a bowl, a jar with water and a
cooking thermometer.
 |
|
I then decided to add a reflector to get better results. So as a whole,
it more evolved than was designed. However, I did have some design
criteria such as that it be able to be stored away using very little
room and be assembled quickly and simply.
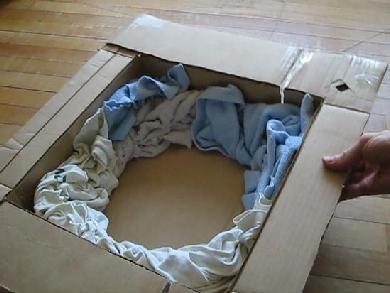
The box with rags for insulation.
 |
|
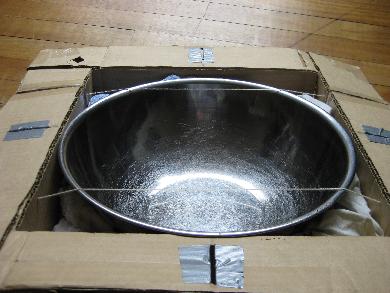
I used strings to hold the bowl in place.
 |
|
The ends of each string was tied on the side.
 |
|
The whole thing prior to assembly is fairly compact.
 |
|
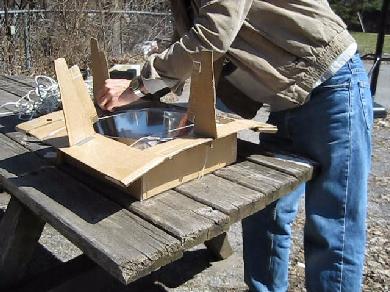
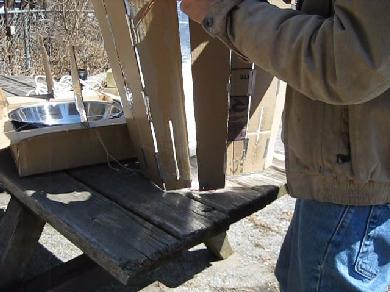
Attaching the vertical supports that'll hold the cone in place.
 |
|
Assembling the cone.
 |
|
To attach the two end segments of the cone together, the following
steps are done at both the top and bottom.
|
1. Bring the two end segments of the cone close together.
|
|
|
2. Thread the wire through the holes of each end segment.
|
|
|
3. Twist the wire ends together.
|
|
|
|
|
|
As the following photo shows, when the cone was attached to the box and
the whole thing was tilted, I found that the sides at the top drooped.
My quick and simple fix was to cut two strips of cardboard, attach
aluminium tape to them and wedge them at the base of the cone between
the insulation and the bowl and sticking up enough to hold the bottoms
of the cone in place.
Droopy cones.
 |
|
Fixed.
 |
|
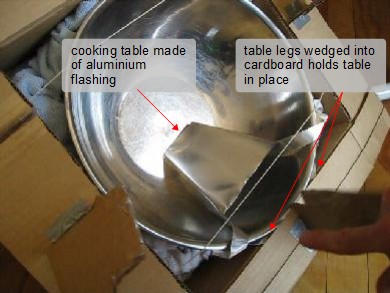
I needed some way to position the jar with food in it firmly in the bowl
of the solar cooker. I tried fashioning something out of clothes
hanger wire, fabricating something using aluminium bars and finally
found a simple way of making a table for the jar to sit on that works
well using aluminium flashing. This flashing can be found in hardware
stores and usually comes in rolls. It's easy to cut with tin snips.
Making sure the solar cooker table is in place.
 |
|
How the solar cooker table works.
 |
|
The last step was to aim the solar cooker directly at the sun.
For this I attached
my homemade sun finder to a top corner of
the box. The photo below shows me aiming it.
And remember, you can find
complete videos on the design and construction of this solar cooker
here.