There are many ways to make a Copenhagen solar cooker. Here you'll
find two variations, both of which are designed to be disassembled
for maximum portability. The variations differ in how the base is
made. The reflectors are pretty much the same.
The parts
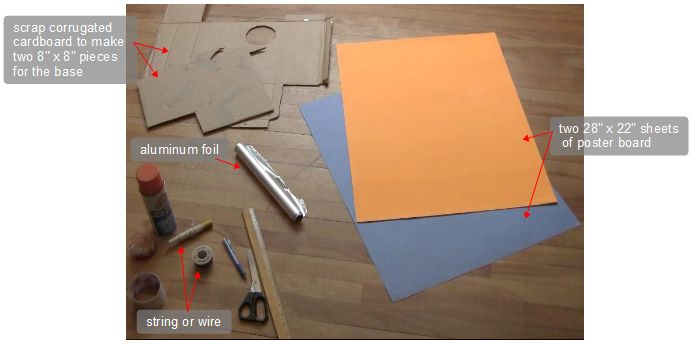
All you need are four 14 inch x 14 inch flexible reflectors, an
8 inch x 8 inch base and some clips to hold the tops of adjacent
reflectors together.
The parts I used.
 |
|
Making the reflectors
The reflectors can be poster board (thin
cardboard) or vinyl or anything flexible enough but not so flexible
that they droop down or flop around in the wind. I've considered using
plastic placemats except the ones I know of are all 12" wide whereas I
need at least 14". The reflective covering
can be aluminum foil or reflective/aluminized mylar. The base
can be wood or cardboard; it must be able to handle heat.
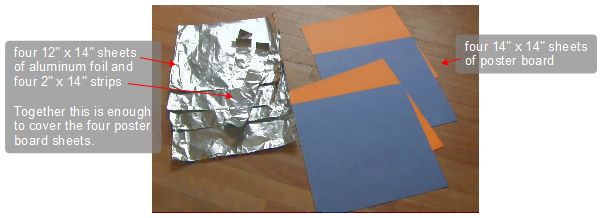
For some unknown reason the orange poster board is thinner than the blue
one and gets almost too soft with the glue I used. So get the thicker
poster board when you buy it.
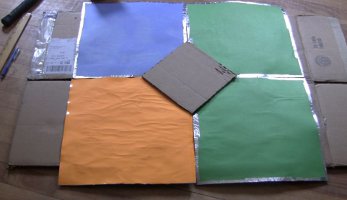
The pieces cut for the reflectors.
 |
|
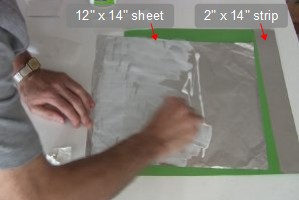
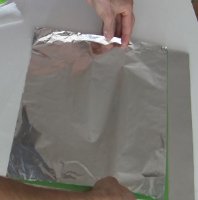
Using a piece of cardboard to spread glue on the dull side of
the aluminum foil. Use any suitable glue.
 |
|
Laying the foil on the poster board.
 |
|
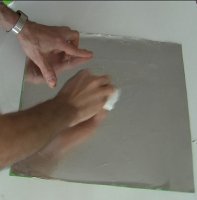
Smoothing out the wrinkles.
 |
|
The glue I was using was just normal white school glue found in
any store that has a school or craft supply section. Since it takes
24 hours to dry completely I put stacks of heavy books on them overnight.
Some important tips: I first tried putting the glue on the poster
board and that resulted in bubbles and poor gluing of the aluminum,
so I subsequently applied the glue to the aluminum foil as in the
above photos. Also, the glue softened up the orange poster board,
even if I put the glue on the aluminum foil. It seems the orange
poster board is thinner than the green or blue and this caused the
problem. So when shopping for poster board, select the thickest
ones.
I also put tape all around the edges to protect the edges.
Making the base
The base is what will hold the reflectors in place at the bottom.
It's also what the hot cooking pot will sit on, unless you put some
sort of stand between them.
It should be made of something that won't melt, so plastic
is a bad idea. Melting can happen due to the hot cooking pot and also
some sunlight reflected onto it. I used corrugated cardboard from
old boxes. Wood
is also fine. Keep in mind that for maximum portablity you want to
be able detach the reflectors from the base for when not in use.
I've made two different types of base:
- corner attachment type of base, and
- slotted type of base.
Both are documented below.
Making the corner attachment type of base
This method attaches the reflectors to the base at the four corners
of the base using things like twist ties or shoelaces. It requires
making holes in the base and corresponding holes in each reflector.
This method was invented by Sharon Clausson who is the inventor of
the Copenhagen solar cooker.
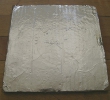
Cardboard base.
 |
|
Cut out a piece of corrugated cardboard from a cardboard box. Make it
8 inches by 8 inches. Glue an 8 inch by 8 inch piece of aluminum foil
to one side.
Following the photos below:
You're going to be pounding nails
through so if you're working on a surface you want to protect,
put something down first. I'm working on hardwood floor so I've
put a sheet of wood down first, and then the cardboard box which you
see.
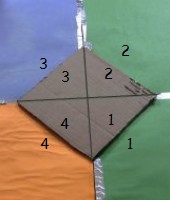
Then lay out the reflectors as shown such that they form a perfect
square meeting in the middle. Then put the base on top with the aluminum
foil side facing down. Line up the four corners of the base with the
four lines made by the reflectors.
Draw lines from corner to corner
on the base. Also, write a number on each triangle on the base and write
that same number on the adjacent reflector.
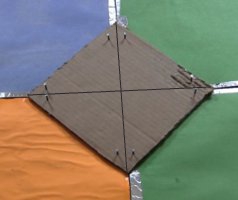
Make two holes in each corner
of the base by pounding nails through. The nails should go through
the base and through the reflectors. Put the nails about 1/2 inch
from the line you drew.
Once you've done that, remove the nails and continue with the next
set of instructions below.
Lay it out.
 |
|
Lines & numbers.
 |
|
Make holes.
 |
|
After you've removed the nails, you should have eight holes in the base
and two holes in each reflector. These holes need to be enlarged to
fit the twist ties or the shoelace you're going to use. To do that
I stick the blade of an xacto knife in each hole and twist the knife
while pushing on it gently, as shown in the following photos.
Enlarging a hole in the base.
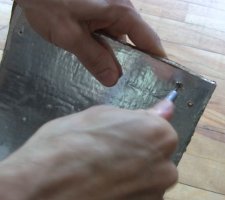 |
|
Enlarging a hole in a reflector.
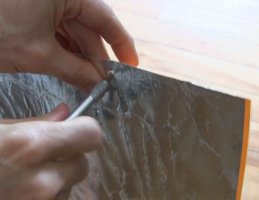 |
|
The next step is to assemble it all. For that see the
Assembling
the attachment type subsection on the main Copenhagen solar cooker
page.
Making the slotted type of base
This method attaches the reflectors to the base by having the
reflectors slide into slots in the base. The reflectors may slip
out of the slots a bit when you adjust the them during use.
This can be fixed with additional securing mechanisms or by adding
paper to make the fit in the slots tighter as needed. This method
was invented by Teong Tan (a member of the
Yahoo SolarCooking group).
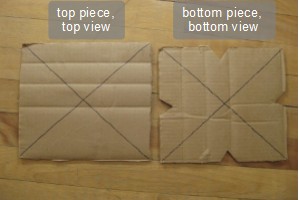
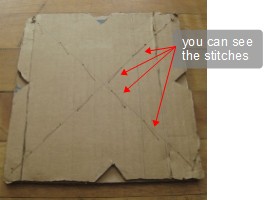
Take two 8 inch by 8 inch pieces of corrugated cardboard,
draw diagonal lines on them from corner to
corner and sew them together long those lines. That leaves the
four sides open for wedging the reflectors into (see photos in assembly
section below.) Make sure you
sew them together tightly so you have a snug fit. If the fit becomes
loose then you can stuff wedges of paper in to make it snug.
I added the innovation of cutting a hole in each side of the bottom
piece to make it easier to find where to push the reflector into.
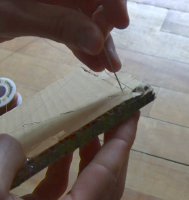
To sew them together I used 30 gauge bare copper wire which I just
happened to have a lot of. Since it's the same thickness as thick
sewing thread, I was able to use a normal sewing needle. You can
use string or whatever won't melt (plastic fishing line would melt.)
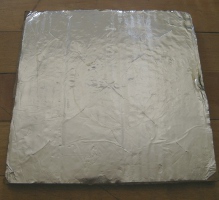
The top piece is then covered in aluminum foil to help with solar
reflection and for some heat protection.
Sewing the pieces together.
 |
|
Finished, bottom view.
 |
|
Finished, top view.
 |
|
The next step is to assemble it all. For that see the
Assembling
the slotted based type subsection on the main Copenhagen solar
cooker page.