Choosing a solar panel angle
What angle do you use for your solar panels to get the most out of your sunlight and what are some ways of making the panels adjustable? Most people just mount them on their roof, at the same angle as their roof. The only way to have your solar panels always pointing at the sun is to put them on a tracker, but very few have suitable properties to do that, let alone the additional finances for installing poles that won't fall down. A good middle ground is to mount the solar panels on a frame that allows you to manually adjust the angle, and to do so twice a year for summer and winter angles.
This page discusses all this.
Where the sun is for different seasons
The following is a diagram that shows why there's a problem at all. The Earth rotates once per day on an axis that's tilted 23.5°. That axis runs through the geographical north and south poles. The Earth also rotates around the sun once per year.
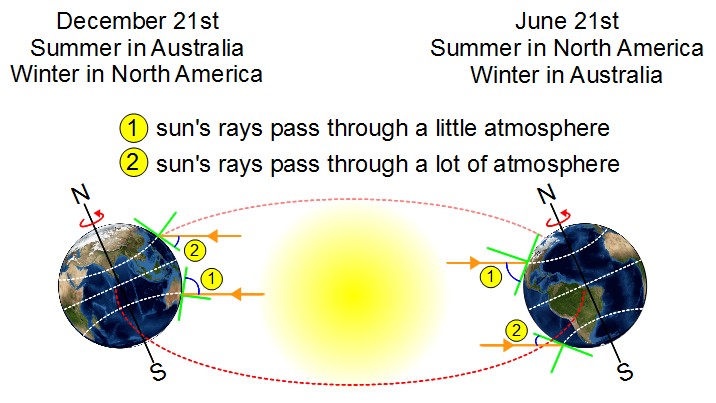
The problem is that on June 21st, the Earth's tilt is such that the north pole is tilted toward the sun while the south pole is tilted away, whereas on December 21st, the north pole is tilted away while the south pole is tilted toward the sun.
If you pick a point in the northern hemisphere, say somewhere in North America, Europe or Asia, then on June 21st the sun's rays arrive at a steep angle and so don't have to pass through much air at all. The sun is very strong as a result. But at the same time, for points in the southern hemisphere, say Australia, much of South America or Africa, the sun's rays arrive at a shallow angle and so have to pass through a lot more air. The sun's rays are weaker as a result. Just the opposite happens on December 21st.
And that's why June 21st is summer in the northern hemisphere and winter in the southern hemisphere, and vice versa. It's also why in the summer the sun is higher in the sky and in the winter it's lower in the sky.
And so in the summer we want the solar panels to be angled such that they're facing more directly upward, but in the winter we want them facing more toward the horizon. Of course that angle also depends on how far you are from the equator.
Same angle all year
Most places are very limited as to where the solar panels can go. Usually only the roof is available and free of shading for long enough. And so most installations have the panels mounted on the roof.
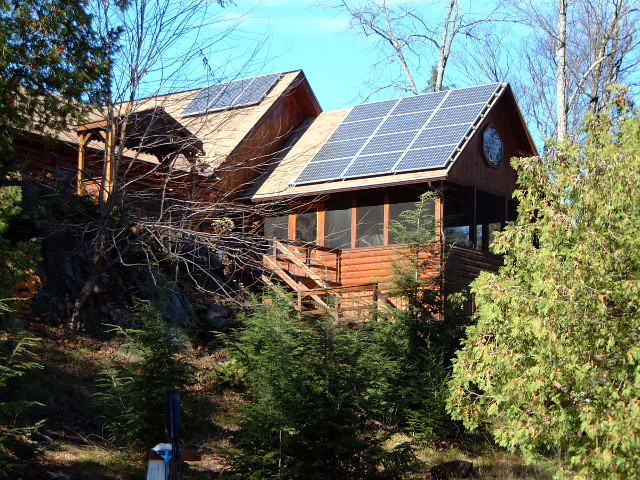
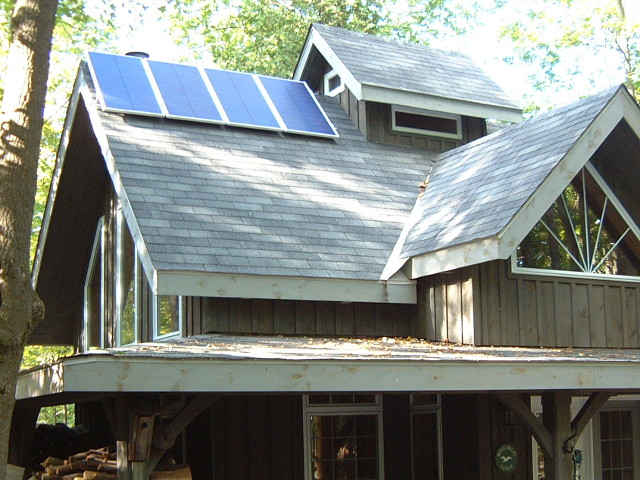
They're also often mounted at the same angle as the roof because:
- there are too many panels to make adjusting them practical,
- an adjustable frame costs more (though it isn't much more),
- you want to keep them close to the roof, otherwise wind might get behind them and pull them off the roof and possibly even damage the roof,
- the roof is either inaccesible or is too steep to be safe to walk around on, or
- you simply don't want to go up on the roof for whatever reason (physically unable, available time, cost of hiring someone to do it, ...) and so you want it to be as plug-and-play as possible.
Angles for an adjustable frame
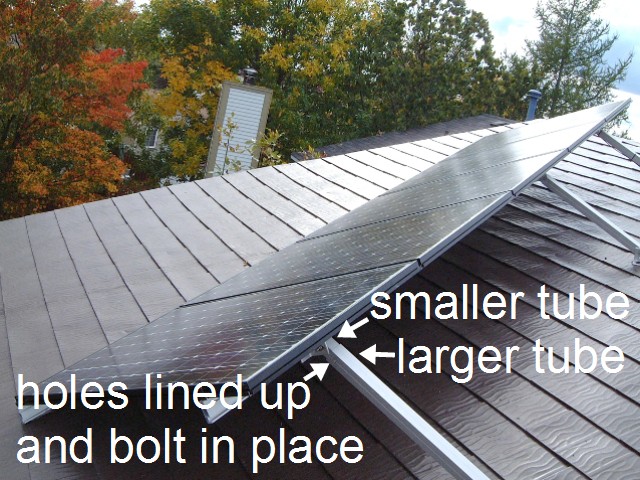
Another possiblity is to use an adjustable frame, one that allows you to manually change the angle of the solar panel, or array of solar panels. Youd' typically do tihs twice a year, in the spring for a summer angle, and in the fall for a winter angle.
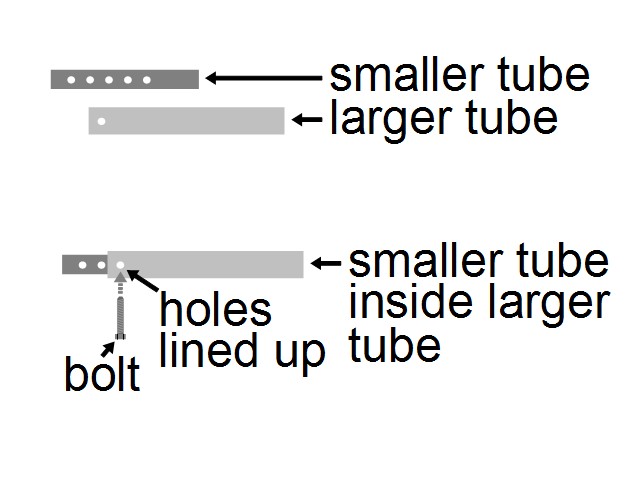
In the photo below that's done by having a smaller aluminum tube inside a larger one, what's called telescoping. The smaller tube slides inside the larger one. The bigger one is connected to the roof, but in a way that allows it to rotate. The smaller one is connected to the solar array, but also in a way that allows it to rotate. The smaller one has multiple holes in it along its length. The bigger one has just one set of holes. You slide the smaller one through the bigger one, making the combination of the two longer or shorter. As you can imagine, that changes the angle of the solar array. At the same time, you'd make sure the set of holes in the larger one line up with a set of holes in the smaller one, and when you have the desired angle, you'd put a bolt through the holes. That fixes the tubes together for that combined length.
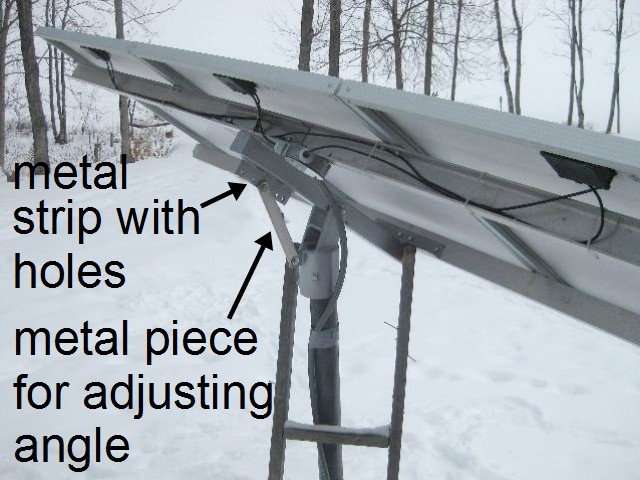
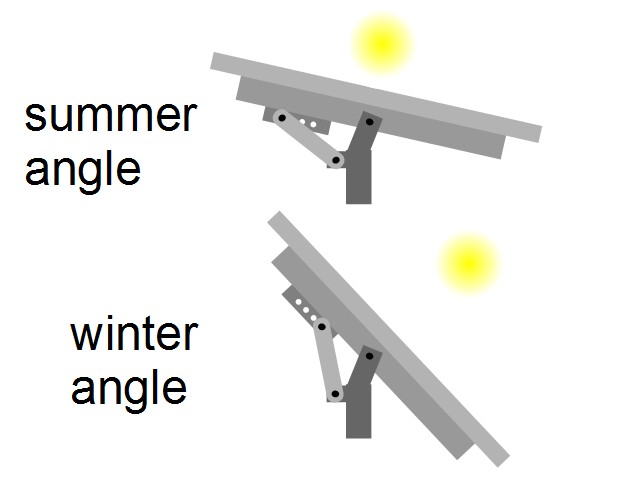
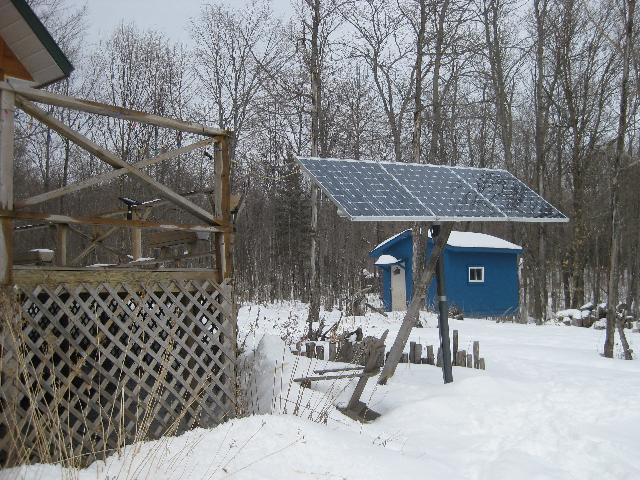
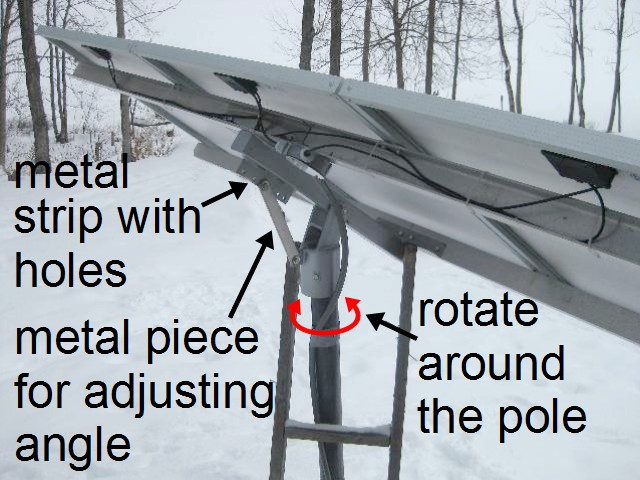
The photo below shows a small pole mounted solar array, but one who's angle is manually adjustable. The same technique shown here can be used for solar panels mounted to any frame. The back of the frame for the array has a strip of metal fixed to it. The strip has a number of holes in it. Extending from the pole is another piece of metal for adjusting the angle by attaching to any of those holes. By attaching to a hole higher up, the solar array will have a shallower angle, facing more upward for a high summer sun. By attaching to a hole lower down, the solar array will have a steeper angle, facing more toward the horizon for a winter sun.
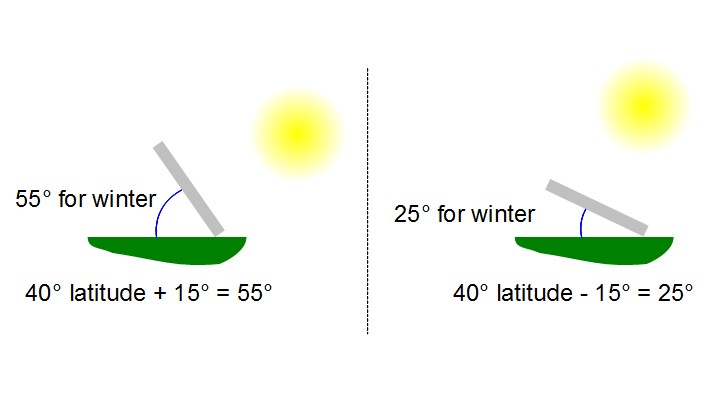
Again, you'd typically you make the adjustment twice a year, in spring and in the fall. The rule of thumb is to first find your latitude and then add or subtract 15° depending on the season.
To find your latitude, an easy way is to look up your city, or a nearby city, on wikipedia.org. The latitude is usually in the box on the righthand side beside the label 'Coordinates:'. You want the first values, the one followed by either 'N' (north) or 'S' (south).
Example 1: Denver, Colorado, USA
From Denver's page on wikipedia we find that its latitude is 40° North.
- for the winter, when the sun is low in the sky, use:
your latitude + 15°
40° + 15 = 55° - for the summmer, when the sun is high in the sky, use:
your latitude - 15°
40° - 15 = 25°
Example 2: Sydney, Australia
From Sydney's page on wikipedia we find that its latitude is 33° South.
- for the winter, when the sun is low in the sky, use:
your latitude + 15°
33° + 15 = 48° - for the summmer, when the sun is high in the sky, use:
your latitude - 15°
33° - 15 = 18°
And here's what that angle means with respect to your solar panels.
Using a pole mounted tracker
If your solar panels, or array of solar panels, are mounted on a pole then you can add a tracker that will track the sun such that the panels are always pointing at the sun. You can have the tracker rotate the panels to follow the path of the sun horizontally across the sky from east to west. You can also have the tracker tilt the panels vertically since the sun is lower in the morning and higher in the afternoon.
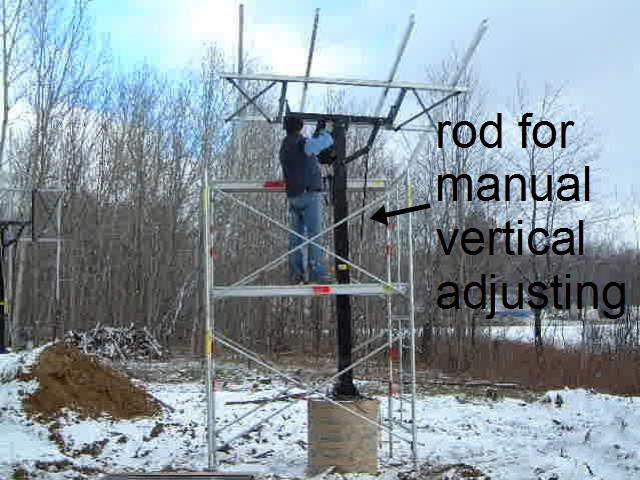
In the winter, in more northern latitudes the sun never gets very high above the horizon and so having the tracker tilt the panels vertically isn't as useful. Instead, people will have a tracker motor simply rotate the panels horizontally during the day to follow the sun from east to west and skip the tilting part. As shown in the photo below, they then have a manual adjustment for the vertical tilting and do the adjustment every now and then, or just in the spring and fall. This is often a long rod that they can reach while standing on the ground. By pushing up or pulling down on the rod, they can tilt the whole array. They then lock the rod in place.
Note that if you have just one solar panel, you can either buy a motorized tracker and gain some energy, or you can instead buy a second solar panel and no tracker and gain even more energy than you would with one solar panel and a tracker. Buying the second solar panel instead usually makes more financial sense.
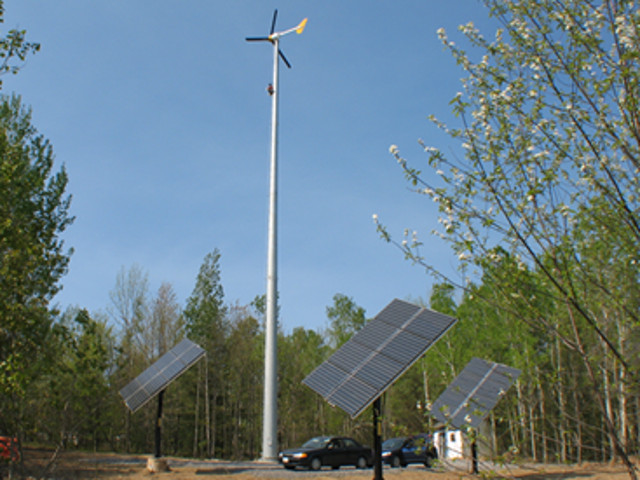
Below is a small pole mounted solar array with just three medium sized solar panels and no tracker motor. Instead it's adjusted manually, both by rotating it horizontally and by tilting it vertically. It's the same one explained above, but it's worth repeating the diagram here with the addition of the horizontal rotating adjustment.
Thank you to Ottawa Solar Power for the use of these photos.
