Solar Pool Heating
Solar pool heating involves using the sun to heat your pool water.
Homemade/DIY solar pool heating systems
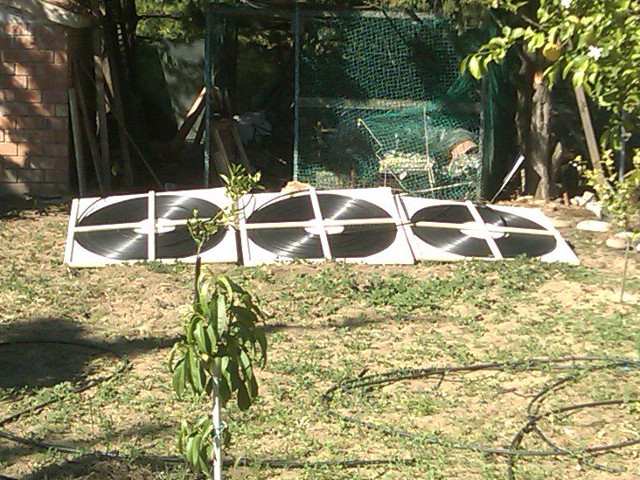
A simple homemade/DIY way of solar heating your pool is to simply connect a long black hose or tube to the output of your pool pump and have the other end dumping into your pool. Then string out the middle part of the long hose along the ground or throw it up on a roof. The pool pump runs the pool water through this black hose and back into the pool. Being black, the hose absorbs the suns rays and becomes hot, heating the water. The result is solar heated pool water. The next step up from this is to make the hose more compact and visually appealing by winding it into a spiral.
Click here for help on sizing the collectors for a DIY solar pool heating system.
Commercial solar pool heating systems
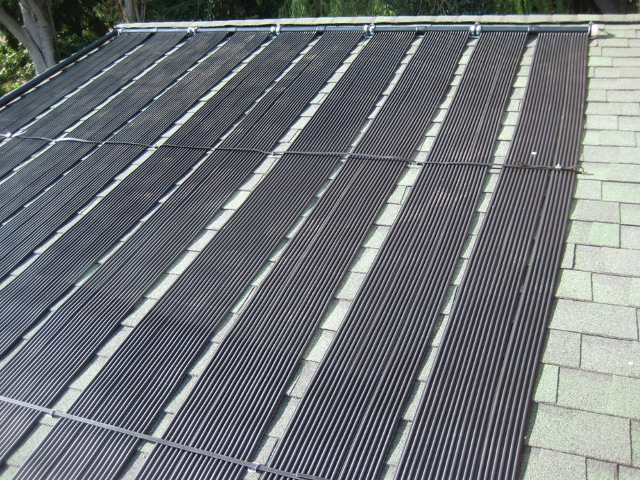
Today there are well engineered commercial products you can buy that replace this hose with flat panels designed to be long lasting and very efficient. These panels are made of a black rubber or plastic and contain many tubes for the water to flow through. The black panels turn the suns rays into heat that is absorbed by the water. There are also products for automating the flow of water so that it flows through the panels only when needed and only when the sun is out.
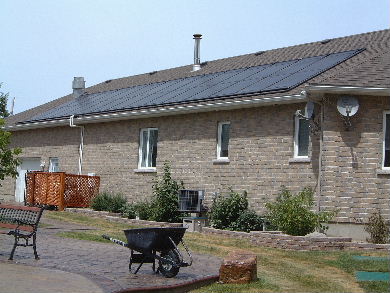
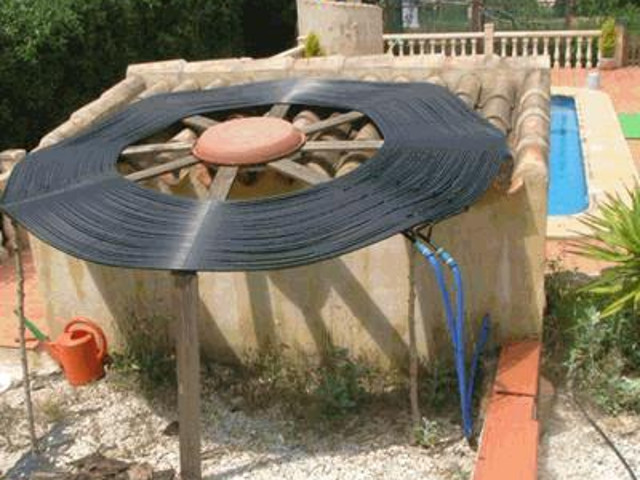
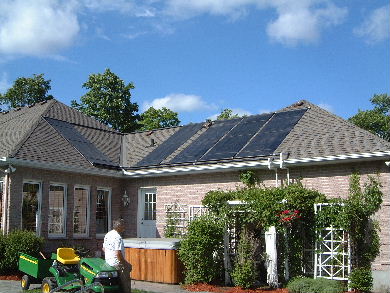
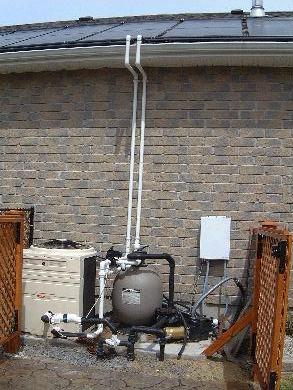
The following photo is a commercial system whose installation I was involved with while working for Ottawa Solar Power.
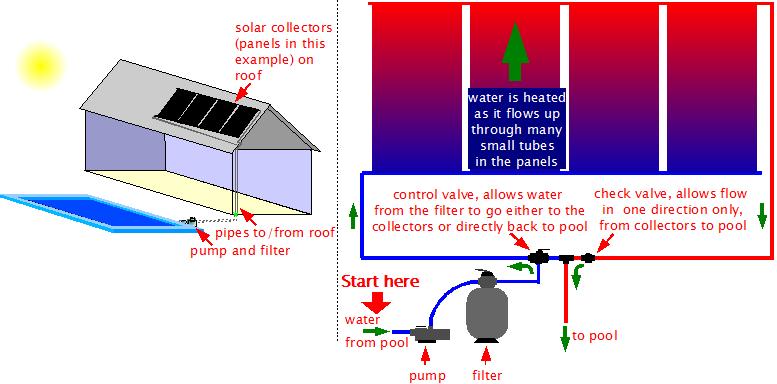
How it works
The plumbing for homemade and commercial systems are both the same. They differ only in the types of solar collectors they use; typically hoses for homemade and panels for commecial. So even though the diagrams use panels as the solar collectors, spiraled hoses could also be used without changes to the plumbing. The only issue would be if something far more efficient such as vacuum tubes were used as the solar collectors. In that case the temperature would be too hot for the materials discussed below. The following is one way in which the plumbing part can be done.
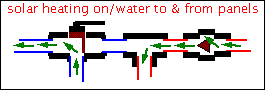
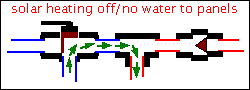
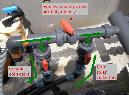
The following illustrates how the above control valve and check valve work together to control water flow. Notice the different positions of the brown blocking piece in the control valve. Notice also in the check valve how the plug (triangular object) is pushed to the left by the water returning from the collectors. Because of the plug's shape, any water coming from the other direction would force it to the right, plugging the hole. There is also a spring (not shown) helping to pull it to the right.
The pipes are typically made of PVC, usually solid pipes but flexible PVC hose is also available. It is best if you use a UV rated material, i.e. a material that doesn't degrade over time from the UV rays of the sun. Black PVC is UV rated, though PVC is most often found in grey and sometimes in white. Often a color other than black is chosen for cosmetic reasons or availability or price. Be sure and use the correct glue for gluing parts together (e.g. PVC glue for PVC parts.) PVC glue is most often grey but clear PVC glue is also available, which is handy when working with black or white PVC since any drips of grey glue would show up very well.
For doing trenches, flexible PEX tubing is often used. PEX is able to easily withstand temperatures found in solar pool heating systems (unless you're using vacuum tubes as solar collectors which are a lot hotter.) Typically a trench 6" wide by 1 foot deep is sufficient. Expect around 1 hour to dig 5 feet long with shovel and pick, especially if there are rocks and roots.
Click here to see how to size the a commercial solar pool heating system.
Using a second heat source
Sometimes a second heat source, such as an air heat exchanger or possibly a natural gas heater, is used in addition to the solar heat. Typically the piping would be installed such that the water is first heated by the solar collectors since the heat from the sun is free. Then the pipes would run the water to the second heat source. The control system for the second heat source would measure the temperature of the water coming to it and decide if it needs to do any more heating. If the water was already heated by the collectors then the second heat source would do nothing, thereby saving energy.
Whether or not a second heat source is needed depends on your environment. In my experience, on systems I've worked on, people either request that we remove their old heat source from use so they can get rid of it, or ask to have it left in just in case it's needed.
Variations
There are, of course, variations to all of the above. For example, in some systems the solar collectors might be laid out on the ground or installed on a wooden support structure which is on the ground. Check with whomever you buy your system from first though. Some solar panel systems absolutely must be installed such that the panels are on an angle with the bottom lower than the top so just laying them on level ground may not work. On the other hand, some are designed for just that. Naturally, for automated systems, that means that one of the temperature sensors would no longer be on the roof but instead be mounted somewhere else near the collectors. Also, some automated systems can be connected to a home computer.
There are also many variations in the types of solar panels but they all work the same as illustrated above. They all have bottom and top pipes with many small tubes for water to flow from bottom to top. The differences lie in what material they're made of, typically rubber or plastic, how the small tubes are manuafactured, how much material is surrounding the tubes for additional heat storage, and how the panels connect to each other.
Your system may include a trench. If your pool pump is far away from the house you probably won't want the pipes to run above ground from the house to the pump. In that case a trench will need to be dug and the pipes put in it. Of course the trench would then be buried and likely covered in grass so that no one will even know it's there.
Maintenance
A few more sample installed systems
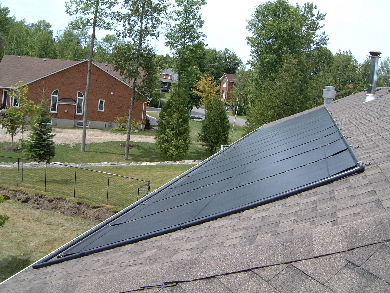
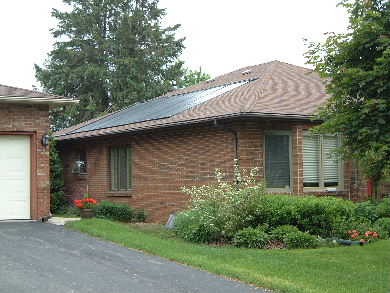
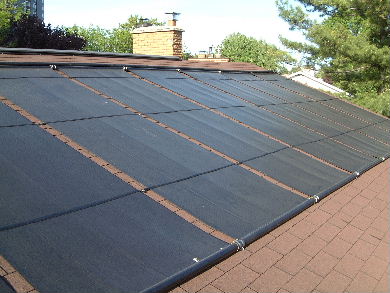
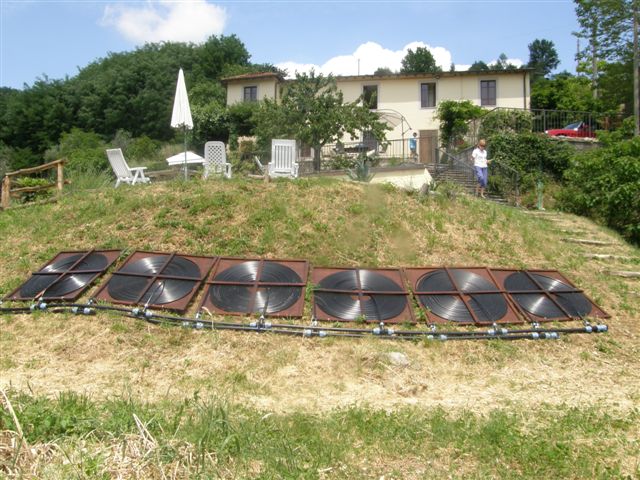
The following photos are a sample of some more commercial systems whose installation I was involved with while working for Ottawa Solar Power.