How to fiberglass BB-8 (v2)'s globe
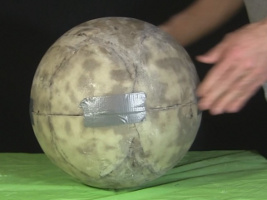
Here's how to fiberglass a ball, in this case a globe, to make it more rigid. Below are what it looked like before and then after it was fiberglassed. Note that once fiberglassed, it was cut open along the equator and taped closed again since it needs to contain the drive system for a BB-8 droid.
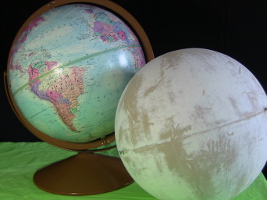
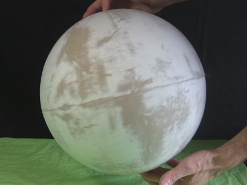
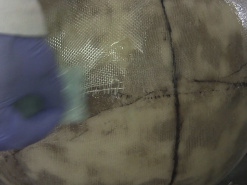
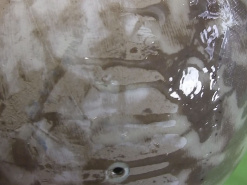
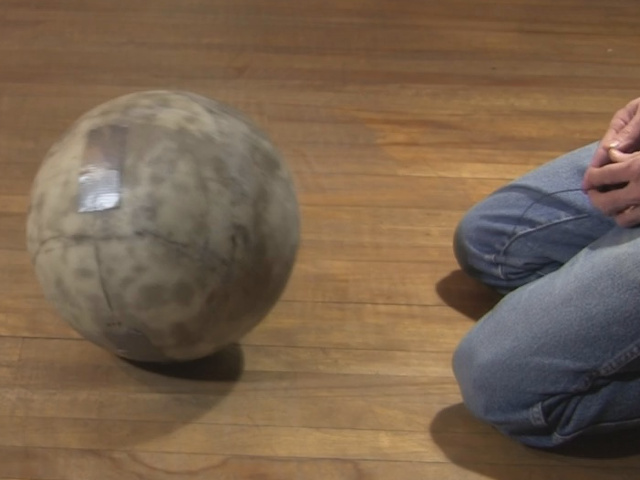
One of the big difficulties in making a BB-8 droid is getting a rigid enough ball that won't deform under the heavy weight required by the drive system inside the ball. Up to this point my ball was a cardboard globe, and as you can see in the photo below on the left, it deforms, but on the right you can see a globe that once covered in three layers of fiberglass there's no noticeable deforming.
How to fiberglass BB-8's ball
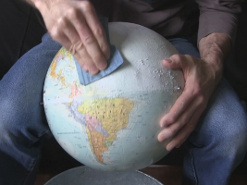
If you're adding fiberglass to a rubber ball or some sort of ball that you'll be removing when done then you can apply the fiberglass to it unchanged. But in my case the cardboard globe would be remaining inside so, as shown below, I first sanded all the paper world map off, and then cleaned any loose material from it. Cleaning can be done using a brush followed by a vacuum cleaner.
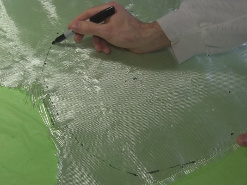
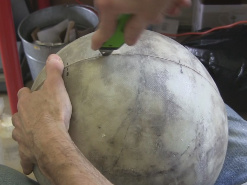
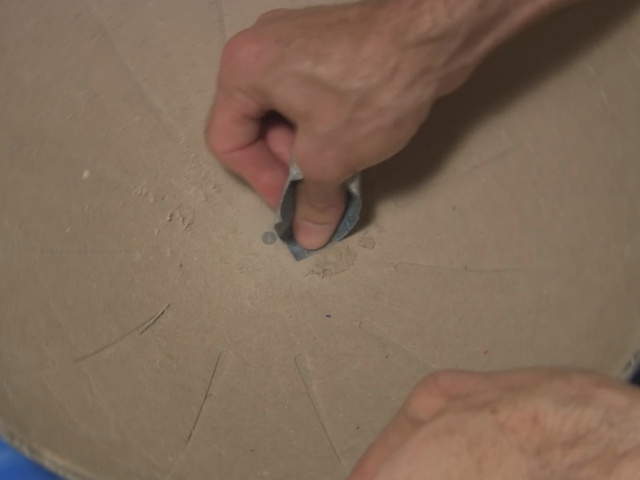
This would be a good time to use a dark marker to mark a line all along the equator so you'll know where to cut the ball open later. This assumes that your fiberglass resin will be transparent enough for you to see through to the mark. Keep redrawing the mark as you add more layers and do sanding.

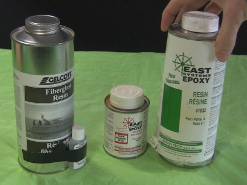
You'll need two things, resin and some fiberglass. The resin bonds the fiberglass together and the fiberglass gives the strength. If you use resin alone then your ball may crack.
The resins come from a variety of manufacturers with a variety of properties and purposes. I ended up using a few different leftover ones, one thick or with high viscosity and one thin or with low viscosity. Being leftovers to save on costs, they were both pretty randomly selected.
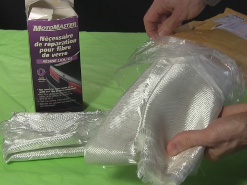
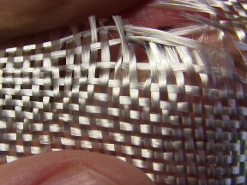
Fiberglass also comes in a variety of forms. You want the one that will be easy to shape, that will drape well following the shape of the ball. I used some leftover from a MotoMaster kit as well as some putchased on ebay. Both were 6oz (200g) plain weave fiberglass E cloth. You don't want fiberglass mat and there is also some plain weave fiberglass that doesn't drape around curves very well so check with the specifications when available.
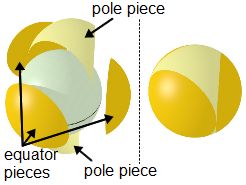
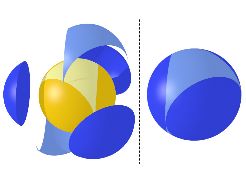
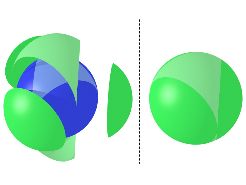
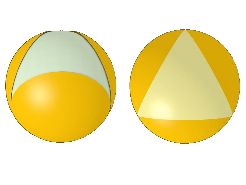
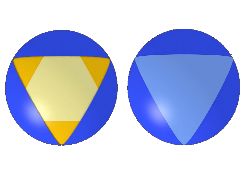
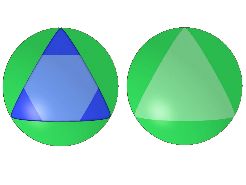
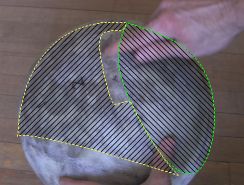
I ended up putting 3 layers of fiberglass as shown in the diagrams below. The colors are as follows:
- 1st layer (innermost) yellows,
- 2nd layer (middle) blues, and
- 3rd layer (outermost) greens.
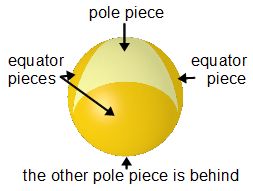
Each layer is made up of 5 pieces: 3 bowl shaped pieces around the equator and 2 triangular pieces at the north and south poles. Notice that the 2nd layer is rotated by 60 degrees with respect to the 1st layer so that they overlap for strength. Likewise, the 3rd layer is rotated by 60 degrees with respect to the 2nd layer so that they overlap too.
For each layer, the first two equator pieces are 12" diameter circles of fiberglass. Once the first two are in place and any drips are sanded away then measurements are made so that the third equator piece will fit snugly between the first two pieces without any overlap. It's usually also 12" but could be a bit smaller or larger.
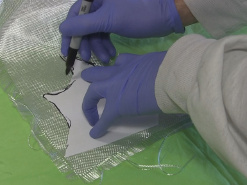
As shown below, I next measured out, marked and cut a fiberglass piece. I cut one piece and then put it in place before cutting the next piece, in case the dimensions would need to be different for the next piece.
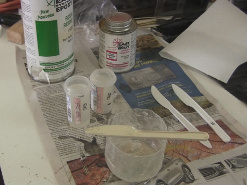
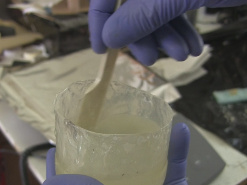
Resin comes in two containers, one labeled "resin" and the other labeled either "hardener" or "activator". They need to be mixed together. The amount you need of each depends on the manufacturer and will be written on the containers. It will be a ratio of one to the other (e.g. 5 part resin to 1 part hardener.) How you measure the parts also depends on the manufacturer and is written on the containers. It'll either be by volume or by weight.
In the first photo below is a setup for mixing by volume. You can see two small cylinders, one marked "R" for resin and the other "H" for hardener. Each has another mark for how much of each to pour in. They're each then poured into the large mixing cylinder at the bottom of the photo. Notice also that I have separate plastic knives marked "R" and "H" as well. That's to ensure that I don't get any hardener in the resin container or vice versa.
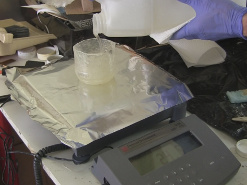
In the next photo is a setup for measuring my weight. An appropriate amount of resin is first poured into the mixing cylinder on the scale, followed by the hardener. For example, if the ratio is supposed to be 4 to 1 then we could put 4 x 22 grams of resin, which will show as 88 grams on the scale. We'd then add 1 x 22 grams of hardener, which will bring the scale up to 110 grams.
You then mix the result very well. Scrape the insides of the container, stir in both directions, and keep doing it very well for a few minutes. If you don't mix it well then some may not harden or will take much longer.
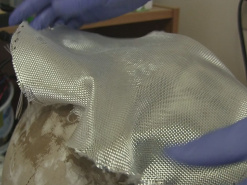
As shown below, the next step is to apply resin directly to the ball. You can lay the fiberglass sheet on the dry ball first to trace its outline onto the ball to help tell you where to apply the resin. Though in the second photo where I'm applying the resin, I hadn't marked it that time.
You can use a paint brush to apply the resin but I found that a strip of scrap flexible foam packing material (the blue thing I'm hold in the photo) worked just as well and didn't require cleaning afterward like a paint brush would. Instead, once the resin is hardened I simply cut it off the end of the foam.
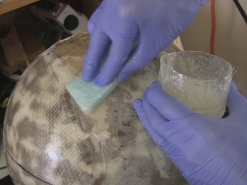
Having spread resin on the ball I then place the fiberglass piece on, pressing it into the resin and gradually working my way to the outer edge, smoothing any wrinkles. Due to the way the fiberglass is woven it deforms easily to meet the curve of the ball.
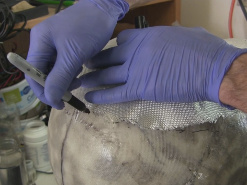
Next, spread more resin on top of the fiberglass, starting from the middle of the piece, and gradually working toward the edges.
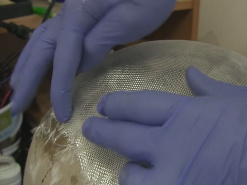
At the edges of the fiberglass where the threads of the fiberglass extend outward, care must be taken to not pull the threads out. Gently spread on the resin in the direction of those threads, gluing the threads down.
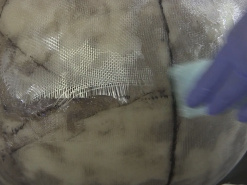
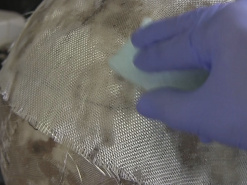
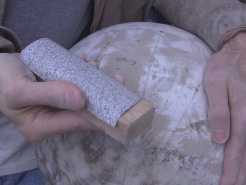
In the photo below you can see the you might get drips. It's best if you sand away any extra resin that extends past the fiberglass like that before putting the next layer over it, otherwise you'll end up with a very lumpy result which will be a lot more work to smooth out. I didn't have a good electric sander and found that sandpaper backed by a block of wood worked very well.
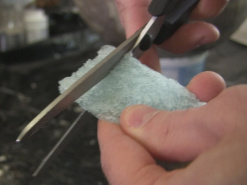
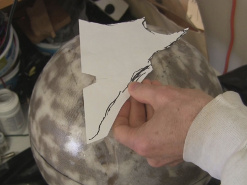
The three pieces around the equator are simple circles but the pole pieces are triangles with curved sides and have to fit snugly in the space at the poles left after the equator pieces are in place (see diagram below.) So to get the right shape I first made a paper template of the right shape and then used the template to mark where to cut the fiberglass. (Note: The first pole piece I did was done in multiple pieces and that's why the template you see below is not a full triangular shape. The remaining pole pieces were done as one piece each.)
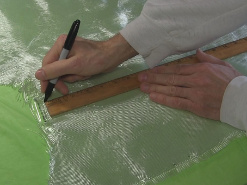
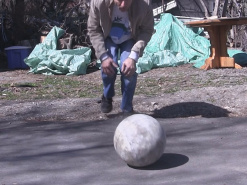
The final step was to check the roundness and make any adjustments. I started by rolling it and checking if it moved straight. It did for most orientations except when rolled from pole to pole, when it veered to one side. Filming it and examining the video I found that it was caused by a gap between and equator piece and one of the last pole pieces I'd put on, where they didn't meet snuggly.
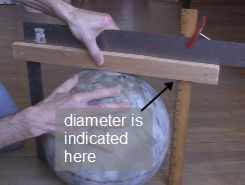
I next clamped a ruler to my square and measured the diameter of the ball. Measuring was done by holding a wooden stick along the square and ruler, as shown below, and rolling the ball below the stick, making contact with it. The marks on the ruler gave the diameter.
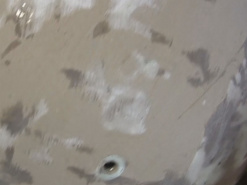
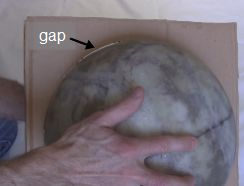
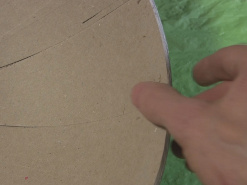
I then cut a circle in a piece of cardboard of the ball's diameter and by rotating the ball in it I found that the poles, especially one of them, was a little flat, leaving a gap between the ball and the cardboard (see photo below.)
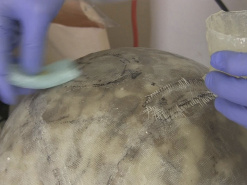
I then filled the gap with fiberglass and added fiberglass to the flat poles and sanded until I ended up with a round ball.
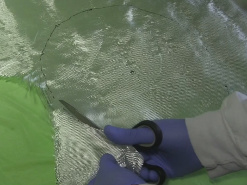
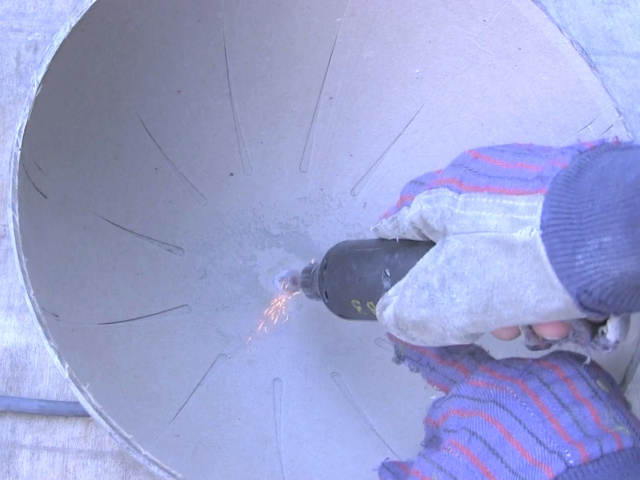
Finally I cut it open by first using my dremel to cut through the fiberglass down to the cardboard along the mark I'd made along the globe's equator. I used the dremel because the blade I had for it was very thin and I didn't want to remove too much material.
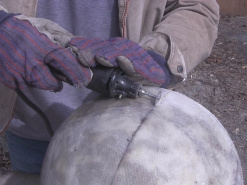
These globes have an extra-thick cardboard ring inside the equator and the dremel couldn't cut all the way through that, so I carefully cut that with a knife. It looks far more dangerous doing it the way I am than it actually is. The groove already cut by the dremel makes it so.
Once it was open I then removed the thick ring material until I had a nice smooth inside edge.
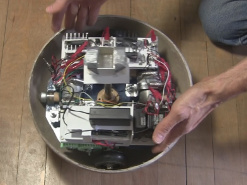
The then lowered BB-8 (v2)'s drive system inside and used just four strips of duct tape to keep it closed (a huge improvement over the plain cardboard globe, which required a lot of tape to keep it closed with the heavy drive system inside.)
Trying it out with the remote control, it worked great. I did find later that some of the resin had dripped inside at the poles and so I sanded that. In doing so I also found that the metal that was a part of the cardboard globe at the equators was preventing the ball from being as circular as I'd like inside, so I used a Dremel tool to grind some of it away.
Video - Making BB-8 (v2) - How to Fiberglass - Part 2
In this video I show step-by-step fiberglassing the cardboard globe.
