How to connect to a Raspberry Pi via Ethernet directly
This involves connecting your Raspberry Pi directly to your computer using an Ethernet cable. The big difficulty here is finding out what the IP address of your Pi is so that you can talk to it from the computer.
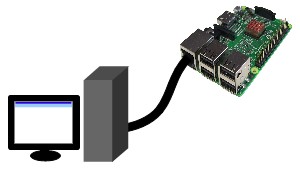
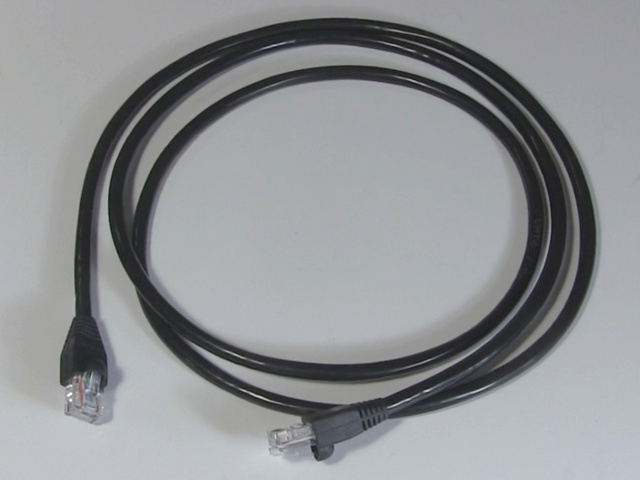
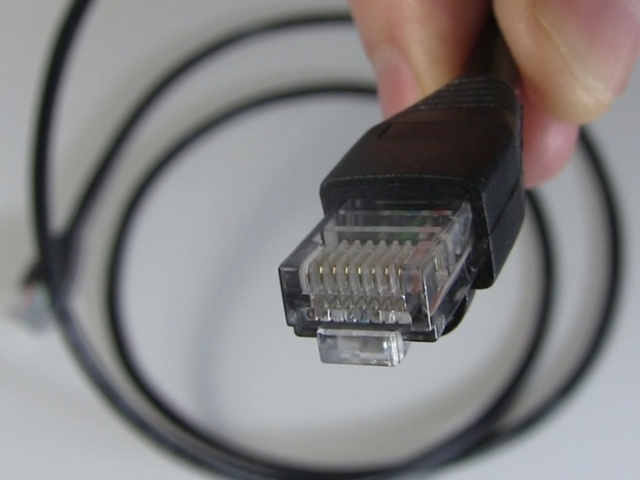
But first, to physically connect them you'll need an Ethernet cable that has male RJ45 connectors on both ends. Plug one end into the computer and the other end into the Pi.
Next, give power to your Raspberry Pi. You should see various lights lit up at different times.
To find the IP address you need two things. You need:
- to know what the subnet mask is for your small network and
- you need to scan that subnet for the Pi.
Finding the subnet mask
A subnet mask, like an IP address, consists of 4 numbers seperated by periods. The numbers range from 0 to 255 but are most often either 0 or 255. Two examples are 255.255.255.0 and 255.255.0.0. The subnet mask basically defines how many possible IP addresses there can be on the subnet.
Just how you find the subnet mask depends on what operating system you're using and tools you have available. Under Windows Vista I go to the Control Panel, click on View network status and tasks, and get the following window. There should be something similar under other Windowing systems.
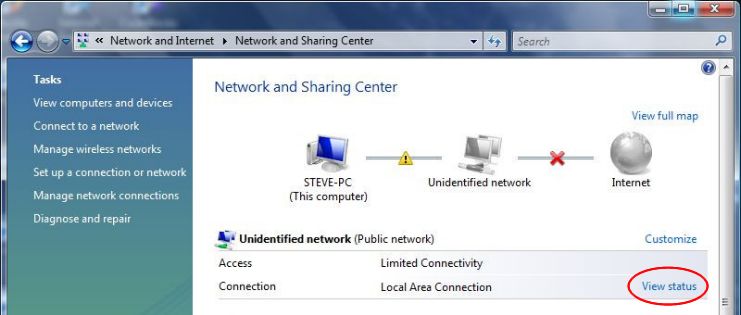
The part we're interested in is the Unidentified network (Public network), where we see a Local Area Connection. Clicking on View status, and then Details gives me this window.
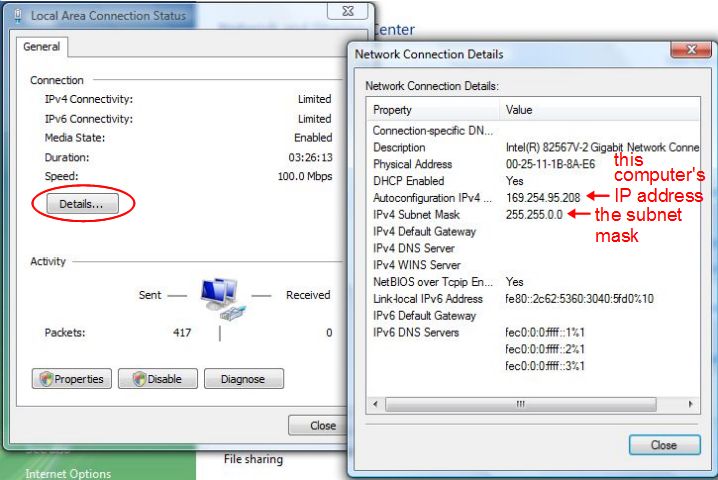
In there I see an Autoconfiguration IPv4 and an IPv4 Subnet Mask. The 169.254.95.208 is the computer's IP address for this little two machine network. It's four numbers, with each number being a value between 0 and 255.
The Subnet Mask is 255.255.0.0. The first 255.255 and the corresponding 169.254 in the same positions of the IP address tells us that both machines on this network have IP addresses starting with 169.254, meaning that the Pi's IP adress is 169.254.something.something. The trick is to figure out what those somethings are.
Each of the two values can be anything from 0 to 255. That means there are 256 x 256, or 65,536 possible combinations, too many to guess. So we need some software that will try talking to the Pi with all 65,536 possible addresses until it finds one that works. This is called scanning.Scanning for the Pi's IP address
One tool for scanning IP addresses is nmap and a popular one seems to be the one you can download at nmap.org. For my ancient Windows Vista I had to run an old version of their nmap under cygwin.
Below is shown the command I ran, nmap 169.254.0.0/16, and what part of the output looked like in the cygwin window. Note that for a long time it showed only the first few lines. After a while it found the Raspberry Pi board and displayed its IP address 169.254.37.77. Had I been watching I could have stopped the scan right there by pressing Ctrl-C. But instead I came back later and the full scan took 44 minutes. The full output was around 43 window-fulls and I had to scroll back to the beginning to see what you see below. You may have to scroll through the output to find the Raspberry Pi information. It also may not be at the top of the output like mine was.
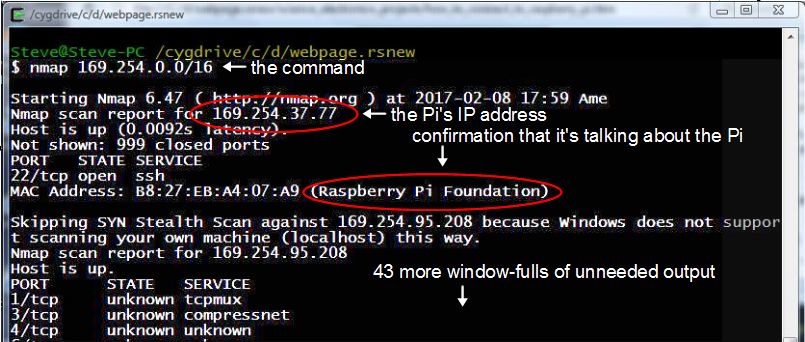
Notice that in the command line I told it to scan 169.254.0.0/16. The /16 tells it to scan by trying IP addresses where the first 16 bits are the same as the given "169.254.0.0". The first 8 bits of that address are the 169. The next 8 bits are the 254. So the first 16 bits are both of those together, 169 and 254, or 169.254 in IP language. It's not important to understand bits, but for those curious, here's 169.254.0.0 written in binary instead.

Each 0 or 1 is called a bit. From the above you can see what we mean by "scan for all addresses whose first 16 bits is 169.254 or 10101001.11111110". And in fact, the IP address I found for the Pi was 169.254.37.77 and as you can see, it starts with 169.254.
What if you were told the subnet mask was 255.255.255.0 instead? Using our computer's IP address of 169.254.95.208, that means all the addresses in our small network start with 169.254.95.something. We'd have to scan only for the last something, which is a value from 0 to 255. That's only 256 numbers and so the scan would be a lot faster. Our nmap command line would look like this instead.

Note that when I powered down the Pi and powered it up again the next day it still had the same IP address, so write it down because you may not have to repeat the scan each time.
Using the IP address to connect to the Pi
Now that you have the Pi's IP address, you can connect to it however you want, provided the setup on your Pi allows you to connect.
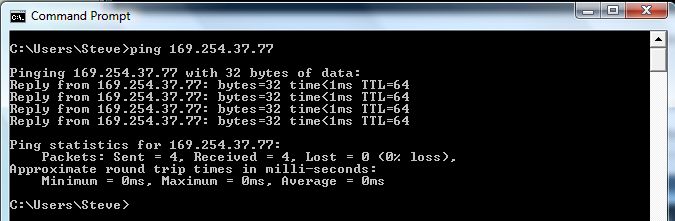
In my case, the setup that came with Raspbian on my SD card allowed me to ping the Pi to see if I could get to it at all. This is done by running the ping command and passing it the Pi's IP address, as shown below. Doing a ping is like tapping it on the shoulder to see if it's there.
I could also start up an SSH (secure shell) session using PuTTY, free software that most Pi users use at one point or another. In the snapshot below I'm running it from a Windows Command Prompt window. Once it was up, I typed in the Pi's IP address.
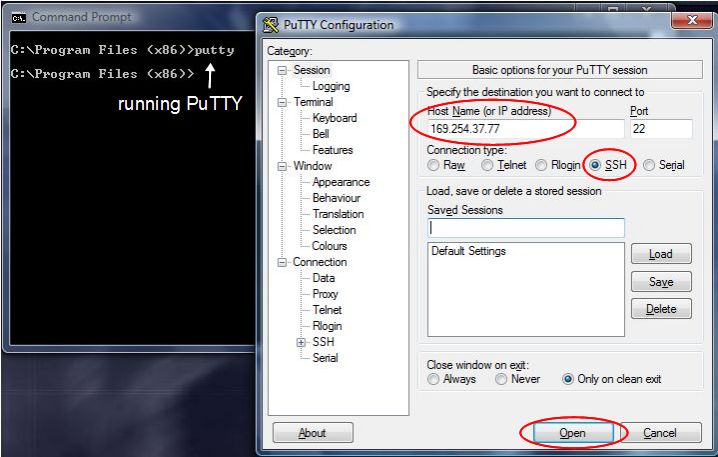
Note above that the Connection type is selected as SSH and so when I click on the Open button I get a new window with an SSH running in it. I'm asked to log in. For a new Raspberry Pi system the username is usually pi and the password is raspberry.
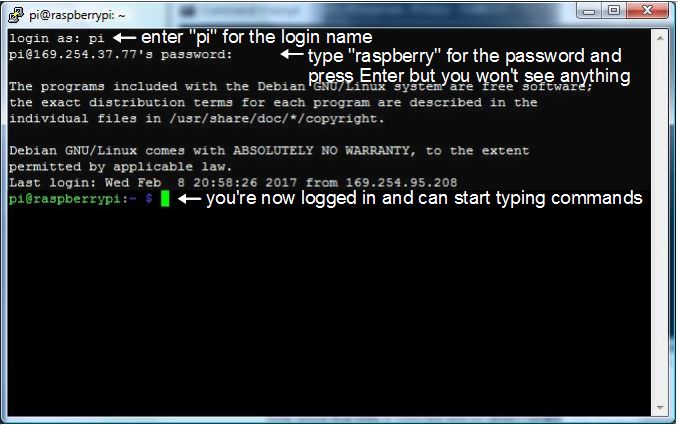
At this point you are connected and able to start typing commands.
