NOTE: This construction technique did not work out! Once I had enough layers to try it (about 50 each of positive and negative layers if memory serves), I bolted it all together tightly. I then did a number of tests that showed no results. I then opened it up and noticed that something was wrong with the construction technique.
Each tin foil layer was made up of 9 plates plus 10 strips connecting those plates plus 1 strip for the contact. In order for all these pieces to be in contact they were laid out such that the connecting strips overlapped the plates and the contact strip overlapped one plate.
Between the tin foil layers were placed waxed paper layers. When this whole thing was compressed together the end result was that the parts of the tin layers where there was overlap pressed into the waxed paper, tearing the fibers making for spots where the dielectric was less than where there was no overlap.
There are solutions to this problem such as painting on a thin coat of wax to even out the tin layers. However, I decided instead to shelve the Mark 2 and sometime in the future build another one where the tin layers are made up of one piece using a cutting machine. This would allow me to do more layers faster and to try alternate configurations.
This electric rocket will be built much like the Mark 1 was built but with the exception that I will cut each piece of the plates by hand with scissors instead of a cookie cutter. I will also cut the wax paper discs by hand. I will try to make it as close to the original plans on Bill Beaty's website as possible, including the use of tin this time.
The inner diameter of the waxed paper discs is 2" and the outer diameter is 4". Each layer of tin plates lines up with the layer below. I am not offsetting them as is being talked about in some versions of the plans.
The tin foil that I am using is .001" thick which is the same thickness as the aluminum foil that you can buy in grocery stores. I purchased it from Pearson Dental. I originally tried Benco Dental but they told me to contact Pearson instead. It cost $37.50 US for 1lb. It comes in a role that is 6" wide but I don't know how long. I'll probably have to order more later. I may have goofed too as even though the box clearly says it is tin foil, the receipt says something about it being aluminum backed. Peason Dental's contact information is given below.
Pearson Dental
Sylmar, CA
1-800-535-4535
1-818-362-2600
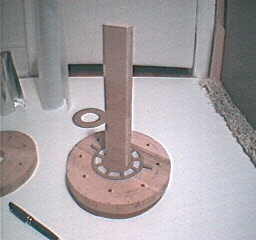
In the following picture you can see the parts before construction begins. Across the top from left to right are: roll of tin foil, roll of waxed paper, and the construction stand. Across the bottom are the two identical wooden discs made of 3/4" maple for the ends of the electric rockets. Their outer diameters are 8" and their inner diameters are 2". In the middle of the diagram are two cardboard roundish pieces. The one on the left is for making sure that the tin pieces are in their correct places and is talked about more below. The one on the right is the template that is placed on the waxed paper sheet in order to mark the shape of the waxed paper disc prior to cutting the disc from the sheet.
|

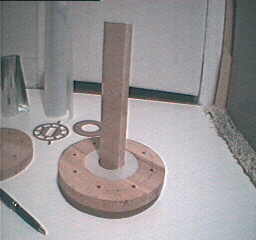
Construction is done with one of the wooden discs sitting in place on the construction stand. The purpose of the vertical part of the construction stand is to hold the waxed paper in place as layers are built up. In the picture below some waxed paper discs have already been placed on the disc. Note that once all the layers are in place, the complete electric rocket is screwed together and the construction stand is slid out from the center hole.
|
There are nine plates per layer made up of individual pieces as is drawn in the original pictures on Bill Beaty's website. The nine pieces are connected using small stips. And each layer then has one more strip that sticks out from the layer for applying the voltage. Once all the pieces of a single layer are placed on a waxed paper disc, a specially shaped piece of cardboard is slid down on the contruction stand to just above the pieces that have been laid down to ensure that they are all in the correct positions. The picture below shows this cardboard piece sitting on the waxed paper (at the time of this picture no tin foil had been cut yet). This ensures that each layer of tin is lined up with the layer below.
|