DI-8K Digital Scale
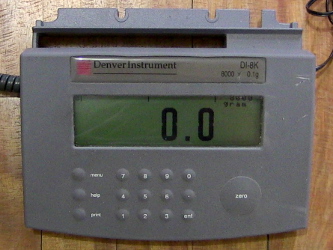
The DI-8K digitial scale from the Denver Instrument Company is one I've used many times over the years. It has a resolution of +/- 0.1 grams, and can display in other units of measurement too.
Here it is all assembled and turned on.
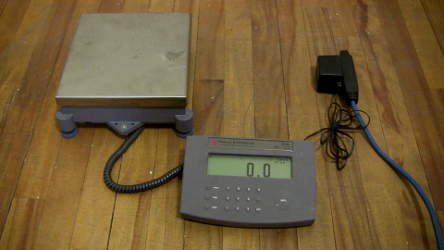
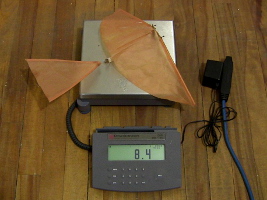
It comes in the major pieces show in the photo below: the display module and the balance module. The pan on the balance module just sits on top and can be removed. In the photo below the pan is sitting upside down on the floor above the display module. The display module has a communication cable that you plug into the balance module.

Here are some specifications:
- Capacity (maximum it can measure): 8000 grams
- Resolution (error, +/-): 0.1 grams
- Units: grams, milligram, kilograms, pounds, grain, ounce, carats
- Pan size: 8" x 9" (20 x 23 cm)
I originally purchased it from the Denver Instrument Company but they no longer exist under that name and use their mother company's name Sartorius.
How to use the digital scale
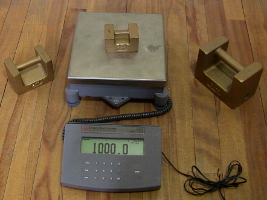
The scale comes calibrated from the factory, however, the manual says to calibrate it once a week. For infrequent use like mine I calibrate it pretty rarely or before making very precise measurements. To calibrate it I picked up some precise masses (see photo below) from a local medical supply store. They're 1 kilogram, 2 kilograms and 5 kilograms, though I only ever use the 1 kilogram one. The other two just came with the set.
Each manufacturer's procedure will differ a bit but basically I use the menu system on the display module to go the calibration section, put the 1 kilogram mass on the scale, and then tell it that it's 1000 grams.
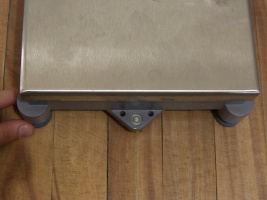
The first step in using the digital scale is to level it. The four legs are threaded, allowing you to lower or raise each corner of the balance module by turning the legs. At the same time you watch the bubble in the bubble level located at the center of one side. The goal is to center the bubble.

The next step is usually to press the big round button labeled "zero". That sets the display to 0.0.
You can now put whatever you want to measure on the pan of the balance module. Below are some examples.
Some examples where I've used the digital scale
Rubber band powered ornithopters have to be as lightweight as possible, so a scale comes in very handy for finding the lightest materials that'll do the job.
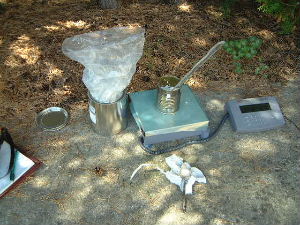
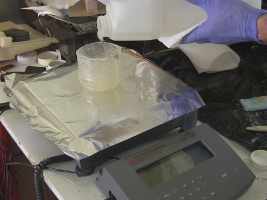
I needed to make a rigid ball for my BB-8 droid so I covered a cardboard globe in three layers of fiberglass. Some of the resin used for that needed to be measured by weight and so this scale came in handy. Note the aluminum foil covering the scale's pan so as not to get resin on it.
In this case the procedure was to put the aluminum foil and the container on top of the pan and then to press the "zero" button to zero the scale. At that point the scale reads 0.0. Only then do you pour the resin into the container. The result is that only the weight of the resin is shown on the scale.

I've also used it for measuring materials in making Barium Titanate capacitors.