Window solar air heater - Outdoor to indoor airflow
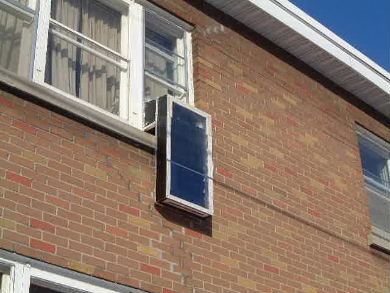
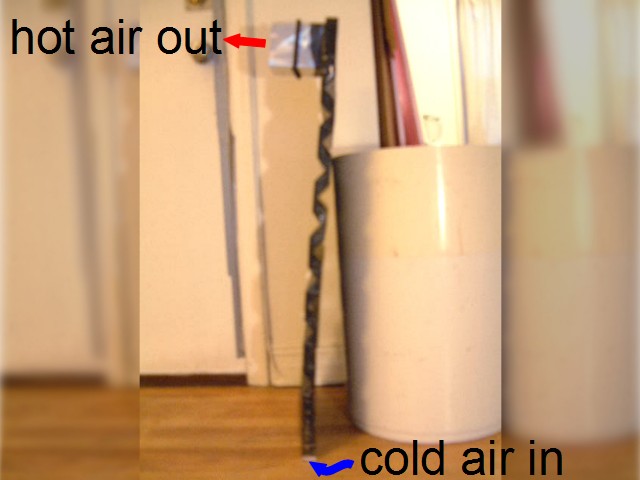
I wanted fresh, warm outdoor air blowing into my apartment in the middle of winter, which in Ottawa can be around -15C (5F), so I designed a solar air heater which would take outdoor air, heat it using the sun, and bring it indoors. Also, being in an apartment I was very limited in what I could mount on the building. So, just as many people place an air conditioner out their window during the summer, I designed a solar air heater that could be placed in a window during the winter without any modifications to the window.
Note that I later modified this one to do indoor to indoor airflow instead which is detailed on this other page, though some details such as absorber construction and the electronics are only on this page.
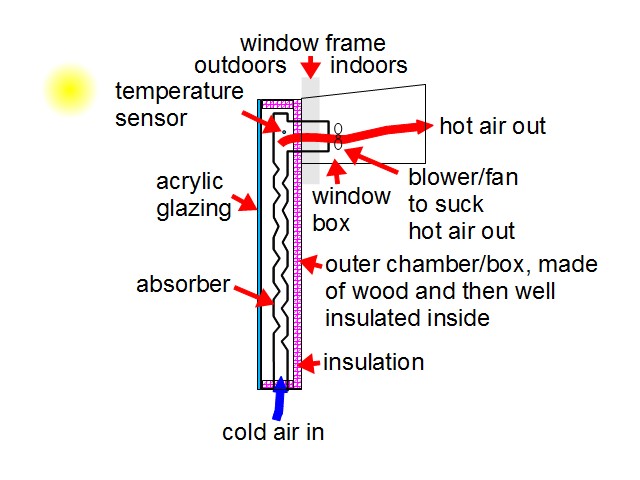
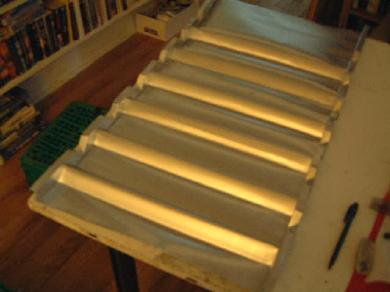
Taking a cue from my mini can solar air heater I wanted the air in the absorber to have a turbulent path. The absorber was basically an aluminium box with horizontal indents in it as the following shows. You can think of the whole solar air heater as an insulated wooden box with an acrylic glazing on the front and with an absorber box inside it.
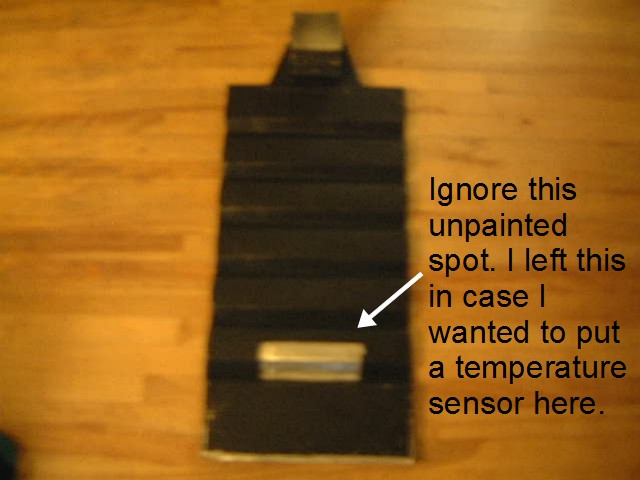
I made the absorber using aluminium flashing available from hardware stores (see photo below). I cut out front, back and two side sheets with overlapping tabs and taped the whole thing together using aluminium tape also found in hardware stores. I cut a square hole in the back sheet and made and taped on an aluminium box, which I also made, for the outlet. The whole thing was then painted with flat black spray paint for painting barbeques and radiators.
The indents in the absorber were to make the air vortex as it travelled through the absorber. This would cause more of it to come in contact with the skin of the absorber and therefore pick up more heat. In the end I found that I was creating too much static friction, slowing the air flow too much for the fan. A newer absorber with less indents shown on the page about the indoor to indoor window solar air heater fixed the air flow problem and made the next problem clear, the small size of the absorber.
For the insulation I used pink solid extruded polystyrene. According to my research which I did after the fact, if in contact with direct sunlight then it would offgass formaldehyde, not something I would want to be mixing with my indoor air. My absorber is a separate air flow chamber, which prevents the air being heated from mixing with the air behind the glazing so this wasn't an issue. I also covered the exposed parts of the insulation with aluminium tape and aluminium foil and even painted the tape and foil with the flat black paint in places. However, the heated insulation offgassed something that fogged up the inside of my glazing, reducing the amount of sunlight hitting the absorber. The insulation I used isn't made for the temperatures encountered (around 50C (122F)).
Electronic controls for fan
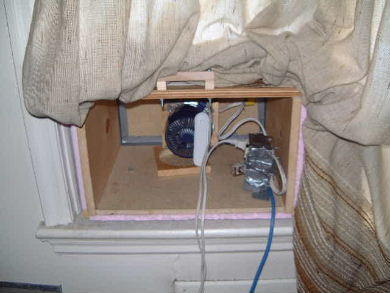
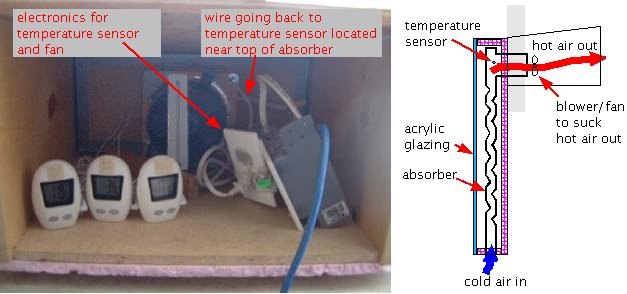
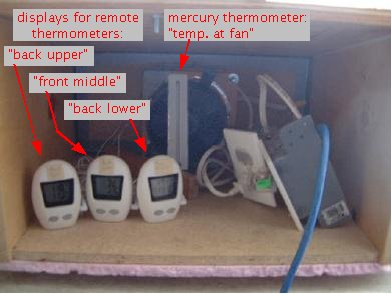
The sun heats the air in the absorber. When the temperature of that air gets hot enough I wanted a fan to turn on and suck that hot air out of the absorber and into the room. Then, once the hot air has been sucked out and the hot skin of the absorber is no longer hot enough to heat new cool incoming air fast enough, I wanted the fan to turn off. For this I canabilized the electronics from my mini solar air heater. This is very simply done through one simple electronic component, a bimetal snap disc thermal sensor. See how to use it in this electronic temperature control circuit. The following photos show the result. WARNING: The following photos contain electronics arrangments that are extremely ugly. :-)
Testing
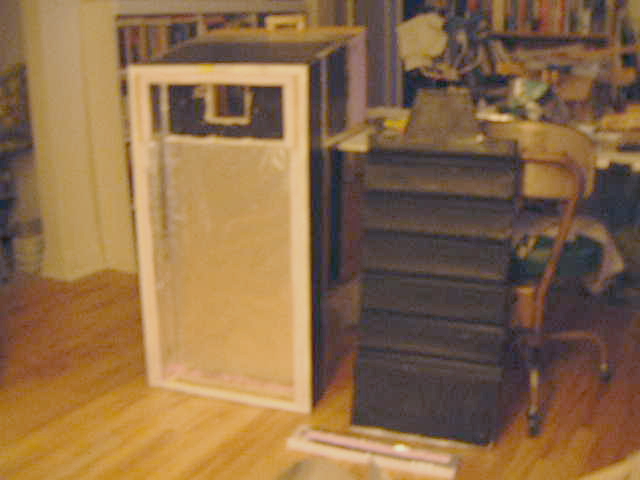
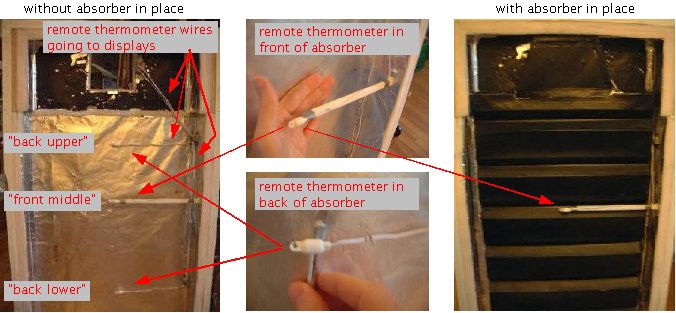
The temperature at a number of places was recorded. Especially handy for this were remote thermometers that consisted of a thermometer on the end of a 10 foot long wire with a display unit at the other end of the wire. See the photos below for how they were positioned. Also used were some regular mercury thermometers and local weather reports for the outdoor temperature.
Analysis and conclusion
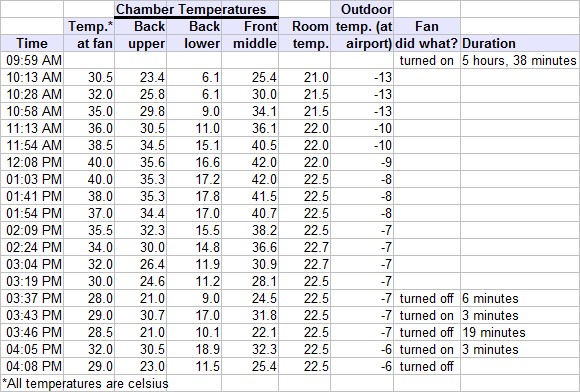
Notice from above that the fan stays on all day, except for the very end when the sun starts going down. This is because the absorber is absorbing heat from the sun at the same rate or faster than the air flowing through it can take that heat from it. The Temp. at fan column is a good indication of this. This is good... except that the room temperature barely changes all day. This is bad. This means that the amount of hot air being sucked in is too small to effect the room temperature much. A bigger fan or an absorber that doesn't have as many indents in it might increase air flow.
Note also that the air in front of the absorber and at the upper back is acting as a good hot thermal mass.
I eventually made a new absorber with just 4 indents, and therefore less restrictive airflow but stupidly, I didn't just put this one in the outdoor-to-indoor solar air heater and test again. Instead, I completely reconfigured the solar air heater to be an indoor-to-indoor one first.
