The following details how I designed by fresnel lens and mirror solar cooker. I've provided the basics so that even if you're building a different type of solar cooker you can still find this useful.
|
Step 1. Find minimum and maximum angles for the solar cooker
The fresnel lens should be facing the sun directly as shown below. To do this I start with the sun's angle with respect to the ground. This angle is often referred to as the sun's altitude or the altitude angle. This angle is also the angle the fresnel lens should be facing.
|
To find the sun's altitude use an online calculator. There are a lot of them out there and almost any one of these will do. I like this one from the University of Nebraska-Lincoln because it's very visual. It doesn't take into account daylight savings time though. Another good one is this one by Sustainable by Design that allows you to specifiy whether or not you're giving daylight savings time.
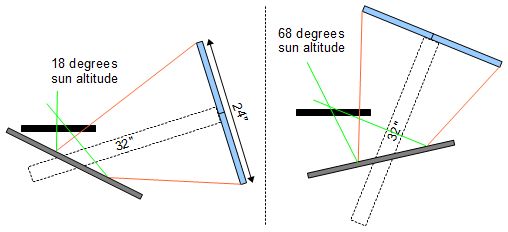
The sun is highest in the sky at noon on June 21. For me the sun altitude at that time is 68 degrees (I'm in Ottawa, Ontario, Canada around latitude 45 north and longitude 75 degrees west.) So that's the highest I need to point my fresnel lens.
Our days get short here in the spring and fall so based on experience I probably won't do any solar cooking earlier than April 15, based on this year's cooking efforts. At 5:00pm on April 15 the sun's altitude is 18 degrees. So that's the lowest I need to point my fresnel lens.
So in summary, these are the values I obtained for my design.
| Date | Time | Altitude |
|---|---|---|
| April 15 | 12:00pm | 54 degrees |
| April 15 | 5:00pm | 18 degrees |
| June 21 | 12:00pm | 68 degrees |
| June 21 | 5:00pm | 27 degrees |
Step 2. Draw the solar cooker at the different angles with sunlight
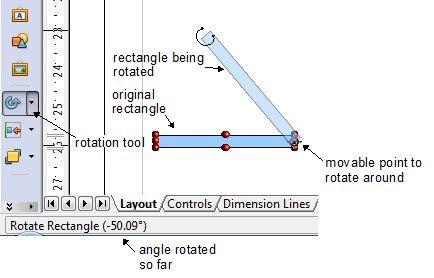
The next thing I did was to start drawing my fresnel lens and mirror solar cooker in a drawing program. I needed a vector type drawing program. That's one where you can draw lines, rectangles and so forth and then go back and select them and move them around. That's different than with a paint type program where once you draw a line, to change it you can only erase it and draw a new one. I also needed the program to let me rotate things and tell me the angle as I did so. I also wanted it to let me select the point to rotated around.
The program I have for that is OpenOffice from OpenOffice.org, a free office suite that includes just such a drawing program.
|
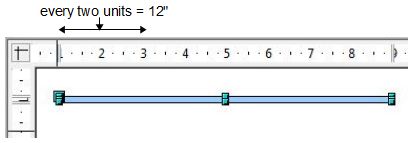
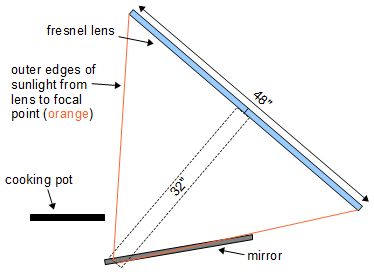
I started by drawing the fresnel lens (see below.) Everything was drawn roughly to scale. My lens is 48" by 24" (48 inches by 24 inches). As the following snapshot shows, the Open Office drawing program displays a ruler across the top and side of the drawing. I simply selected a scale that allowed me to draw things in a reasonably workable size.
|
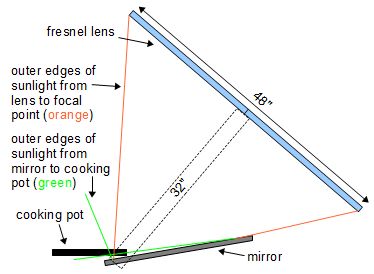
As a matter of habit I figured the 24" edge would be parallel to the ground and the 48" edge would be angled vertically. From tests with my fresnel lens I knew the focal lenth was around 32 inches. So I drew two orange lines from the outer edges of the fresnel lens to a location 32 inches away. The area inside those orange lines represented the cone of sunlight focused by the lens.
I then positioned the mirror somewhere near the end of that cone of sunlight. I didn't want it too close to the focal point because the mirror would get too hot.
I also added a black rectangle representing the cooking pot but I didn't know where to put it yet. Its position would be determined by where the light from the mirror would reflect to. But where was that? Step 3 will talk about how to figure it out.
I grouped everything together and rotated it all around 50 degrees for a good first rough idea.
|
Step 3. Rearrange the parts to work with the sunlight
When drawing sunlight reflected off a mirror there's one simple thing to remember:
The angle of reflection is equal to the angle of incidence.
|
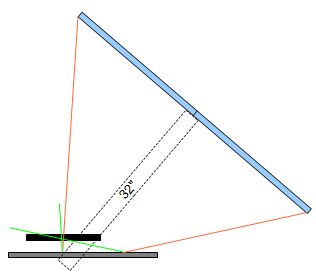
So as the following drawing shows, with that in mind and using some green lines which I moved around and rotated in the drawing program I was able to see where my two orange lines would go when they reflected off the mirror.
The two green lines met at a new focal point. I put the cooking pot somewhere short of that focal point since I wanted to spread the sunlight over the bottom of the cooking pot.
|
|
Clearly the cooking pot had to be too close to the mirror and only a portion of it would get the reflected sunlight. I tried some other positions but no matter what I did the cooking pot ended up having to be inside the cone of sunlight between the lens and the mirror in order to get decent light to its underside. See the other example above.
What I realized was that the sunlight cone from lens to mirror was too wide if I wanted the cooking pot to be above the mirror. So I decided to try with the 48" edge of the lens parallel to the ground and the 24" edge angled vertically. As the following drawings show, this worked a lot better.
|
Step 4. Figuring out the mirror size
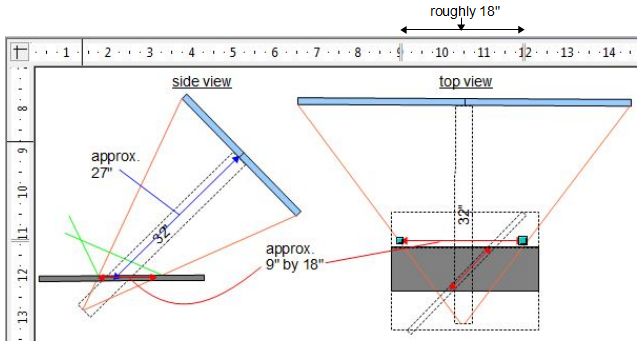
Since I was drawing everything to scale (see step 2 above) all I had to do to figure out the required mirror size was to draw side and top views and look at the area that the mirror intersected the cone of sunlight. This required a little rotating in the case of the side view to make things line up with Open Office's rulers. Then I just read off the size on the ruler. See the following snapshot for how I read the 18" wide dimension off the ruler. Remember, the scale I'd selected was that every two units on the ruler is 12".
|
To fudge it I rounded the mirror size up to 12" by 24". And luckily, one of the old mirrors I'd collected years ago was 12" wide and a lot longer than 24". So all I had to do was cut it to size.
Step 5. Draw the support mechanism to make sure it all works
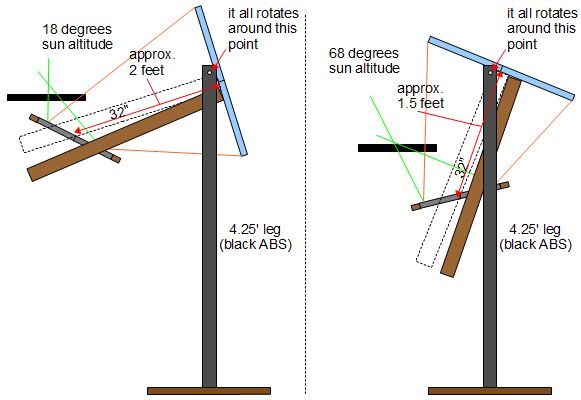
Next I added the support structure and drew the entire thing using the minimum and maximum angles. The reason for this was to make sure that things would work mechanically without interfering with each other. I didn't want to build it and find out that the mirror couldn't be rotated into position because the support legs were in the way or something like that.
|
Notice that the mirror is now drawn to scale, including the wooden frame for it. Also notice that in the one on the right it looks like the mirror might be interfered with by the legs but the mirror is only 24" wide and the legs are 48" apart so there's no problem.
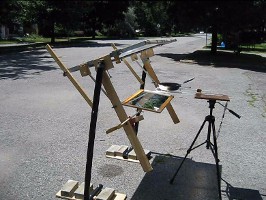
The finished result
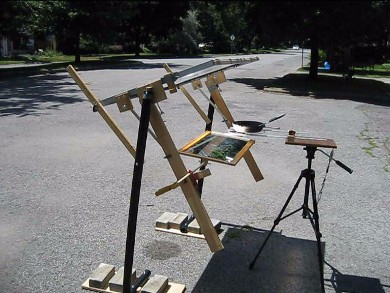
And here's the finished result...
|
... along with a video showing it's assembly and use.

