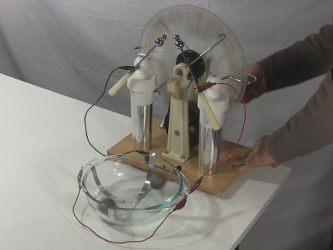
The ball cyclotron (or electrostatic accelerator) is an easy to
make science project that you can make from a bowl, some ping pong balls
and kitchen aluminum foil. However, it does require a high voltage source
like a
Wimshurst machine
or a medium sized
Van de Graaff generator
or anything more powerful if you have it. When the power is turned on,
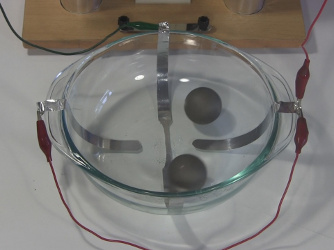
one or more balls placed in the bowl move rapidly in a circular fashion
around the inside edge of the bowl. You can see the balls moving so fast
below that they are blurred.
There's also a video below showing
demonstrations and instructions for making it.
|
|
The ball cyclotron running - closeup.
 |
|
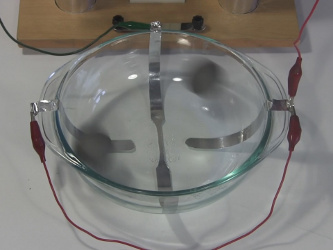
The ball cyclotron not running.
 |
|
How to make a ball cyclotron/electrostatic accelerator
There are two parts to making the ball cyclotron. The first is to
make the bowl by putting strips of metal in it. The second is to
make at least one lightweight ball that has an electrically conductive
surface. Both are detailed below.
Making the bowl
Find a bowl that has a bit of a flat bottom, some fairly vertical sides
and a gentle curve going from the flat bottom to the fairly vertical sides.
The flat bottom helps with starting the balls in motion and the sides
keep the ball in the bowl when moving fast.
Either get some kitchen aluminum
foil or some aluminum tape available
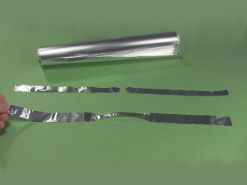
at hardware stores. Cut three strips of either material as shown in
the photo below. As you'll see from the other photos below, the long
one should span the entire diameter of your bowl and the two short
ones should be long enough to get around 1 inch/25 mm from the long one
when laid in the bowl. They should also leave some hanging over the sides
of the bowl.
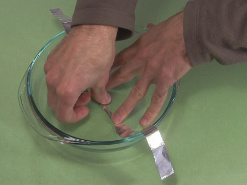
If using aluminum foil then use
any tape to tape the long strip inside the bowl, as shown in the photo.
I like using clear tape since it looks better. If using aluminum tape
then simply strip that backing off the tape and tape them into the bowl.
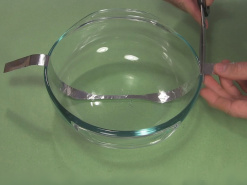
Only one end of the long
strip should extend outside the bowl. Cut one other end, as shown below.
1. Prepare metal strips.
 |
|
2. Tape the long strip in place.
 |
|
3. Cut one end.
 |
|
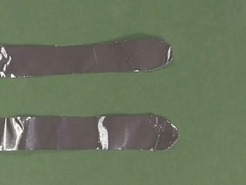
Cut the one end of each of
the two short strips rounded, as shown in the photo below.
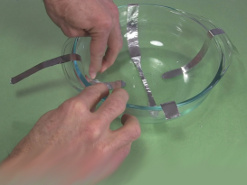
Tape the short strips into the
bowl. Notice in the photo that inside the bowl they are spaced around
1 inch/25 mm from the long strip. Also notice that their ends hang outside
the bowl.
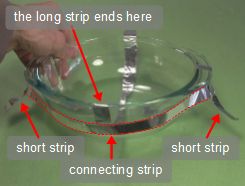
The two short strips need to
be electrically connected together somehow. In the photo below this
is shown done by cutting another strip of aluminum and taping the
ends of it to the two ends of the short strips that hang outside the
bowl. If you do it this way, make sure that where you do the taping
that aluminum is touching aluminum without any tape or sticky glue
in between, otherwise electricity won't be able to flow from strip to
strip. Alternatively you can connect them using a wire with alligator
clips on the ends or any other way you have.
Whatever way you do it, it's important that you do it on the side of
the bowl that you'd cut the long strip short in step 3. You want this
connecting strip to be as far from the long strip as you can get it,
otherwise there might be sparks or corona losses between them
due to the high voltage.
4. Rounded ends of the short strips.
 |
|
5. Tape short strips in place.
 |
|
6. Connect short strips together.
 |
|
The bowl is now ready.
Making the balls
You'll need very lightweight balls for this to work. I've found that
ping pong balls work well, however, you have to cover them in some
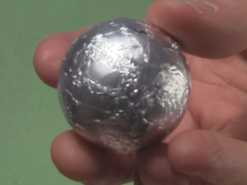
sort of electrically conductive coating. One option is to tightly,
and smoothly, wrap aluminum foil around them. Another option is to
paint them. Both are shown below.
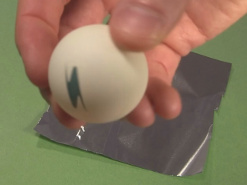
Get a ping pong ball. I buy
mine from sports stores.
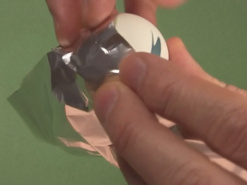
Wrap it in aluminum foil. No
tape should be needed to hold the foil onto the ball.
1. Get a ping pong ball.
 |
|
2. Wrap in aluminum foil.
 |
|
The wrapped ball.
 |
|
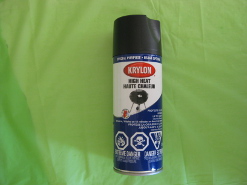
For painting the ball
I tried both Krylon BBQ and Stove spray paint, available in all hardware
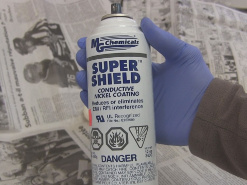
stores that sell paint. I also tried a special
Super Shield Nickel Coating from MG Chemicals,
available in most electronics stores.
Both worked equally well. This means that both paints were electrically
conductive. The Kylon paint wasn't very conductive but it doesn't need
to be very conductive for this to work. You can experiment with other
paints to see if they work too but I can't guarantee it. However, these
were just two cans of paint that I just happened to already have, so
chances good are that other paints will work too.
Krylon BBQ and Stove spray paint.
 |
|
Super Shield Nickel Coating spray paint.
 |
|
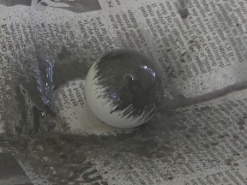
Painting with nickel paint.
 |
|
Running the ball cyclotron/electrostatic accelerator
To run it you'll need a high voltage power supply, but it does not have
to have high current. A Wimshurst
machine is an example of a high voltage, low current power supply.
A high current one is fine too, just not necessary.
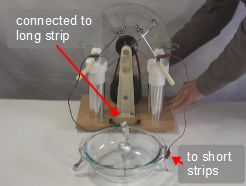
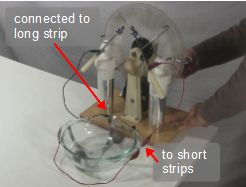
As shown below, you'll need to connect one side of your high voltage
to the long strip and the other side to the short strips. I'm using
wires with alligator clips on both ends.
Then put the ball, or balls in the bowl such that they're touching a
metal strip. Turn on the power supply, or start cranking it in the
case of a Wimshurst machine, and the ball(s) should start to move around.
If they don't then either the voltage or current is too low. They
likely won't start moving in a circle right away, but should after a
few seconds.
Connections for the aluminum foil cyclotron.
 |
|
Connections for the aluminum foil cyclotron.
 |
|
The video below shows demonstrations as well as step-by-step how to
the a ball cyclotron along with some optional coverings for the balls
and the aluminum strips in the bowl.

