Corona motors (or electrostatic/atmospheric motors)
A corona motor is a form of electrostatic motor. It's also sometimes called an atmospheric motor when it's run off of atmospheric elecricity (more on that below.)
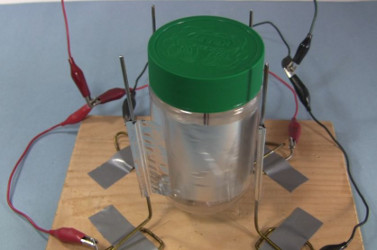
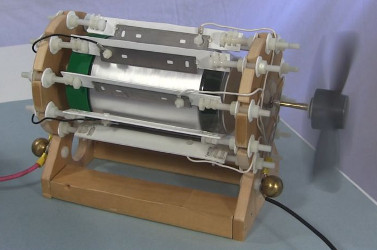
So far I've made the two corona motors shown below, a simple corona motor (version 1) that anyone can make, and a more powerful one (version 2) (a video of this one is below.)
How it works
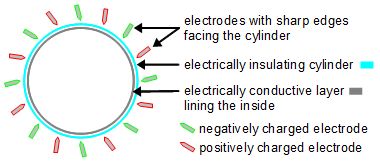
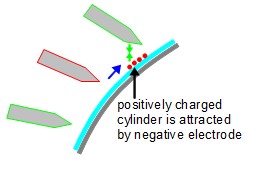
A corona motor is a form of electrostatic motor that consists of an even number of needles or blades, called electrodes, surrounding a disk or cylinder (see diagram below.) The disk or cylinder is made of an electrically insulating material, like plastic for example. For improved performance, an electrically conductive material lines the inside of the cylinder. The electrodes are charged alternately with different polarities: one is negative, the next is positive, the next is negative, then positive, and so on. They're kept charged and given a steady stream of current by some high voltage source. One set of electrodes may be at high voltage negative and the other at high voltage positive, or one may be at high voltage (negative or positive) and the other at Earth ground potential.
The following is a sequence of events that happens (see diagrams below):
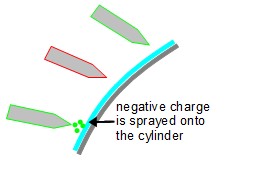
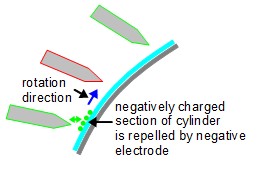
Step 1. A negative electrode sprays negative charge onto the section of the cylinder that it faces.
Step 2. Like charges repel each other so the negative charge on the electrode repels the negative charge on the cylinder. But since the cylinder is made of an electrically insulating material the charges can't go anywhere. Instead they repel by taking the cylinder with them. The cylinder begins to rotate.
The direction of the rotation is determined by having the electrodes be mounted on an angle. You can think of this angle forming an arrow with the cylinder pointing in the direction of rotation. The reason for this is that the angle causes the charge to be sprayed more in that direction, and so there will be more charge on the cylinder in that direction and so more repulsion in that direction.
Alternatively, if you manually rotate the cylinder in some direction then that initial momentum will cause it to continue to rotate in that direction.
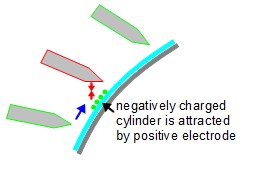
Step 3. The negatively charged section of the cylinder approaches the next electrode which is positively charged. Unlike charges attract each other. So the negatively charged section is attracted by the positively charged electrode.
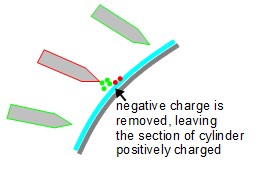
Step 4. As the negatively charged section passes the positively charged electrode, the negative charge is removed by ionization from the section, leaving it positively charged.
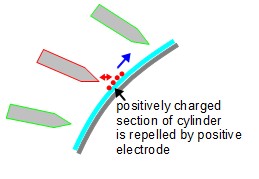
Step 5. The now positively charged section is repelled by the positively charged electrode.
Step 6. The positively charged section approaches the next electrode which is negatively charged. Since unlike charges attract, the positive section is attracted by the negative electrode.
Go back to step 1 and repeat.
Powering using atmospheric electricity - an atmospheric motor

Video - Corona Motor (v2) or Electrostatic/Atmospheric Motor
This video shows my more powerful corona motor (v2) in action, along with an overview and a load test measuring torque, work and power as it lifts a mass.
Video - How to Make Corona Motor (v2) aka Electrostatic Motor/Atmospheric Motor
This video shows step-by-step how to make my corona motor (v2). The bearings I used are dry ceramic bearings, manufactured by Boca. I bought them on ebay here but if that link no longer works then search on ebay.com for "ceramic bearings" and make sure they're "dry" bearings since having grease in them makes them harder to turn.
For the cylinder, I started with a Kraft peanut butter jar which is featureless along the sides and whose sides are perpendicular to the ends i.e. it's a nice cylinder. It's found in most grocery stores in Canada. In case you can't find it, its dimensions are 90mm (3 1/2") in diameter by 158mm (6 1/4") long. But you don't need a cylinder of the same dimensions in order to follow along with the video below and make your own. I don't give the dimensions in the video because I just roughed it out as I went along, so there should be no need for dimensions.
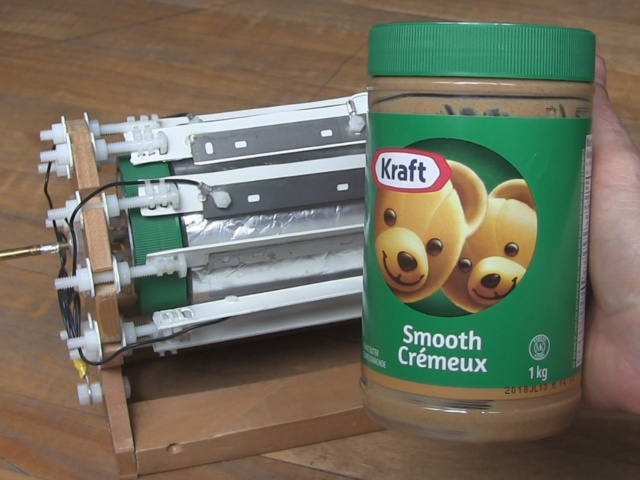
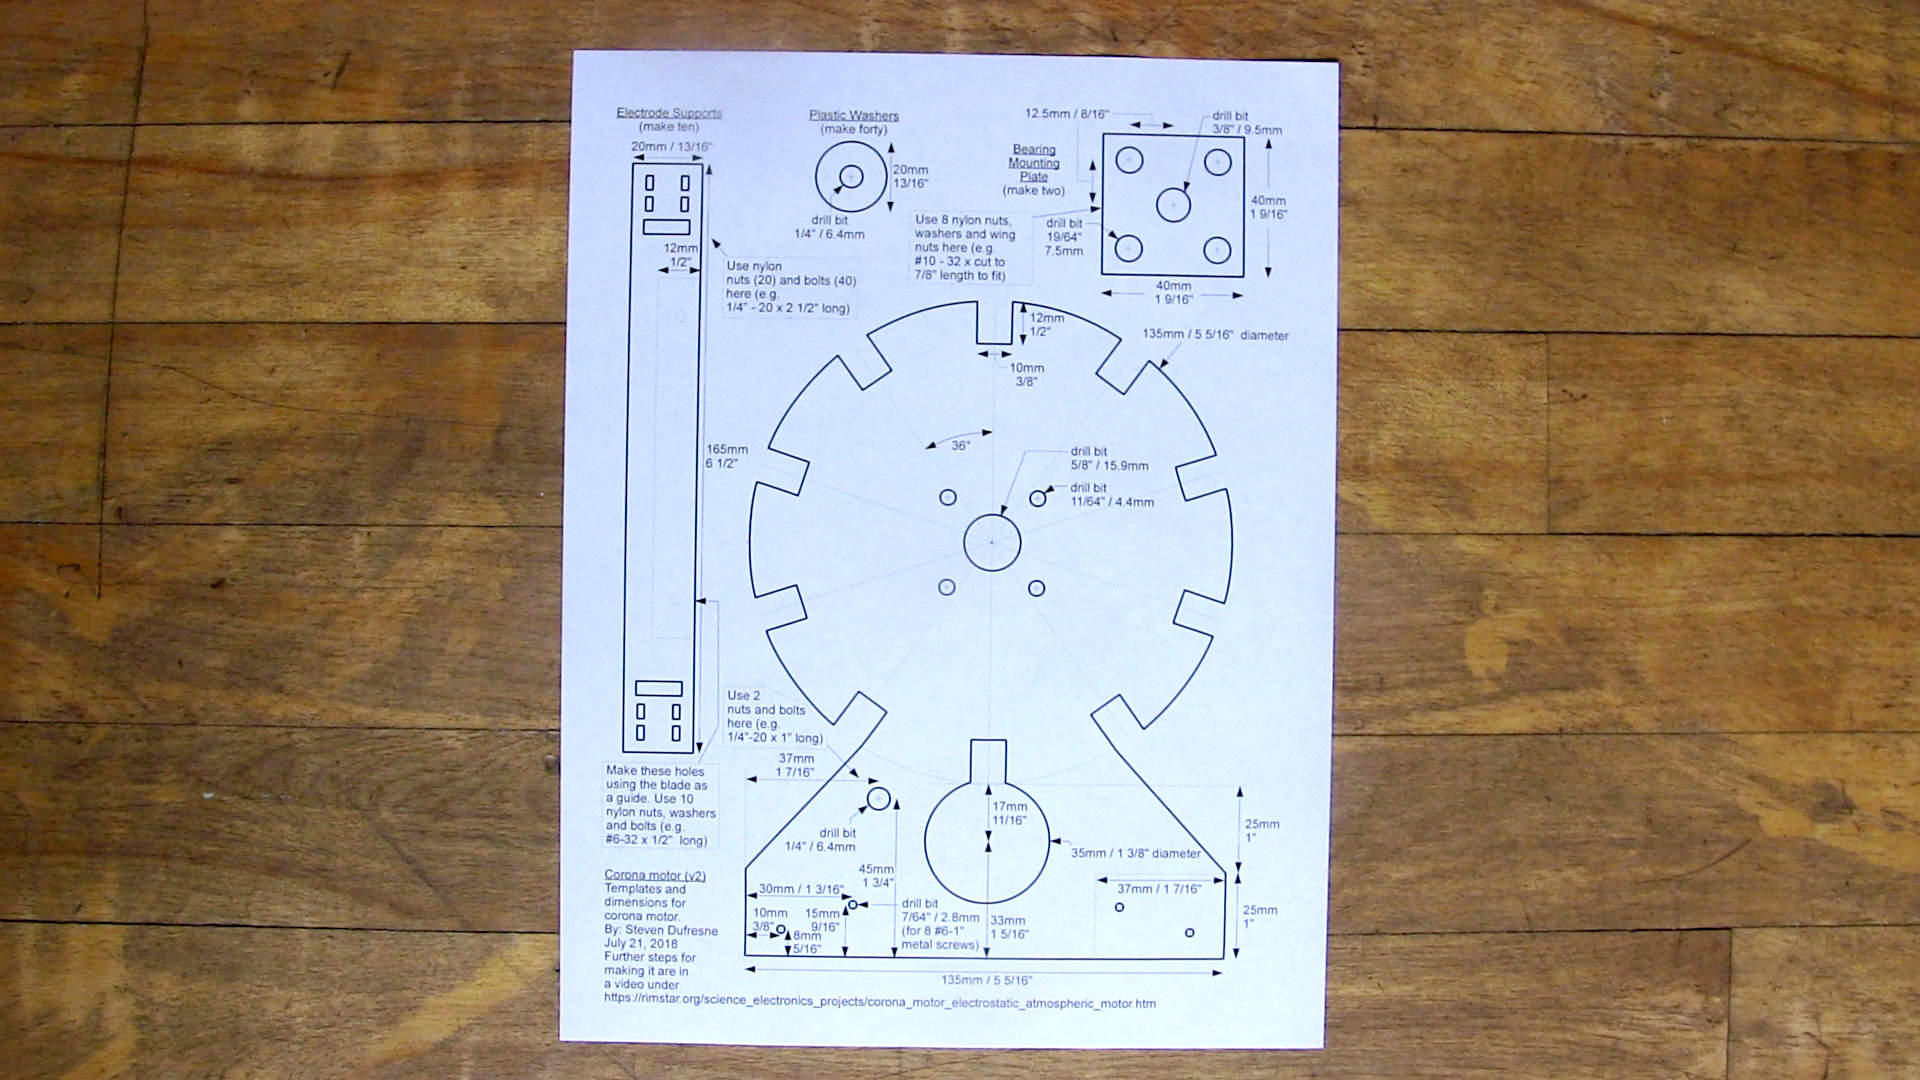
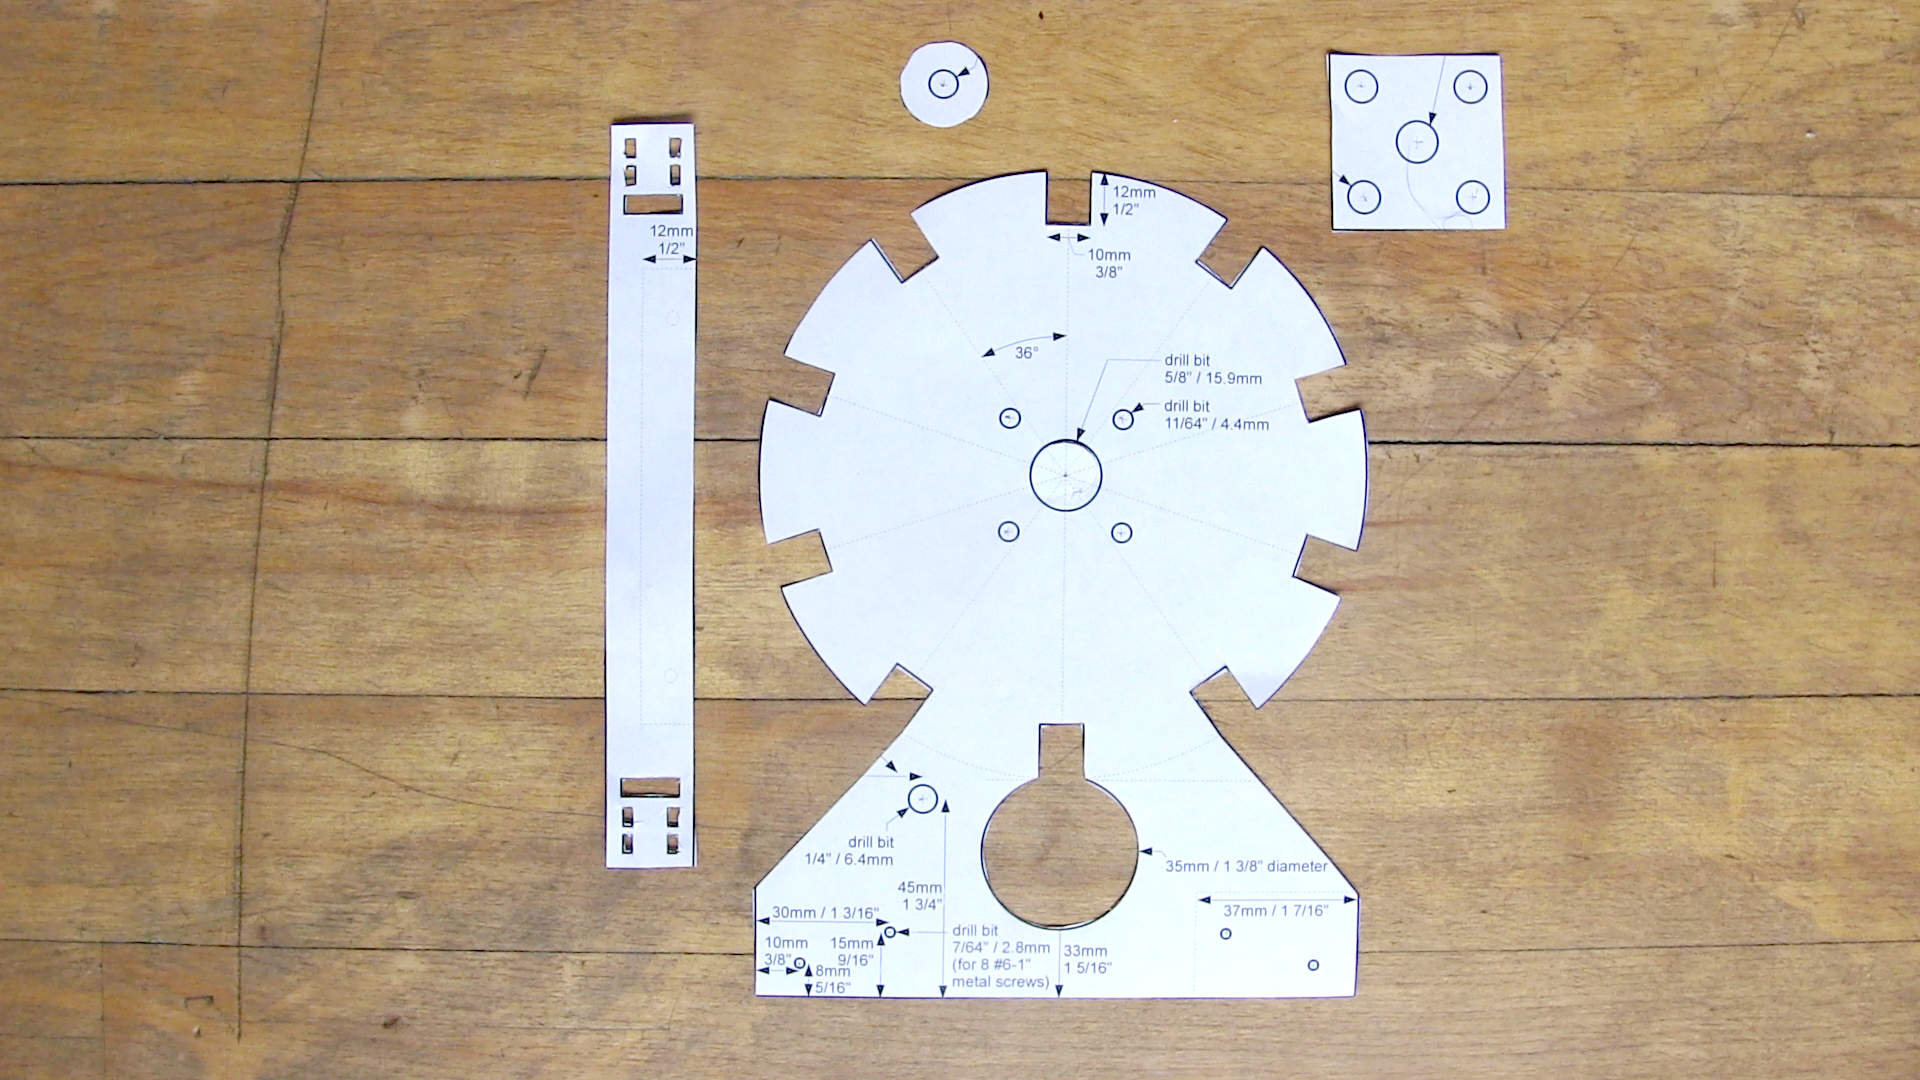
However, if you can find that peanut butter jar or a thin-walled cylinder with that diameter (the length isn't so important) then you can either just follow along with the video or I've since measured everything and drawn up templates which can be printed on Letter size paper (8.5" x 11"), cut out, and traced onto wood and plastic. It's available for download below.
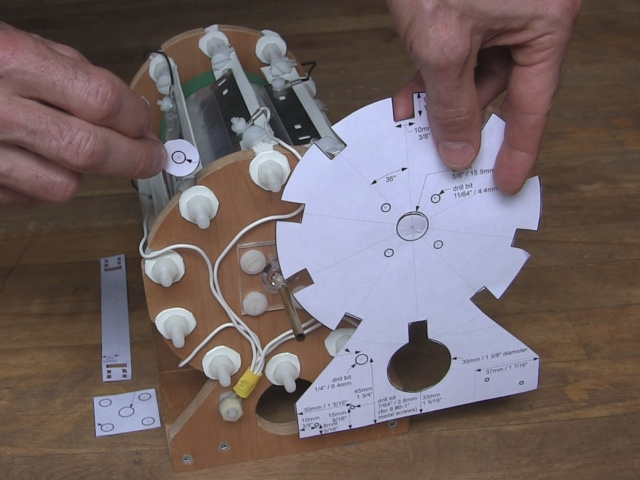
Here's the downloadable template for the wooden ends:
corona_motor_v2_templates_dimensions.pdf - 30KB, PDF file
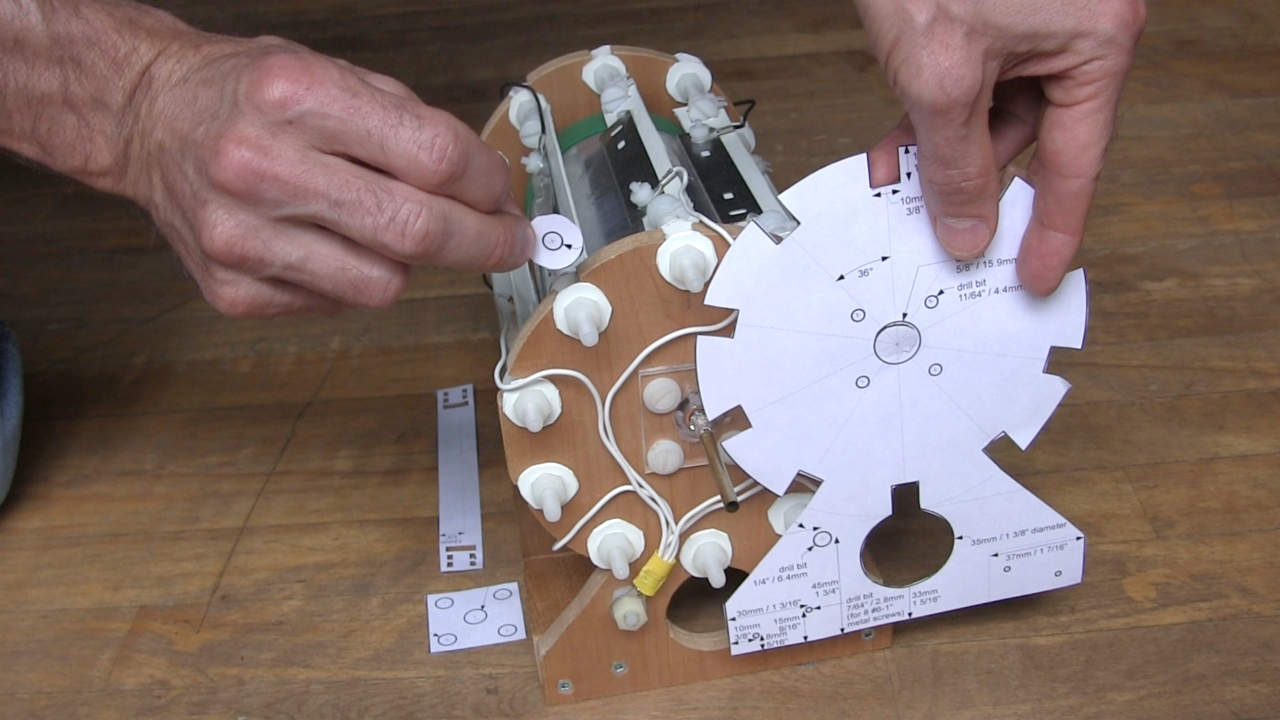
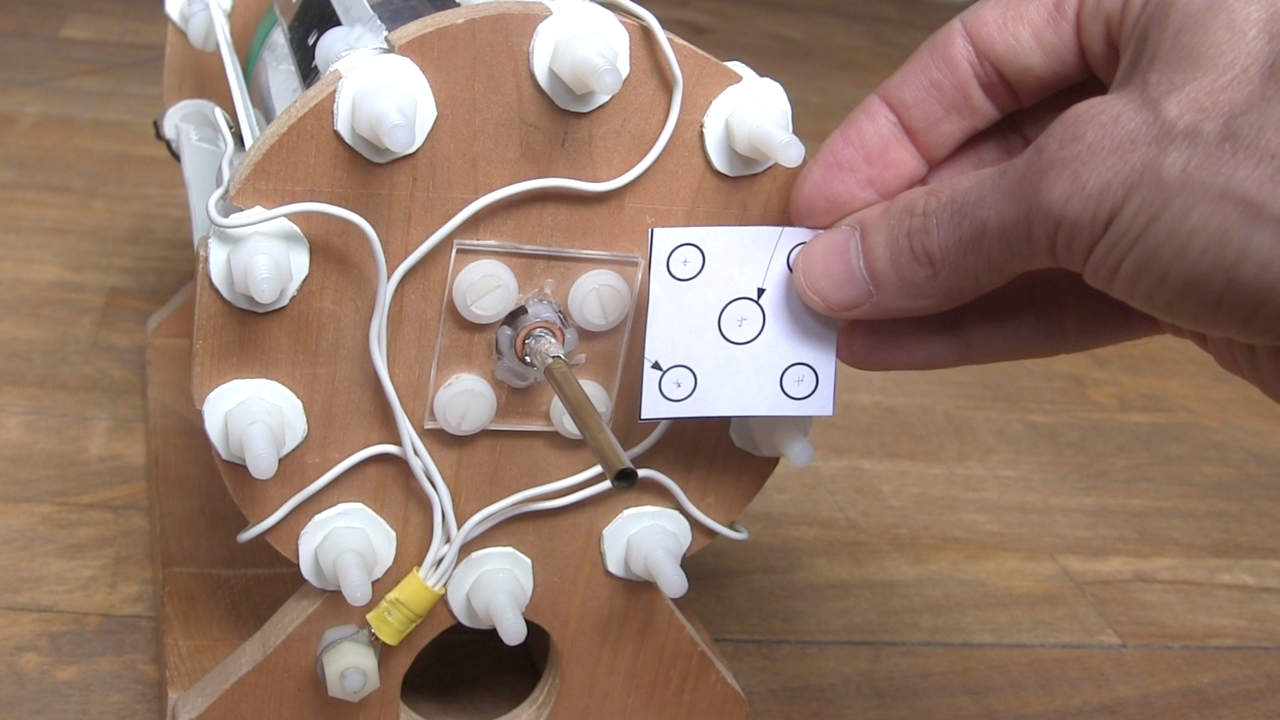
And here are photos to show you what the pieces are for.