Hydrogen generator electrolyzter for a balloon
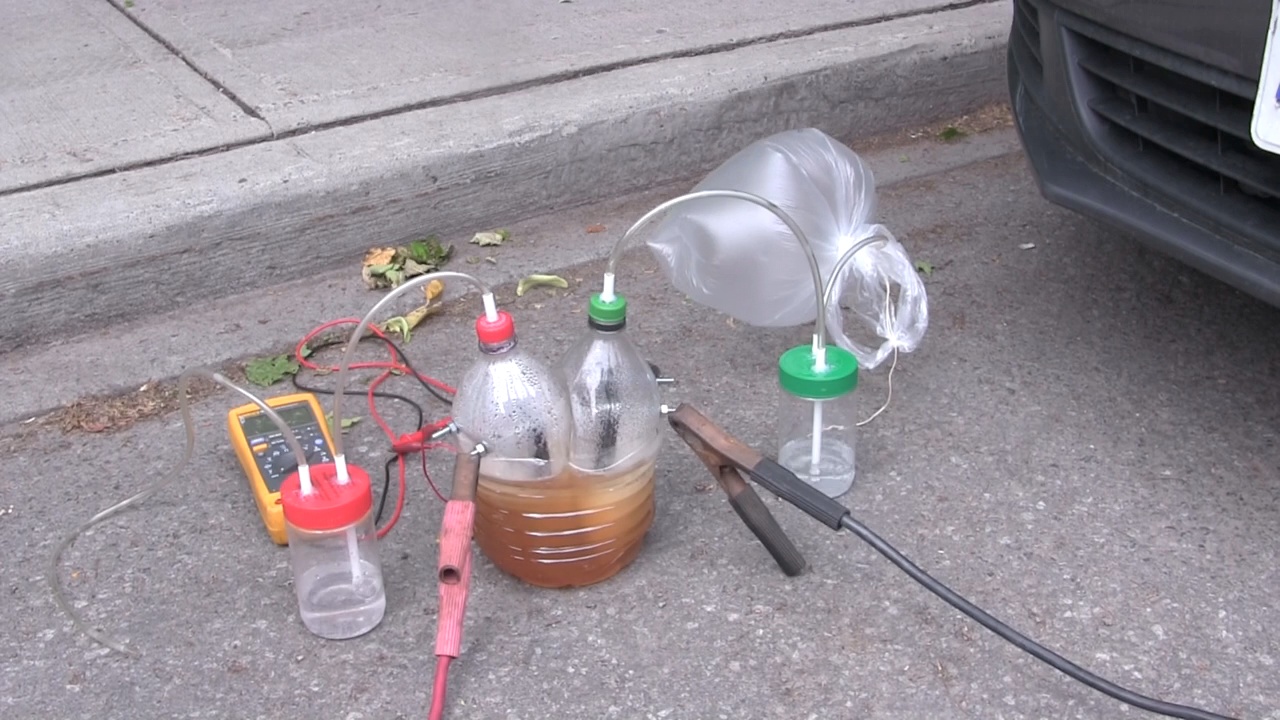
Here's how I made an electrolyzer as a hydrogen generator to produce hydrogen for putting in a balloon, making the balloon fly.

While it was a success, the balloon filled with hydrogen and it flew, there were some issues which I talk about below in the analysis section.
How the hydrogen generating electrolyzer works
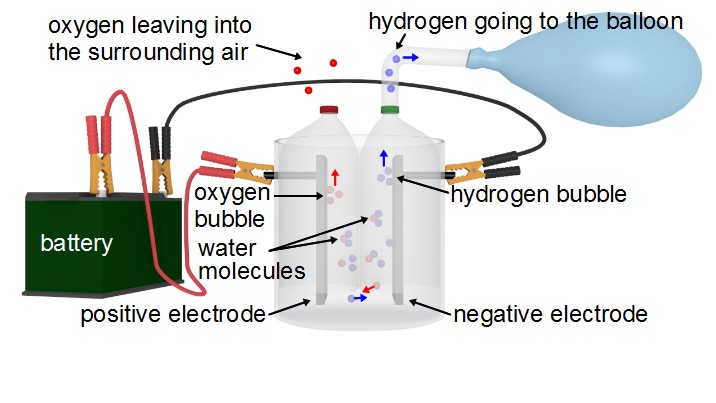
Water is made up of molecules of two hydrogen atoms (H) and one oxygen atom (O), H2O. The electrolyzer has electrodes in it made of metal plates. When DC electricity is applied to the electrodes they split apart the water molecule, separating the hydrogen from the oxygen. The oxygen is pulled to the positive electrode and the hydrogen is pulled to the negative electrode.
As more and more oxygen collects on one electrode and hydrogen on the other electrode, they form bubbles. These bubbles rise up and exit the electrolyzer.
This electrolyzer is designed to make the oxygen go into the surrounding air and to make the hydrogen go into a balloon. In that way it's a hydrogen generator.
Video - Making a Hydrogen Generator Electrolyzer for Balloon
The following video shows step-by-step how I made the electrolyzer, followed by it working to fill a balloon. It also explains what an electrolyzer is and how it works.
Note that while it worked great, there were some issues with it which are discussed below in the analysis section. In the future I wouldn't stack the plates since the inner plates have a minimal effect. I would have just one plate on each side, as shown in the above diagram of how it works.
Analysis
First of all, it worked. Yay! But there were some issues to do with the electrode plates.
Non-stainless steel plates
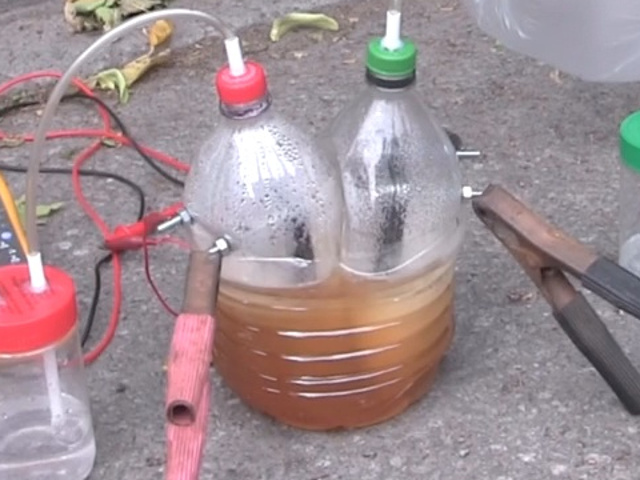
Look closely at the photos below and you'll see that near the start of the experiment, the fluid in the side producing oxygen was pink while the fluid on the side hydrogen producing was filled with clear bubbles as it should be. Near the end of the experiment, after around 20 minutes, the fluid in the whole electroyzer appeared rusty brown.
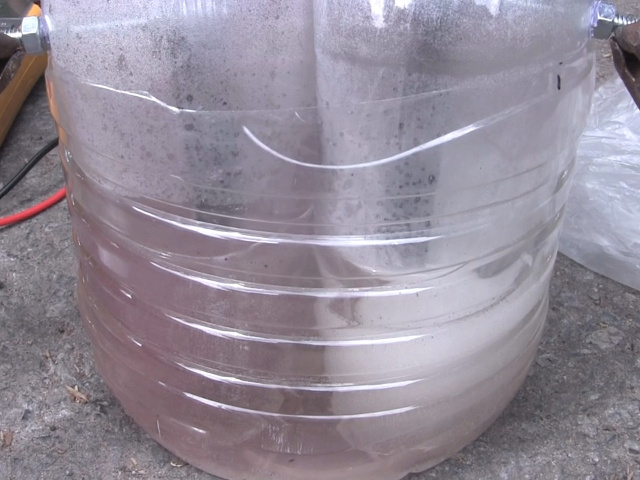
This is not supposed to happen with stainless steel plates, the fluid should remain clear or filled with clear bubbles. I've used plates with stainless steel in different electrolyzers in the past and did not have this problem after many hours of using the electrolyzers. That leads me to conclude that the plates I used this time either were not stainless steel afterall or were cheap ferritic stainless steel with a low amount of chromium.
This turned out to be a good thing from an experimental point-of-view since they allowed the analysis regarding the value of using stacked plates which I talk about next.
Stacked plates add minimal value
In the comments to my YouTube video, one commenter said that:
making electrodes from multiple parallel plates in configuration like that is not improving anything: there's no electric field between plates of same voltage to move ions.
What he's talking about is called a Faraday cage, an effect which causes a conductive enclosure to prevent electromagnetic fields from existing within it. Without that field, the water won't be split, the electrolysis won't take place inside the enclosure. In this case the enclosure is the area between the outer two plates where the three center plates are.
My initial response was that I felt the spacing was big enough that the Faraday cage effect would not take place, which is why I felt there was no problem doing it this way in the first place.
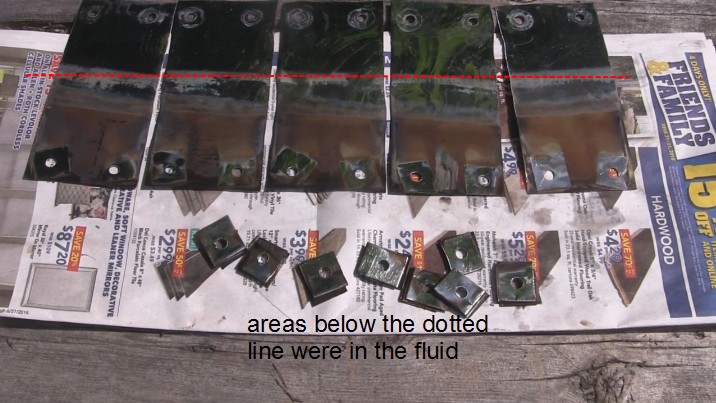
So I dismantled the electrodes. The photo shown here is of the oxygen plates. The areas of the plates which appear non-silver were the areas which were in the fluid.
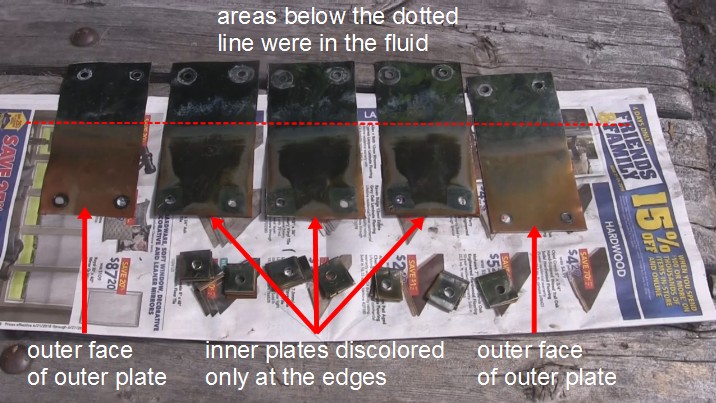
The two plates on the end are showing the two faces which were pointing outward. They are discolored evenly where they were in the fluid. The discoloration could not easily be rubbed off with a surgical-gloved finger or fingernail pressing hard.
The three plates in between are faces which were in between the outer two. They were inside the Faraday cage. Sure enough, only near the edges is there any discoloration.
This indicates that the commenter was right and that there's little added value in stacking plates like this. I certainly won't bother again in the future.
What about the plates on the hydrogen producing side? As these photos show, they were discolored too.
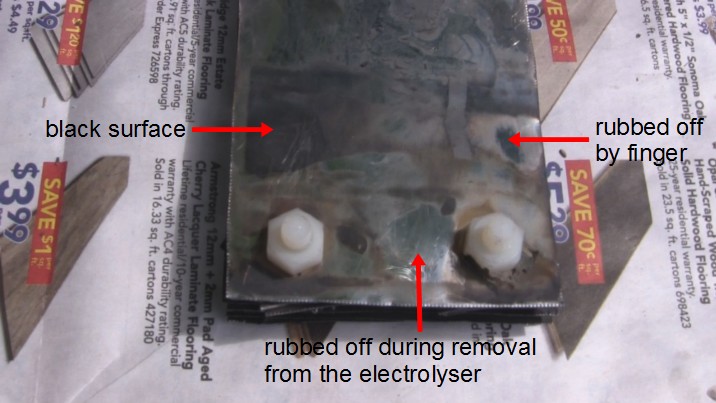
There appear to be two types of discoloration. The outer faces of the outer plates are black. The inner plates have black at the edges and are filled otherwise with rusty brown. It's possible that there's rusty brown everywhere but that it's not as apparent where there's black.
The rusty brown discoloration rubs off easily. The black is a little harder to rub off.
Note also that the entirety of the areas which were in the fluid are covered. That might lead you to think that the Faraday cafe effect did not take part here. But it's possible that the rusty brown came from the oxygen side of the electrolyzer as the electrolyzer gradually filled up with rusty brown fluid and is not corrosion on the hydrogen plates at all. That would also explain why it rubs off so easily.
