How to make electrolytic capacitors at home
Here's how I made an electrolytic capacitor starting with a simple low capacity one (stores a small amount of energy) and then moving on to a higher capacity one (stores more energy).
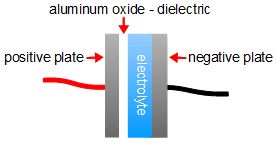
A homemade electrolytic capacitor is one where the dielectric is a very, very thin layer of aluminum oxide (see the diagram on the right.) In fact, even though the negative plate is labelled as the grey metal strip, the electrolyte is conductive and really counts as part of the negative plate too. Since the dielectric is very thin, the capacitance is relatively high, 60 to 500 microfarads. At least it's high compared to most homemade capacitors that use just paper, plastic or the sides of a jar as the dielectric, 600 picofarads. Comparing that more visually:
- 500 microfarads = 0.0005 farads for a homemade electrolytic capacitor
- 600 picofarads = 0.0000000006 farads a a normal homemade capacitor
Note that these are good for science projects and experimenting but are not very stable. If you let them sit for a while, the dielectric layer deforms and will reform when you next use it.
Making the electrolyte
The baking soda can be found in the baking goods section of any grocery/food store. The borax can be found in the laundry goods section of grocery stores in North America at least. The water must be distilled water. I haven't tried tap water but I know of someone who did and didn't succeed. When he switch to distilled water, it worked.
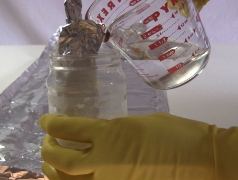
To mix the electrolyte, fill a container with distilled water. Put as much as you'll think you'll need for the capacitor, more if it helps to make it. Put one teaspoon of either the baking soda or the borax into the water. Stir until it disolves i.e. you see only water. Repeat a few times until it no longer disolves. Even that may be more than is needed. I put around 3 or 4 teaspoons for around 1 cup/250 ml of water.

Preparing the plates
I've made two different electrolytic capacitors. The first was a simple one just to test if it works and the second was a spiral shaped one with a higher capacitance.
Simple plates in a container
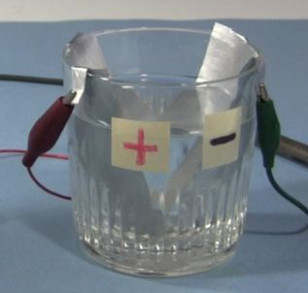
The one in the first photo above is the simplest and consists of just two aluminum plates in a glass filled with electrolyte. It's capacitance is around 60 microfarads. I've used both kitchen aluminum foil and aluminum foil from a soda can and both worked fine. The container can be made of anything.
Notice that I cut the aluminum such that a part is sticking out of the electrolyte for making electrical contact with. I've also labelled one as positive and one as negative since electrolytic capacitors are polarized, meaning they must always be connected the same way.
It's important to that there be nothing on the aluminum to start with. For the foil all you can do is take it straight off the roll, cut it and put it in the container with minimal handling. For the soda can aluminum you'll have to sand off all paint and also sand the other side since it also has a coating on it. Then clean it thoroughly with dish soap and very hot water and then rinse it thoroughly (I used tap water to rinse it.)
Spiral electrolytic capacitor plates
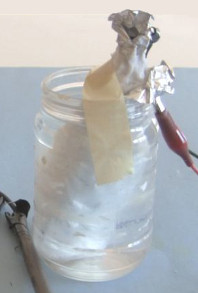
The one in the second photo above is made of long strips of aluminum for the plates that have been rolled into a spiral so that it doesn't take up so much table space. It's capacitance is around 500 microfarads.
The diagram below shows how the layers are arranged.
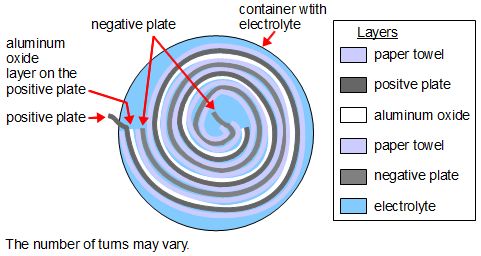
The paper towel is used to keep the positive and negative aluminum foil plates separate, but still allow electricity to pass through it since it's soaked in electrolyte. Remember, the aluminum oxide is the insulating dielectric; everything else is a conductor.
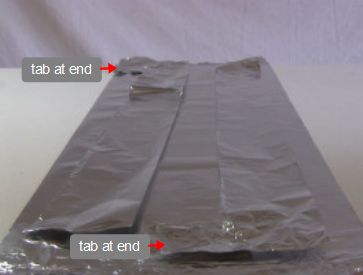
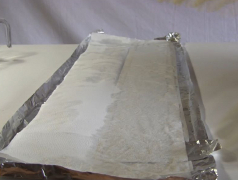
Below are some construction photos. The first step was to cut two long L-shaped pieces of aluminum foil. The first photo shows these two pieces laid out on top of a full sheet of aluminum foil. Notice the ends of the L's, referred to as tabs in the photo.
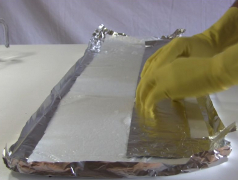
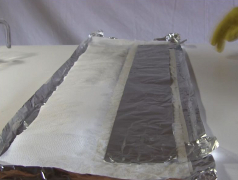
Next, as you can see in the 1st photo below, a sheet of paper towel was laid on the aluminum foil sheet and electrolyte was poured on it so that it was soaked in electrolyte. Then one of the L-shaped pieces of aluminum foil was laid on one side of the soaked paper towel.
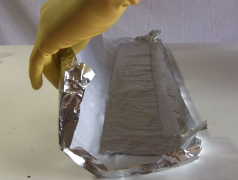
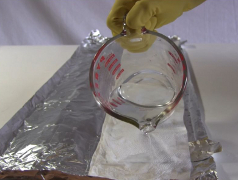
In the 2nd and 3rd photos you can see how I folded the other side of the soaked paper towel onto the aluminum foil piece.
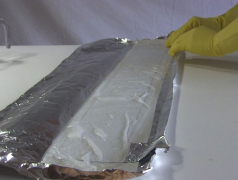
In the 1st photo below you can see another sheet of paper towel was then laid on top, followed by the other aluminum piece in the 2nd photo. The 3rd photo shows how the paper towel was then folded over the aluminum pieces and also soaked with electrolyte.
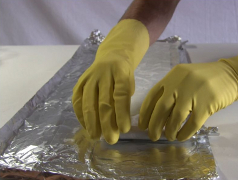
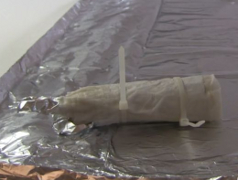
Finally, as shown below, it was all rolled up and held with tie straps. It was then put in a container and electrolyte was poured in to make up for any that might evaporate away. Done!
Forming the aluminum oxide layer
The last step is called "forming" and is where the aluminum oxide layer is formed on the positive plate. It consists of connecting the capacitor to a power source and applying a voltage that is higher than the voltage you'll be using that capacitor at. Since it is an electrolytic capacitor, it is polarized. One plate is always the positive and the other is always the negative. The polarity you used during forming is the polarity you'll use when the capacitor is in a circuit.
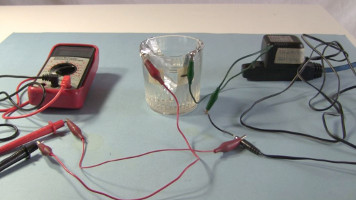
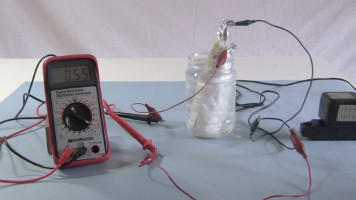
In the photos below I'm using a 9 volt DC adapter for the forming. The meter is on the amp scale. When the forming begins, the current is high but it immediately starts to drop. At first the current drops quickly but its dropping gradually slows. When the current has dropped quite low and is no longer changing much, stop the forming. Your capacitor is ready.
Demonstations
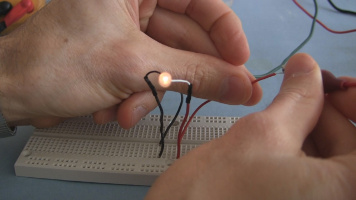
And here are some demonstration photos of them in use.
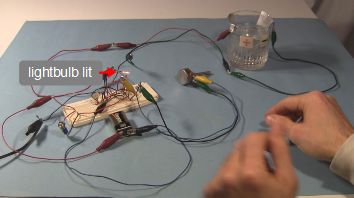
Video - How to Make Electrolytic Capacitors
Video going step-by-step through how to make the simple electrolytic capacitor, along with a demonstration of it in a circuit that makes a light blink on and off.
Video - How to Make a High Capacitance Electrolytic Capacitor
Video going step-by-step through how to make the spiral electrolytic capacitor, along with a few demonstrations of charging it and then discharging it through various loads.
