The following details a technique for creating the plates for the electric rocket device. It involves making the equivalent of a cookie cutter but for tin (or when I used it, aluminum) foil.
WARNING - WARNING - The plates created with this technique have points on their edges. This is because the blade used is a serrated one. At high voltage, these points would be where the charge goes instead of spreading out on the surface. This may or may not have a detrimental effect on the result. I'm not sure that a non-serrated blade would work with this technique. It is also possible that if the device works at lower voltages this may not be an issue. However, the report of this device does say that rounding the corners on the plate gives better results. So this technique, unless you can figure out a way to do it with a non-serrated blade or an efficient way of removing the points afterwards, may be a bad way to go.
A solution! The nice thing about the internet is that if you let your problem be known, out of all the world, someone is bound to come up with a solution, or at least a probable one. In this case it is a non-serrated blade that can be bent into the proper shape. I Just received the following email:
I checked out your updated website. One thing that I tried, that I copied from someone else's email was to make the cookie cutter using women's razor blades. These blades are single flexible blades. When placed into the pattern of the electrode and pushed again the foil, voila! Instant pattern. I tried it by using art board. I foolishly made the mistake of using 2 sets of razor blades. Anyway, now that I saw your website, I think I'll use balsa wood with the single set of razor blades. It's just a suggestion.
David Rosignoli
How to build the cookie cutter
I incorrectly used aluminum foil and I am not certain if this cutting technique will work with tin foil. It all depends on how thin it is and how hard it is to cut. The cookie cutter is made of two separate parts. One part has the serrated blade for cutting and the other has holes to admit the serrated blade.
|
| ||
|
|
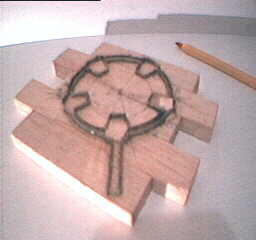
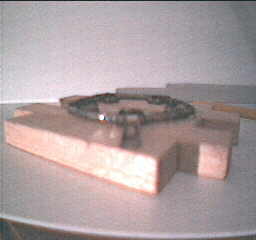
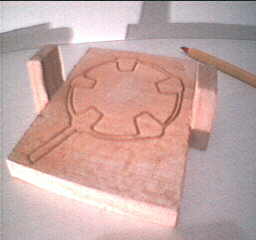
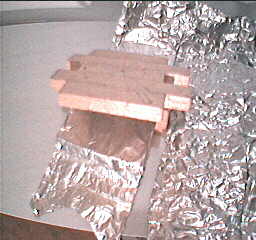
Note that if you look carefully you can see that the bladed part is a mirror image of the hole part. In fact, you can think of the blade part as the positive and the hole part as the negative. When in use, the hole part sits flat on the table with a sheet of foil sitting on it. The blade part is the brought down, blade side downwards, onto the foil.
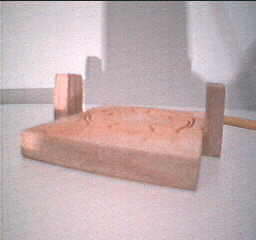
Note that the hole part has risers (the vertical pieces of balsa) on either side. These act as guides to guide the blade part down straight into the hole part. Note that the blade part has extra lengths of balsa sticking out on either side to contribute to this guided placement.
The blade part is made of balsa wood. The actual blade is made up of many short segments of the serrated blade that comes attached to aluminum foil boxes that you buy in grocery stores. I used many short segments instead of one (or a few) long one(s) because it was easier to build. Each segment was only about 2 cm long. To attach the blades to the balsa wood I first got a brand new sharp xacto blade for my xacto knife. Trust me. A lot of headache will be saved if you have a very good cutting knife. Trace out the shape of your foil plate onto the balsa wood using a pencil. Then use the xacto knife to cut a shallow hole in the blasa following your tracing. It will look much like the hole part in the picture above but the grooves will not be as wide. Make them just wide enough to hold the serrated blade snuggly.
One by one, cut a segment of serrated blade for the cookie cutter and shape it to fit into some part of the hole that you'd cut into the balsa wood. Put a bit of wood glue onto the blunt part of the blade segment and push it into the hole such that the serrated part points up. Keep adding segments until you have a complete cookie cutter. Note that you actually end up with two complete serrated blades. One on the inside and one on the outside.
For the hole part of the cookie cutter get another piece of balsa wood. Take your completed blade part and push it down onto the surface of the hole part. Just push it down enough to make a visible indentation. Then take your sharp xacto knife and cut out this indentation. Note that you will actually have to cut a groove about 1 mm wide and deep enough to admit the blade of the bladed part when cutting a foil a plate.
|
| ||
|
|
Tips to making dies from the AccuCut roller cutting tool
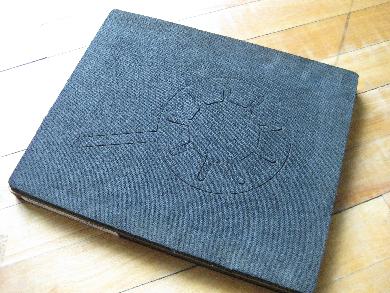
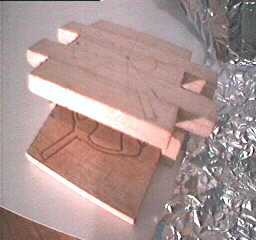
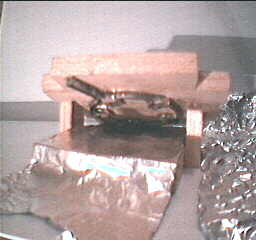
For my electric rocket Mark 3 verison I went with a roller type cutting machine from AccuCut along with some custom dies that they made for me. One of the dies is shown in the photos below. The AccuCut process works similarly to my cookie cutter approach above except that instead of pressing a bladed die downwards into a negative, they run the bladed die against a roller with the material to be cut between the die and the roller as in the following video.
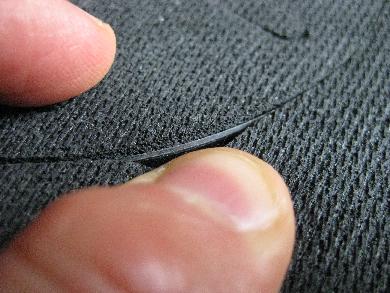
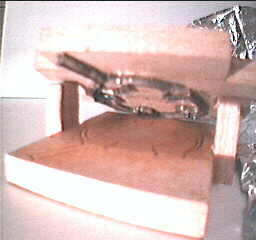
The main reason I mention this here is to show you that their blade does not stick out from the die as mine does. Instead the cutting edge of the blade is about 1mm down below the top surface of the foam, as you can see in the photo below on the right of one of my custom dies. This seems a useful thing to do since the foam would help to hold the material in place before the cutting blade even encounters the material.
|
|