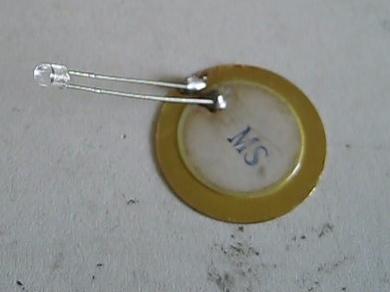
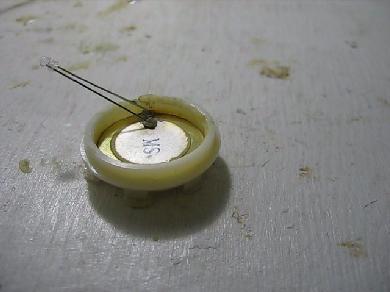
Piezoelectric crystal disk from gift card
Piezoelectric disks can be found in the speakers in some musical gift cards (see below for how to check at the store if the card has the right type of speaker without damaging the card.) Here's an example of one I extracted and tested by attaching a diode and letting water droplets fall on it. There seem to be a variety of speaker cases but this should give you some idea of what to expect.

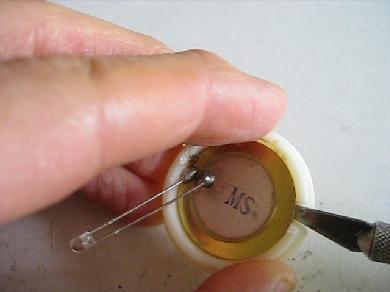
diode soldered on.
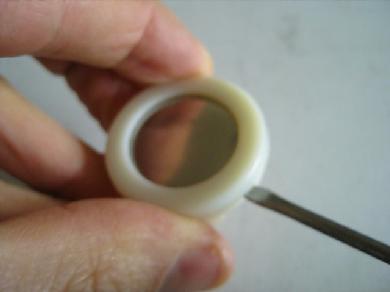
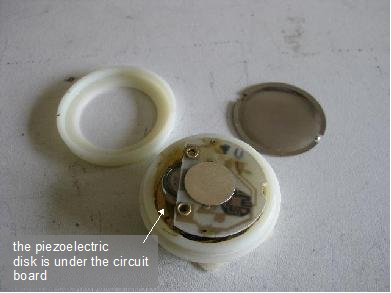
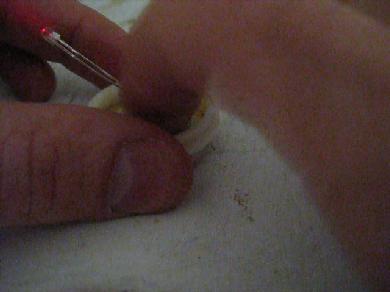
Step 1. Use a screw driver and/or knife to pry the speaker case apart. Then remove the metal plate and lift the circuit board (they may be wedged in tight) so you can get at the piezoelectric disk underneath.

Step 2. Desolder the wires from the circuit board. I desoldered them at the piezoelectric disk itself but if you don't want to take a chance on ruining the disk you can desolder where they connect to the circuit board instead or just cut them.
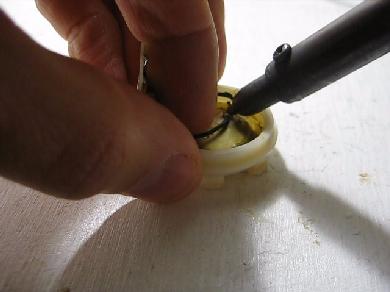
Step 3. Select a diode and solder it in place. Before this step I knew nothing about LEDs (Light Emitting Diodes) but the fellows at the electronics shop explained to me that the first value on the packet labels below, 125 mcd and 1,400 mcd, is the brightness of the diode in millicandelas (thousandths of a candela.) From testing by connecting my piezoelectric disk to my oscilloscope I saw that the voltage I got when tapping hard on the disk was in the 2 to 9 volt range. Nothing on the diode packages told me if the voltage value was the minimum required or a maximum. If it was a maximum then I figured I'd be okay since the disk gives it sharp, short duration spikes. Since the diodes on the right were the brightest, 1,400 mcd, I went with them.


Note that at one point after I'd attached the diode I was messing with it and pulled off the leg attached to the whitish crystal material. That included pulling off all the solder below it, exposing a yellowish material. Luckily I was able to just put the leg and bit of solder back over the yellowish material and press with my soldering iron and it worked again.
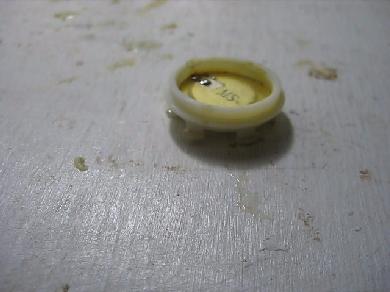
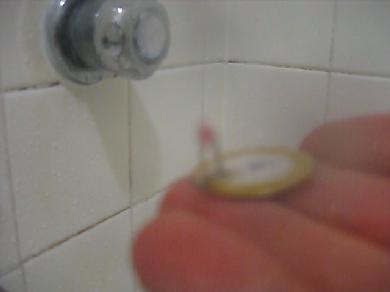
Step 4. Test it by tapping with the fleshy part of your finger or banging on it hard with the blunt end of a pen or something. It can take quite a bang. You can see in the photo below that the diode lights up. Note that the light from the diode is largely unidirectional.
Another test I did was to hold it under the shower while the shower was just putting out drops of water. I couldn't just hold it under the sink's tap because the water drops had to fall a long distance to build up momentum in order to have enough effect to light the diode. It does work.
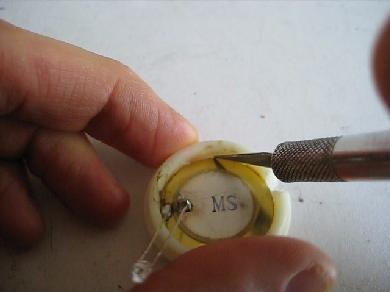
Step 5. Remove the disk from the base of the speaker case. This is done easily by scraping around the edge of the disk with a sharp tipped knife. It's only glued in place around the circumference. Then cut a hole in the side of the wall of the case down to the level of the disk so that you can slip the sharp tip of the knife under the disk to gently wedge it up.
How to check the type of speaker in a gift card
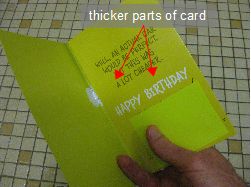
Gift cards either have electromagnetic speakers or piezoelectric crystal speakers. The speaker is usually glued in between layers of cardboard in the card but you'd have to damage the card to see it. It should be fairly easy to tell from the thickness of the card where the speaker might be. There may also be a separate circuit board resulting in multiple thick areas. See the photos below. The electromagnetic speaker is of no use for piezoelectric experiments but how do you tell which type it is without damaging the card?
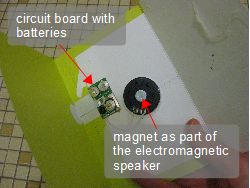
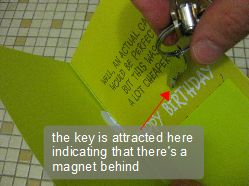
The electromagnetic speaker has a magnet as part of it. It's a little difficult and may not work but if you bring something metal that's attracted to magnets. Some keys are for example but test with a magnet ahead of time since some keys are not. Then open the card and look for where the card is thickest. Hold the metal object loosely by one end and touch the other end to various spots where the card is thickest (see third photo below.) Do it on both sides of the cardboard. If the metal object is attracted to and tries to stick to the cardboard then it's because it's being attracted to the magnet. That means it's an electromagnetic speaker and of no use for piezoelectric experiments. If it's not attracted then it may or may not be an electromagnetic speaker, since it can still be difficult to tell, but at least with this method, if it is attracted you know not to get that one.