Enclosed solar panel made out of transistors
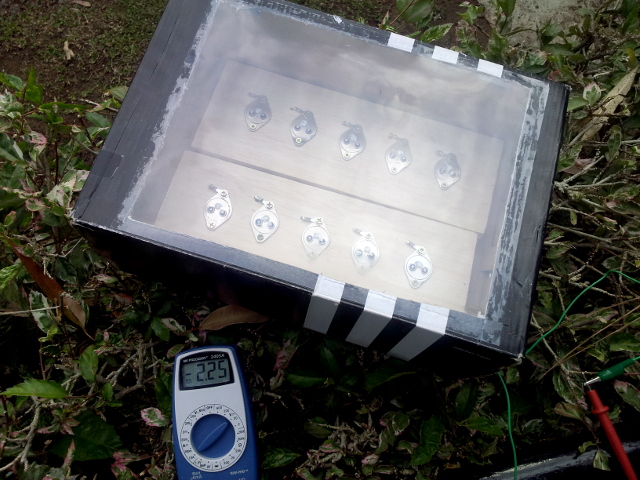
This is a DIY solar panel made using 10 2N3055 power transistors
for the solar cells. It was made by a group for a school physics
project and submitted to rimstarorg by Edson Godoy
( ).
What's different from
the small calculator transistor solar panel here is that
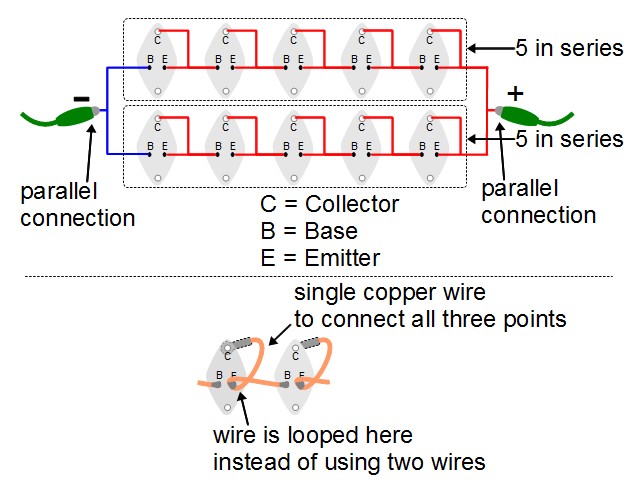
they used two series strings of 5 connected in parallel in order
to get more current and that it's enclosed in a box with glazing
to prevent any dust or any small particles to get inside the photovoltaic
cells.
Full credit for the project is as follows - cede: ULATINA - HEREDIA - III CUATRIMESTRE del 2012. curso: FL-220: Laboratorio de fisica general II grupo: 5286 profesor: ARMANDO NEVARES.

The cover we used was simply a plastic cover sheet used on reports, manuals, etc. Which was glued together on top of the shoebox using some standard glue stick. It was needed only to prevent any dust or any small particles to get inside the photovoltaic cell.
We connected the (+) Collector with the (+) Emitter to the (-) Base... the two positive leads went into the negative lead which amplified the signal a slight bit (see diagram below). Therefore allowing the 5 transistors in series to produce a voltage of around 2 volts with direct sunlight... Of course when two of these series rows were connected in parallel, the voltage stayed the same, but the current increased.
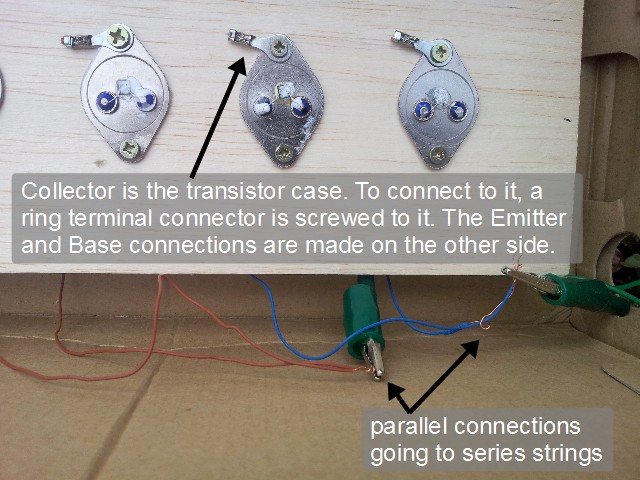
To help ensure a good connection, a single copper wire was used between adjacent transistors (see diagram below). This was done by having the wire go from the collector to the emitter and then looping it and continuing on to the base of the next cell. This also made soldering to the emitter easier since only one wire had to be soldered to it instead of two separate wires.

The original intent was to mount the transistors onto some sort of heat sink material using heat sink mounting kits. However, after going all over town to try and find the connections for the transistors, it appears that they had no clue of what we were talking about.
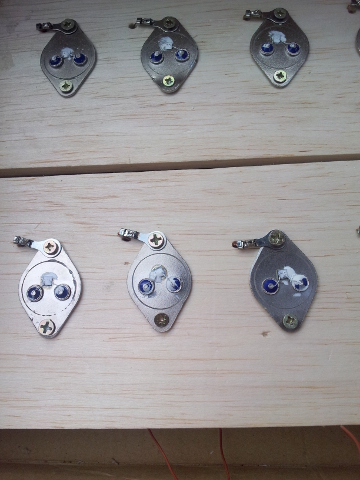
So, the alternative was using a block of balsa wood to finish the project; worked out pretty well (see photos below.) The balsa block We purchased had a thickness of 8mm (1/3") just enough for the ends of the transistors to stick out from the bottom and have them soldered together with some copper wiring.


It took about 5 hours to complete after opening up the transistors, creating the holes on the wood block, soldering the terminals, cutting the block and cutting open the show box, and testing it with a multimeter. For all that effort we got an A on our project even though the photovoltaic cell produced only 3.10 volts (AT ONE POINT!)
Besides mounting the whole photovoltaic cell, the hardest thing was finding all the materials needed to assemble it. The most expensive items were the transistors themselves; we had to replace three of them since the wires inside the transistors were extremely thin and delicate.
|
Do you have a project you'd like to share on rimstar.org too? You're more than welcome to. Click here for details. |
|

