Electrostatic/smoke precipitator - a simple one
A smoke precipitator, or an electrostatic precipitator, is a device which removes smoke or other particles from the air using high voltage electrostatics. Below you can see my simple one along with a diagram of how it works.
Note that as I show measuring in one of the videos below, a smoke precipitator of this design and rough dimensions needs around 21,000 volts to work. In that same video, I demonstrate powering it with a Wimshurst machine so the electrical current required isn't very large.
At the high voltages required, this produces ozone which in large quantities is hazardous to your health. Use in a well ventilated area. There is some voltage below 10,000 volts which doesn't produce ozone but I've never been able to find out what it is.
How the smoke/electrostatic precipitator works
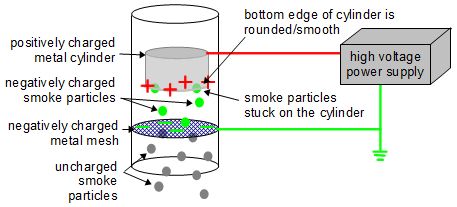
In the above diagram, the metal mesh is charged with a negative charge and the metal cylinder is charged with a positive charge.
Uncharged smoke rises up the tube. As it passes through the metal mesh, smoke particles pick up a negative electron from the mesh causing them to become negatively charged.
Unlike charges attract each other so the now negatively charged smoke particles are attracted to the positively charged cylinder and when they get there they stay there. The remaining uncharged air continues up through the tube.
The bottom edge of the cylinder is deliberately rounded/smooth. This is to avoid creating positive ions in the air and deionizing the smoke particles before they get to the cylinder. With a rounded/smooth bottom edge, the electric field there is not so strong as to do ionization.
How to make a smoke/electrostatic precipitator
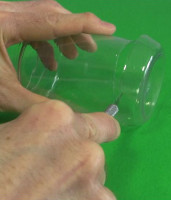
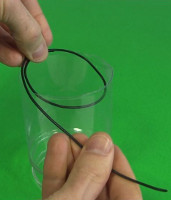
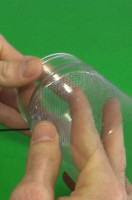
As shown below, start with a plastic jar that has fairly straight sides. Cut the bottom off the jar. Then cut a piece of wire that you can make a loop out of that fits in the jar but still with a length outside the jar. Strip the loop part of the wire and solder it so that the loop is closed. Simply twisting the wire tightly will also hold the loop closed if you don't have soldering facilities.
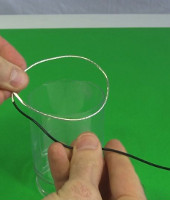
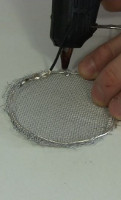
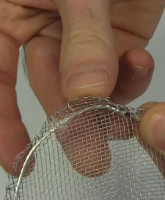
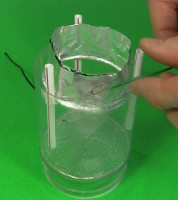
Next, as shown below, get a piece of metal flyscreen that has no coating on it and cut a circle that's the size of the loop you just made. This is the metal mesh. Make it a little larger than the loop in places. Hot glue the mesh to the loop. Then bend any overlapping mesh tightly over the loop's stripped wire to make good electrical contact. Make a hole in the side of the jar near the top end for the wire to feed through (the jar is upside down in the photo below.) Finally, put the loop and mesh inside the jar and feed the wire through the hole from the inside. The mesh should sit inside the jar near the top.

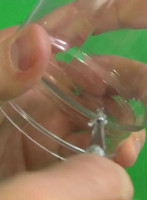
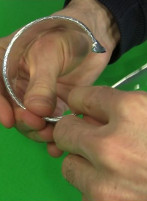
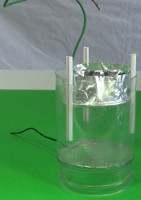
As shown below, hot glue three straws to the inside of the jar. These will act as supports for the metal cylinder which you'll make next. Get a piece of wire that is thick, either because the metal of the wire itself is thick or because the insulation is thick. This will act as filler to make the bottom of the cylinder rounded and smooth. As shown below in the 2nd photo, bend it into a circle that fits snuggly in between the straw supports.
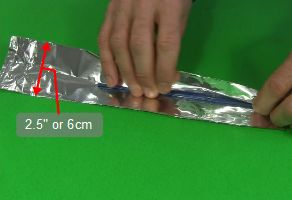
Then cut a piece of kitchen aluminum foil around 2.5 inches or 6cm wide and longer than the wire you just prepared. Straighten out the wire and fold it into the foil near one end. Fold the foil over with the wire at the fold. As in the 4th photo below you can see the foil folded around the wire has made a nice smooth, rounded edge. Form the whole thing into a cylinder.

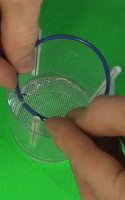
As shown below, tape the cylinder closed. Then tape a wire to the side of the cylinder. Lower it into the jar between the straws. Done!

Testing the electrostatic/smoke precipitator
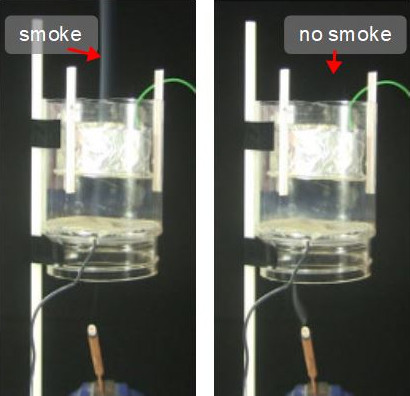
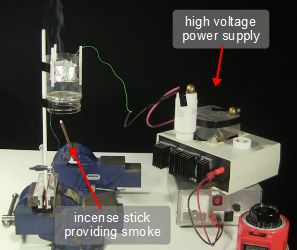
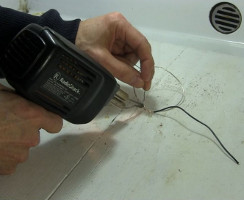
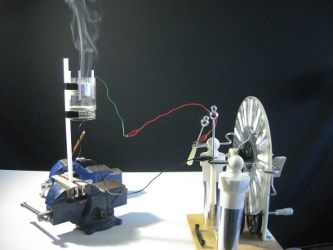
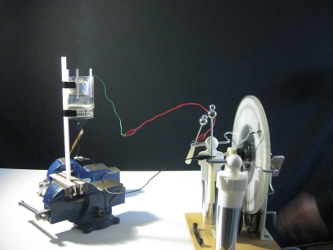
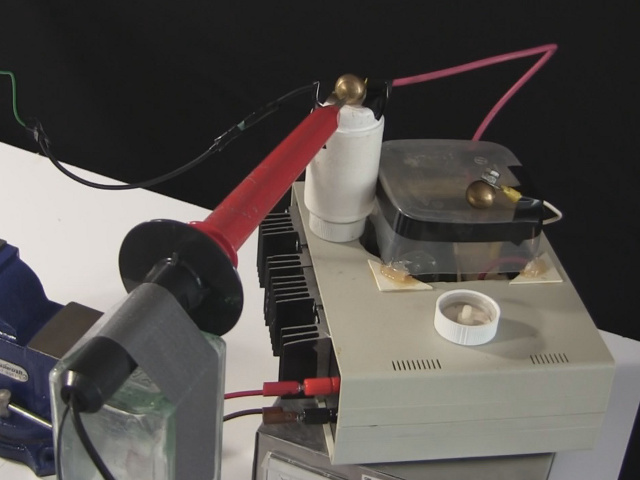
You'll need a high voltage power supply. I've had success with both my homemade 30kV DC power supply and my 27cm disks Wimshurst machine as shown below, both of which put out high voltage DC. The 30kV one has more current available for ionization of the smoke particles and collected more smoke on the cylinder than with the Wimshurst machine, but as you can see below, the Wimshurst machine did collect most of the smoke. This shows that you don't need a high current power supply to make this work. A Wimshurst machine is very low current.
The distance between the bottom of the cylinder and the mesh can be adjusted. The smaller the distance, the lower the voltage that's needed. Also, make the distance bigger or smaller as needed to minimize smoke coming out the top. But make sure you turn off and discharge your power supply before making any adjustments so that you don't shock yourself. If sparking is occurring between the cylinder and the mesh then increase the distance until there's no sparking.
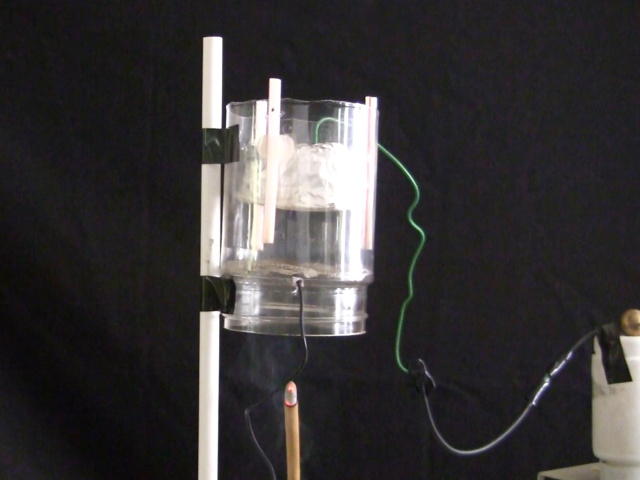
In the photos below you can see an incense stick being used to produce the smoke.
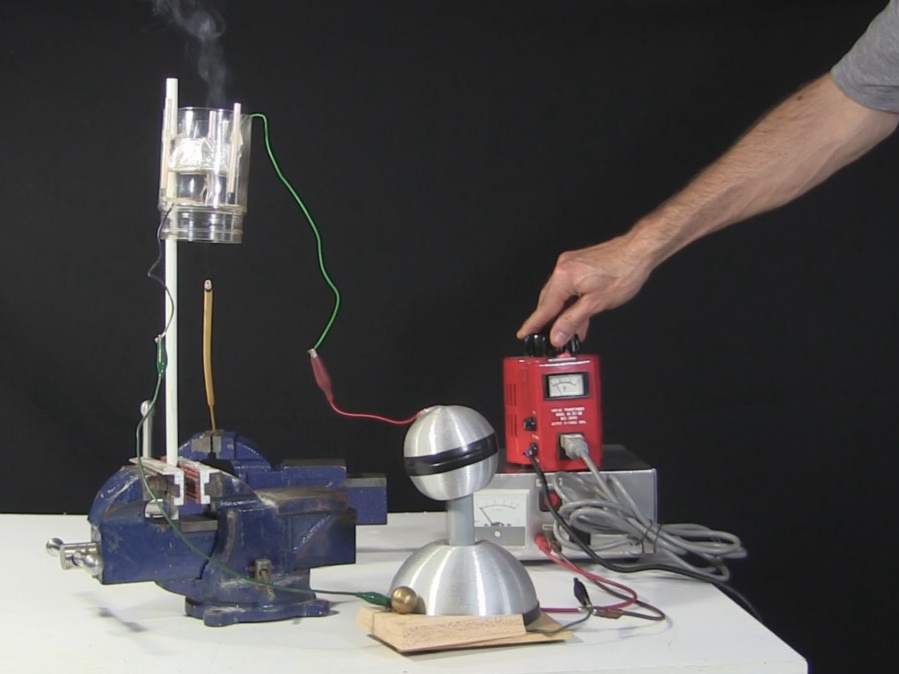
I also tried with my Cube high voltage power supply, which puts out pulsed DC at around 20,000 volts, and my small commercially made Van de Graaff generator but all they did was make the smoke turbulent.
Video - Electrostatic Precipitator/Smoke Precipitator - How it Works/How to Make
Below is my video showing step-by-step making the above electrostatic precipitator along with setup and testing. I show it with smoke produced by an incense stick, a candle and matches that've just been blown out.
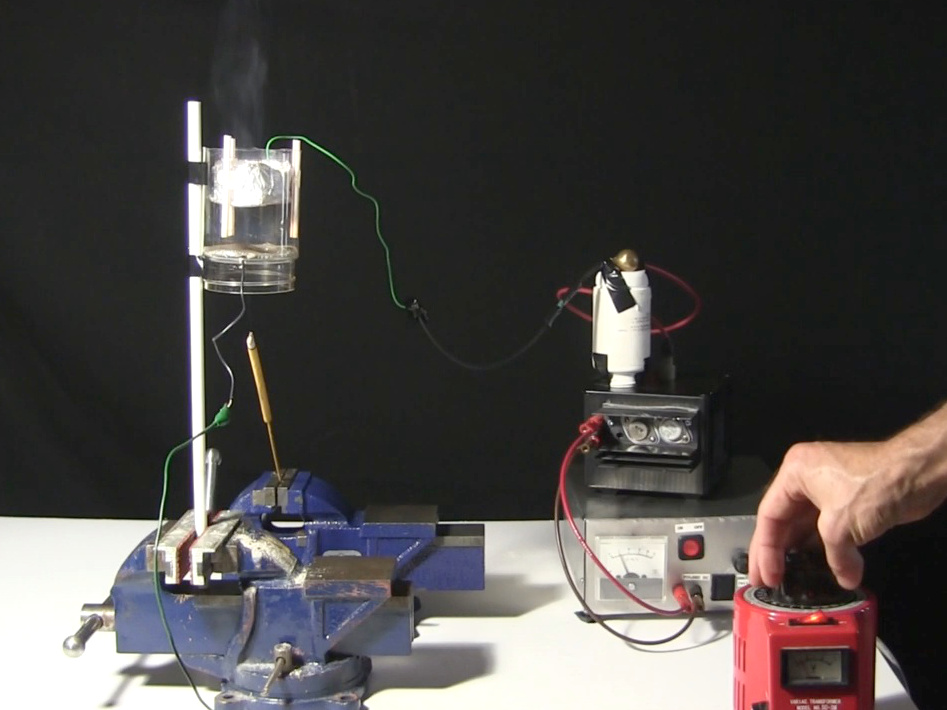
Measuring the voltage required
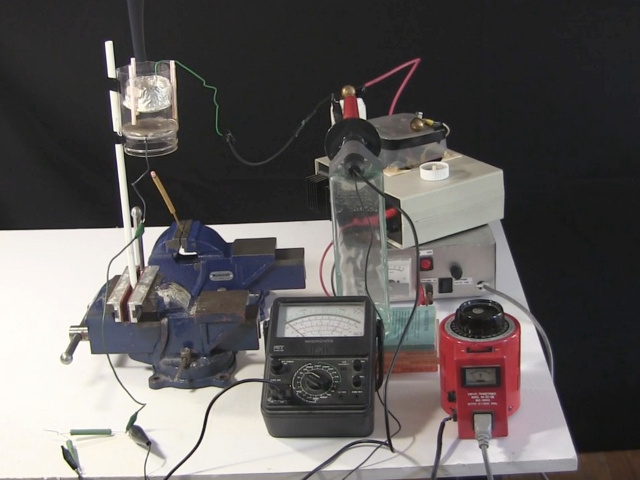
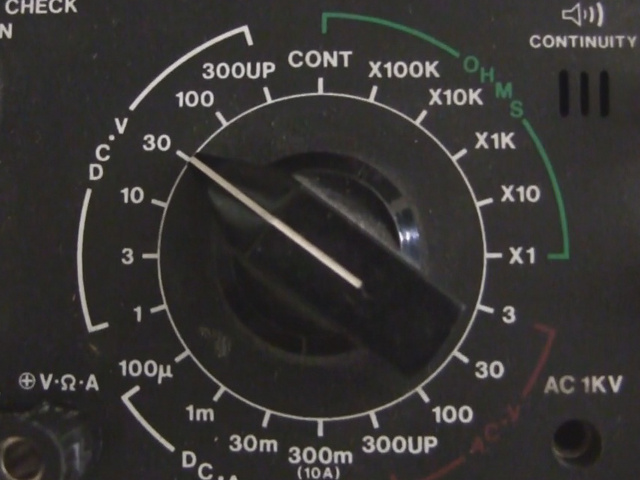
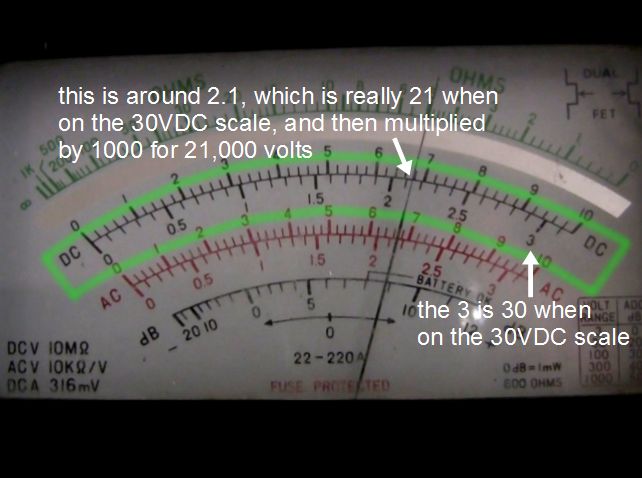
I used the setup below to measure the voltage required. The distance between the mesh and cylinder is 27mm/inch. At smaller distances I got too much sparking. I used my 30kV DC high voltage power supply. The high voltage probe is my Fluke 80K-40 probe. The meter dial is set to the 30 VDC scale which means I read the 3 VDC scale on the readout which is really 30 VDC. The needle points to around 2.1, which is 21, and then multiplied by 1000 due to the probe to get 21,000 volts.
Note that this voltage required is specific to the particular geometry of the mesh and the cylinder. Different shaped parts will require a different voltage (e.g. smaller diameter wires on the mesh with greater spacing would ionize air more easily are require lower voltages.)
Video - Smoke Precipitator - Measuring Voltage & Demos
Ever since I released my first video above I got lots of questions asking what voltage was needed and what can power it, so I finally made the voltage measurements you see above and in this video. I also tried out a few more power supplies, also shown above and in this video.
