Izzy - Artificial Intelligence robot
Izzy is a robot testbed for experimenting with artificial intelligence, machine learning and simulating the human brain.
So far it's gone through a few different iterations and experiments.
- Object recognizer in a box (May 2017)
- One eyeball, emulating the human eye for fixating on changes in the field of vision (Aug 2018)
- Two-eyed robot (Dec 2019)
- Object recognition (Yolo 3 and darknet) and fixation (May 2022)
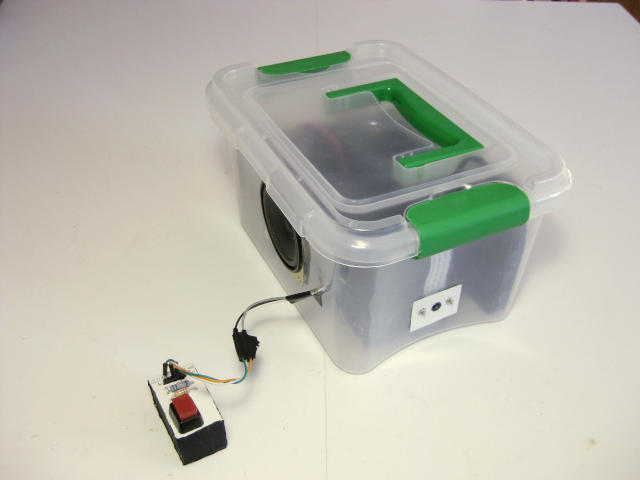
Object recognizer in a box (May 2017)
My first experiment involved putting a Raspberry Pi 3B in a box with a Pi Camera, a speaker and amplifier, a switch, and a battery. I called it Obbi. The user would point the camera at an object and press the switch. Obbi would then say, "I am thinking about what you showed me." and then it would spend around 10 seconds (this was 2017!) running the image through Google's Inception neural network on the Raspberry Pi. It would then say, "I think you showed me a ..." and would say what it recognized. You can see and hear it in action in this article I wrote about it for Hackaday.com.

One eyeball, emulating the human eye for fixating on changes in the field of vision (Aug 2018)
Izzy needed eyes. I started with one first. Since I wanted to emulate a human being, I made it the size of a human eyeball, around 1 inch in diameter. Two servo motors make it move, one rotating it horizontally and one vertically. I designed it using Blender, 3D modelling and animation software, and printed it on my 3D printer. At this time, I used a Pi Camera connected to a Raspberry Pi 3B.
The software I wrote emulated how we automatically look when something changes in our field of vision, like an unexpected movement of a leaf for example. The algorithm was based on some of what happens in the neurons in the retina at the back of the human eye. It did this by taking two photos, then looking for the area where there was the biggest change between the two photos. It would then move the eye to center on that area.
The following is a video all about the making of this Pi Camera eyeball.
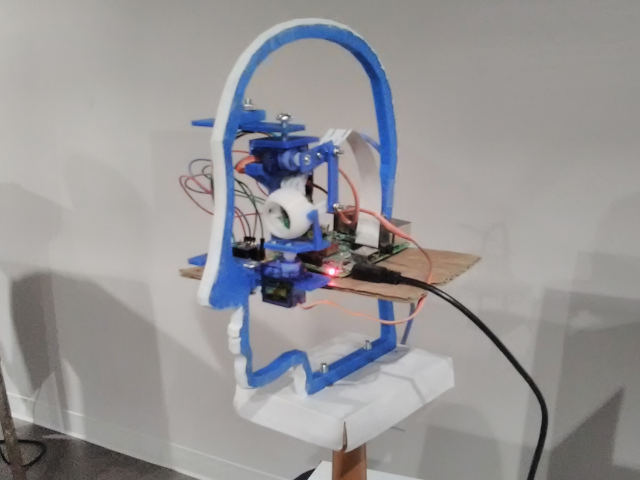
Two-eyed robot (Dec 2019)
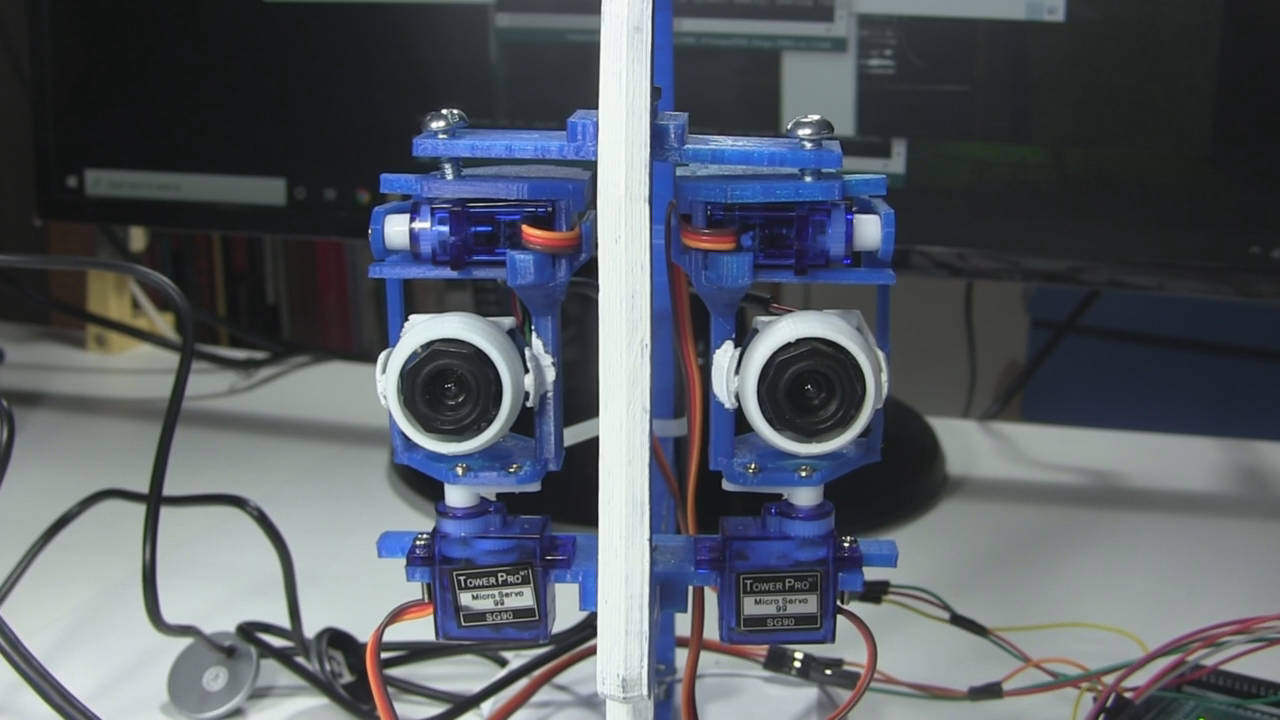
The next step was to make improvements to the eye structure and print a second one so that I could have two eyes. The improvements were:
- to make it more compact to one day better fit inside a human head structure,
- to make more of its parts 3D printable,
- to switch from the Pi Camera to webcams that use USB so that I could use it with a wide selection of hardware.
The following video details the changes I made and shows more about how it's made as well as some testing.
If you want to 3D-print your own then the files can be found here on Thingiverse.com.
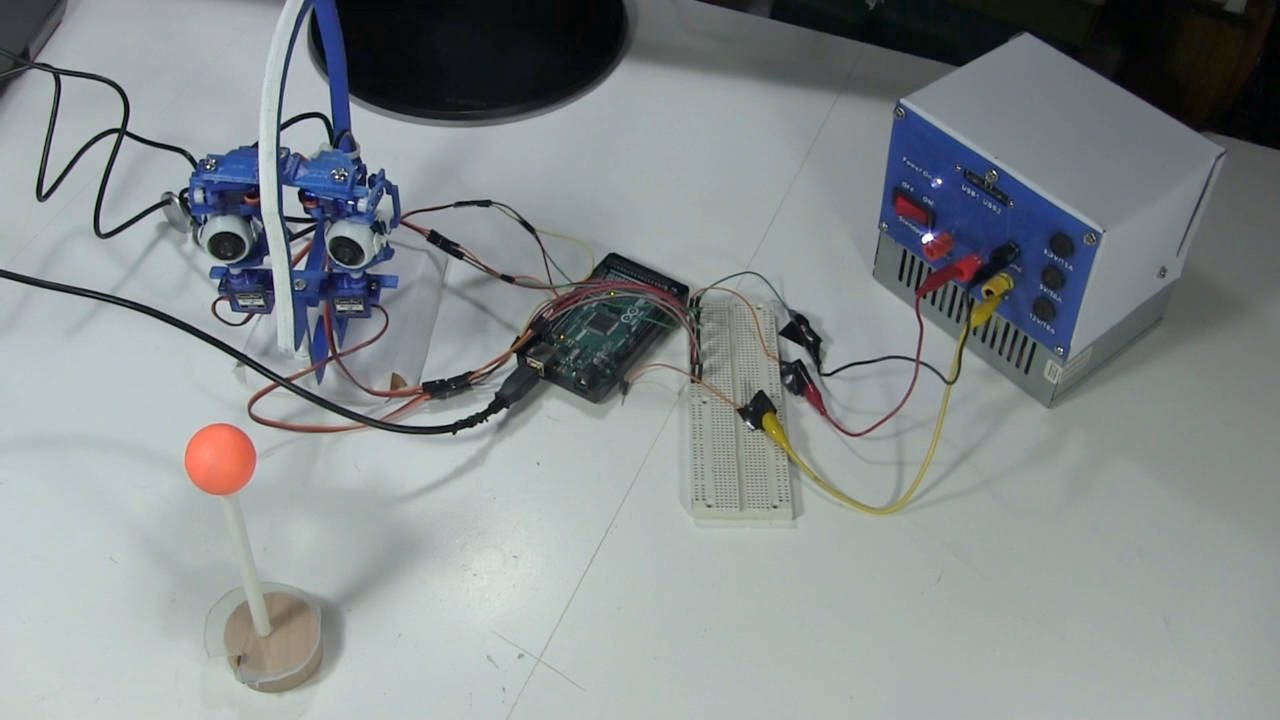
Object recognition (Yolo 3 and darknet) and fixation (May 2022)
The next step was to do something with the two eyes, in this case to make Izzy able to recognize objects that both eyes see and then move the eyes to both fixate on an object.
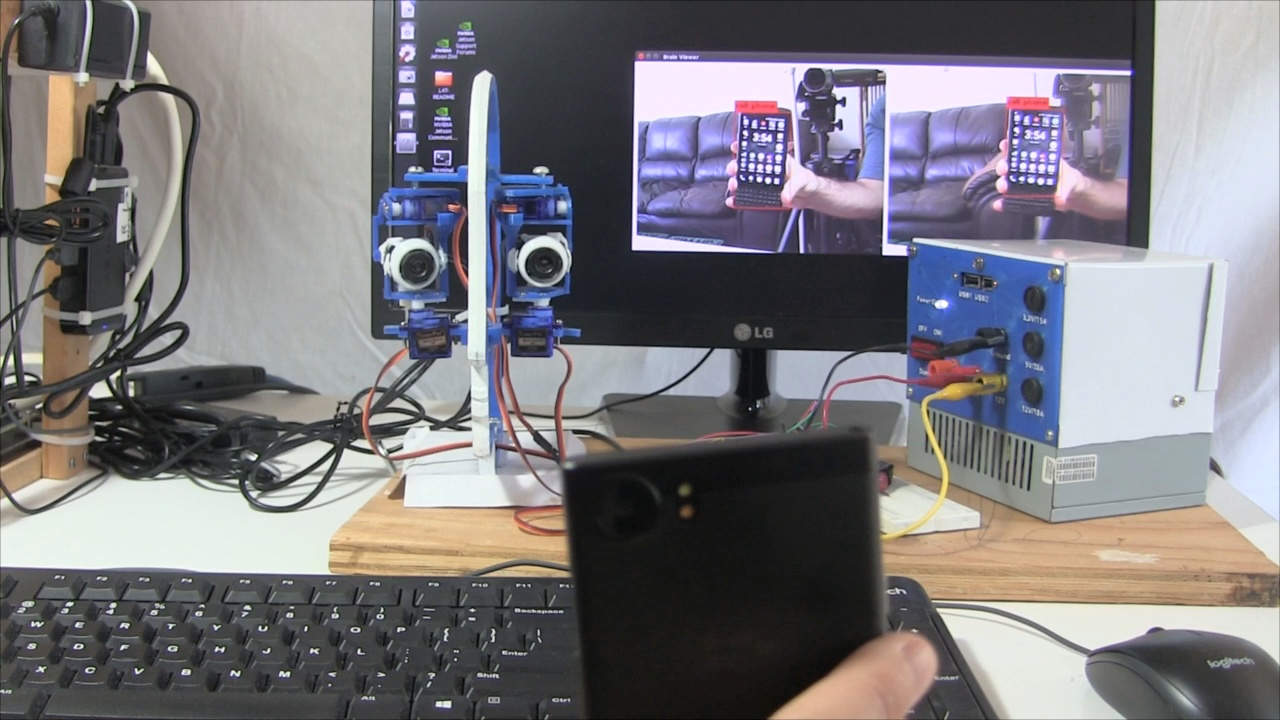
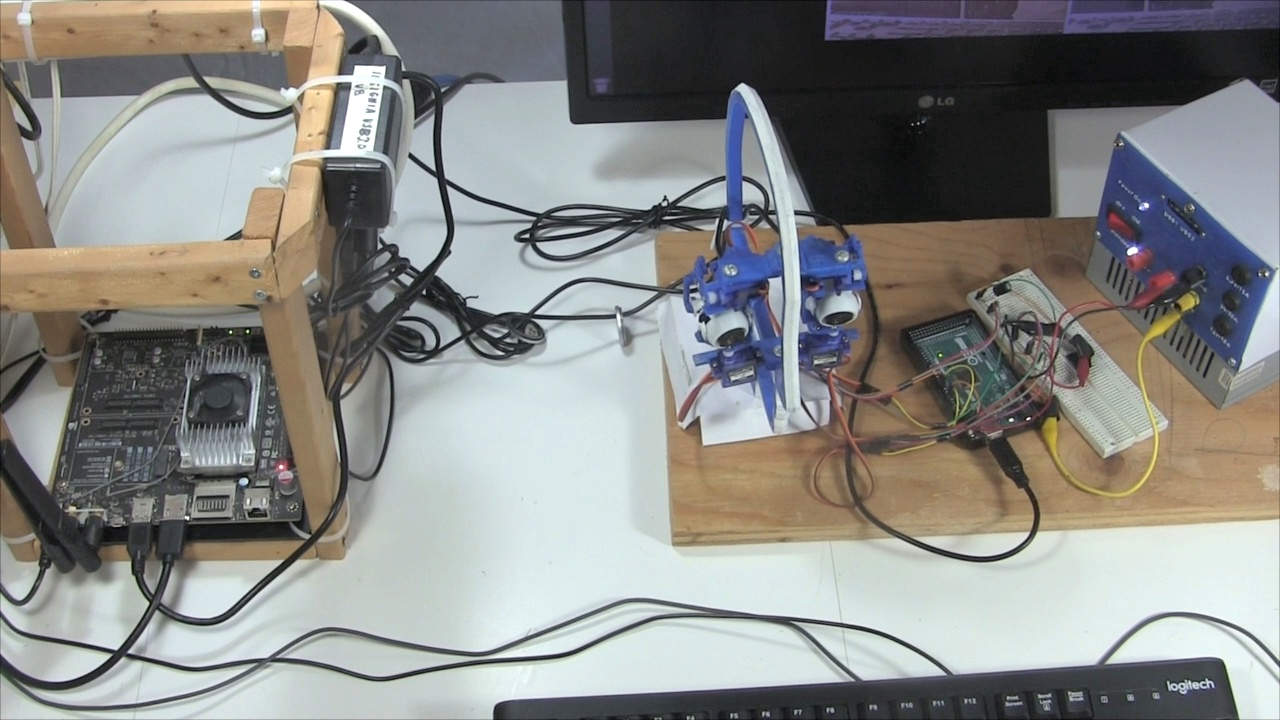
Below, you can see the setup. I had an old NVIDIA Jetson TX1 board, a board with an ARM chip and NVIDIA GPU on it, running Ubuntu, a Linux distribution. The servo motors for the eye's cameras are controlled by an Arduino Mega 2560 which the Jetson TX1 talks to over serial over USB. The Arduino and the motors are powered by my homemade ATX/PC power supply. the
The following video shows a demonstration of Izzy in action recognizing, fixating on and following a phone. It also gives an introduction to the setup and software.
The following video shows some additional enhancements I made to Izzy's software. Previously, Izzy had only the object labels and probabilities that the object recognizer gave it in order to select objects to look at. However, if both eyes saw 2 "person"s in their respective images, then the eyes would both look at the "person" that the object recognizer said had the highest probability of being a person. The problem was that the "person" with the highest propbability might be different for each eye and the eyes would then fixate on different ones.
The solution was to add further criteria for selecting an object. For this next version, I made it reject a pair of objects if they were different in size by at least 50% and I also looked at the colors in the objects to pick the ones that matched best.
The software is all written in C. For getting the video from the webcams, I use Video for Linux 2 (V4L2). The object recognition is done using the Yolo 3 neural network being processed by darknet, a neural network framework. I tried more modern versions of neural networks but Yolo 3 was the most modern that worked with my Jetson TX1. I also wrote a lot of software to tie it all together. I did have to modify darknet so that my software can send it images through shared memory and get images back that have a label and a rectangle around each recognized object, and also to send it commands and get results back over Unix Domain Sockets (UDS). The software is very much all a work-in-progress as this is a never ending project.
Click on the following to download zip files containing all the source code for the September 30, 2024 verison of Izzy except for the modifications to darknet.
izzy_obrec_fixation_20240930.zip - 40KB
arduino_side_aserial_serial_usb_servos_20221119.zip - 4KB
I have a separate page all about the changes I made to darknet.
