Big Stirling engine for concentrated solar using Fresnel lens
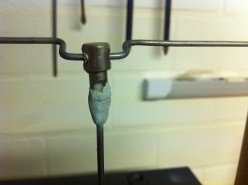
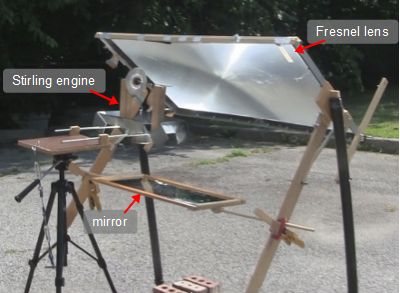
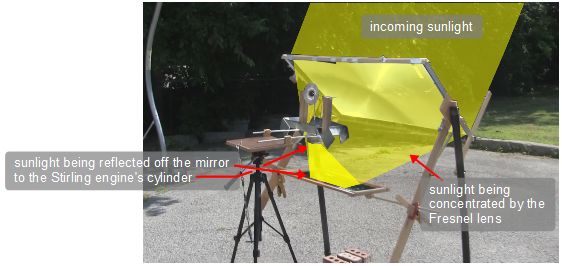
I designed this Stirling engine (photos below) to be powered by my Fresnel lens, basically using concentrated solar power. My Fresnel lens doesn't focus very well so I needed a big cylinder to capture all the concentrated sunlight. And since it's for outdoor use, I decided to try air cooling by giving it a large top plate that acts as a heat sink. I also wanted my Stirling engine to be sitting upright so I could spray water onto the top plate so, as diagrammed below, I reflected the sunlight from the Fresnel lens onto the Stirling engine's cylinder using a mirror.
How the Stirling engine was made

Cooling the Stirling engine
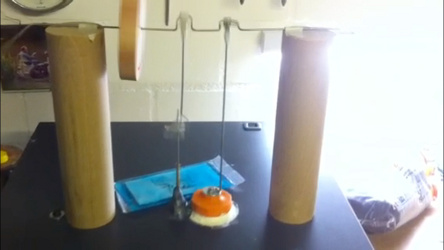
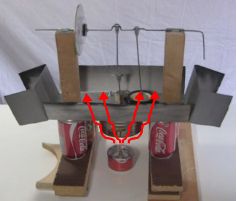
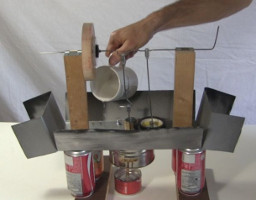
In the photos below I'm running it inside using an alcohol lamp as the heat source. The problem with this is that the hot fumes flow up on the outside of the top plate, heating it. This is a problem since a Stirling engine needs heat at one end and cold at the other end. So I poured water over the top plate and that made it rotate faster. You can see this acceleration happening in the first video below.
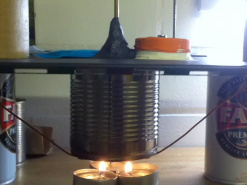
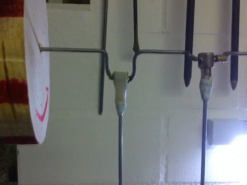
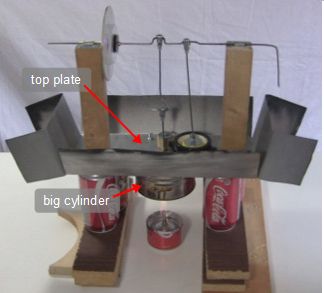
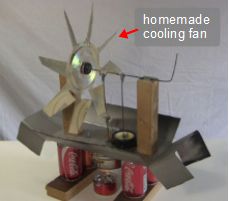
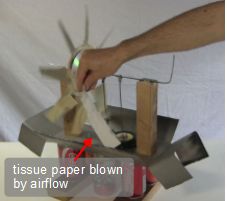
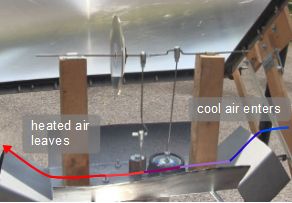
Another method of cooling I tried was to make a fan out of cardboard and have the fan blow air over the top plate (see photos below.) Notice that the fan is powered by the Stirling engine. When used indoors it allowed the Stirling engine to run for longer, since the top plate was taking longer to heat up. In the photo on the right you can see the airflow pushing on the tissue paper.
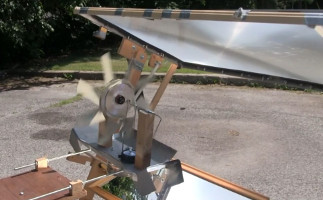
When it's outdoors, I sprayed water on the top plate but found it wasn't really necessary (see photos below.) Even a light breeze flowing over the top plate is enough to keep it cool.

I ran it with the fan outdoors, but it wasn't needed. Instead it was just a good test of the Stirling engine running with a load, especially since the breeze was flowing in a direction that countered the rotation. But as you can see in the second video below the fan turned quite well.
Video - Stirling Engine Explanation, Demos and Experimenting
This video starts with an explanation of how this Stirling engine works. Then it shows my first runs of this Stirling engine indoors as I gradually made improvements and experimented with it.
Video - Stirling Engine Powered by Fresnel Lens/Concentrated Solar Power
This video explains how the Fresnel lens and mirror concentrate sunlight onto the big cylinder of the Stirling engine and then shows it working. It also shows a little about how the airflow cooling works.
Stirling engine's by other people using this one as a guide
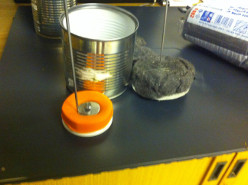
Below are some photos of one Stirling engine made by someone in Germany using the above one as a guide. It works very well.
The big metal plate that acts as structural support and as a heat sink is made from a computer case. For the diaphragm casing he's using a small, flat can-like plumbing part. It's 4cm in diameter and about 2cm high. He simply wrapped the orange colored balloon around it. The big cylinder is 8cm in diameter and 8cm tall. The displacer is 3cm high. That way it can move up and down 4cm.