Strong stand for gravity light and other things
The trickiness in making this sturdy pole was to:
- have a base that would hold the pole upright despite the pole wanting to tilt,
- have an actual sturdy pole that wouldn't bend or crack despite sideways forces near the top,
- be portable, since I knew I'd be taking it to maker faires, and
- be made of stuff I mostly already had.
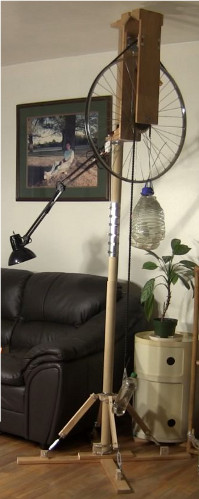
As shown below, the parts are a base and two 4 foot long poles, which are 2" diameter wooden dowels I found in a hardware store located where all the other smaller dowels are found. Having the one long pole be made up of two shorter 4 foot long poles made this portable.
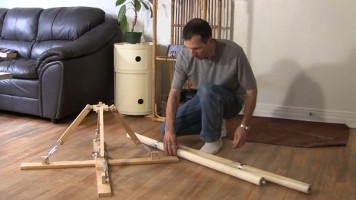
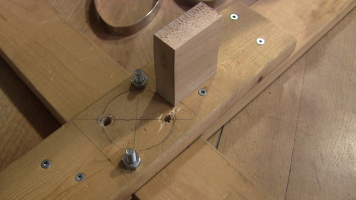
As shown below, the base starts as a cross with boards 3ft/90cm long. Then there's a neck with a hole for the pole to go through that's higher up and that holds the legs at the top.

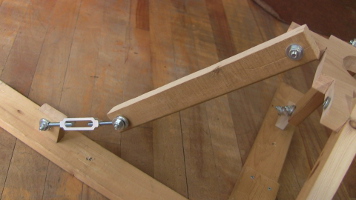
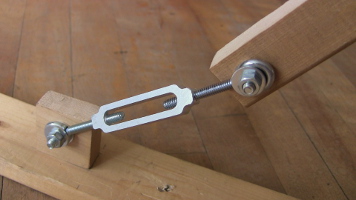
The legs (see below) are intended to be adjustable so that the whole pole could be tilted if needed. Turnbuckles were put at the end of each leg to provide this adjustability. This failed since the flat boards that sat on the floor were too flexible and would bend instead. If something stiffer had been used on the floor then it should have worked. Is it was, it helped only a little.
Note that all nuts and bolts were tightened firmly to hold everything stiffly together despite what it looks like in the photos below.
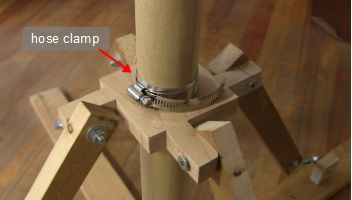
The neck is shown empty below and with the pole in it. Notice the hose clamp wrapped around the pole. The neck actually produces an upward force on this hose clamp. Without it, as the turnbuckles are tightened, the neck would actually move up. This probably wouldn't be the case if the boards that are flat on the floor are made of stiffer material.
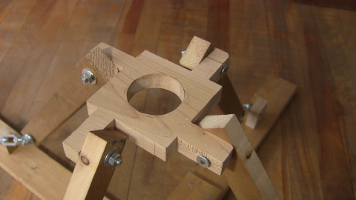
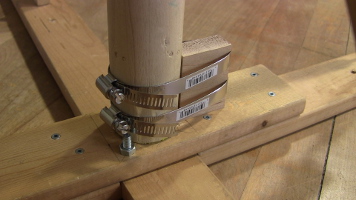
The bottom of the pole had to be firmly held in place. To do this I screwed a block of wood to the cross piece. As shown in the 3rd photo below, the bottom of the pole is then clamped to this with two hose clamps.

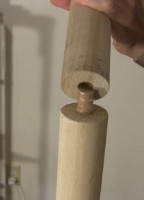
As shown below, holes were drilled at the ends of the two 4 foot long poles, and a dowel was snuggly fit into one of the holes. Then the other 4 foot long pole was lowered onto this dowel, resulting in one long pole.
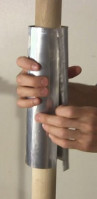
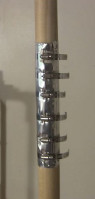
To stiffen that up, aluminum flashing of the kind available in hardware stores, was wrapped around the place where the two poles met and then hose clamps were tightened around that. There result was a very solid single 8 foot tall pole.