Electrets
An electret carries a permanent electric field just as a permanent magnet carries a permanent magnetic field. One way to think of an electret is as a capacitor that always carries a charge and that you never have to recharge (except when you make it initially or something bad happens to it such as it is melted.)
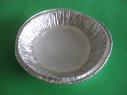
Here are my attempts at making an electret, some successful and some not.
Making Electrets
Working with high voltage is dangerous so take necessary precautions. Further, wear suitable goggles and gloves when making electrets.
The basic steps to making an electret at home are:
- heat the electret material to the melting point and keep it hot for a while,
- turn off the heat, heat up the top electrode (I use a heat gun), move it to above the electret material and turn on the high voltage power supply thereby placing an electric field across the electret material,
- once the electret has cooled, turn off the power supply, and
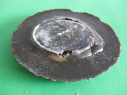
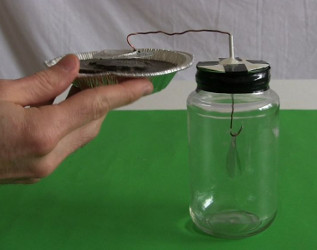
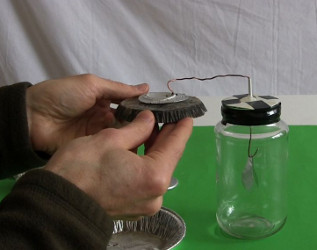
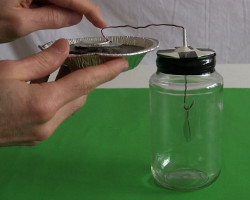
- quickly wrap the electret material completely in aluminium foil to short out both sides,
- wait a few weeks before unwrapping and testing.
By the time the few weeks are up, many of the dipolar molecules (molecules with two poles: positive and negative) within the electret will have lined up in such a way that the resulting electric field has the opposite polarity of the electric field that was used in step 2. This is the polarity reversal which I'll talk about more below.
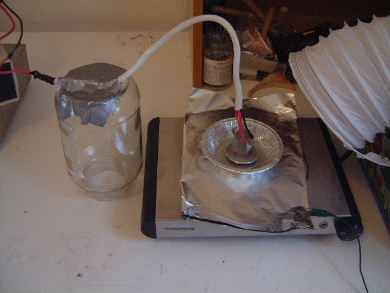
Looking closely at the above steps you see that you need a heat source, high voltage power supply, ... Here's a setup I've used in the past.

In the above picture are the following: 1. 30kV DC power supply, 2. variac voltage control for power supply, 3. high voltage probe, 4. oscilloscope for reading voltage using above probe, 5. high voltage wire (positive) feeding top electrode, 6. ground connection (negative) feeding bottom electrode, 7. electric heater, 8. ventilation hose.
When doing it again I would add an ammeter on the ground connection line (6) to measure the current. The current should never go above 0.5 milliamps and while the material is at its most conductive before it hardens, it should be limited to 0.1 milliamps1. If the current is too high then I'd also add a resistor there too in order to limit the current.
Make sure you have good ventilation! When the electret material is heated up it will likely give off toxic fumes or at least ones you don't want to breath.
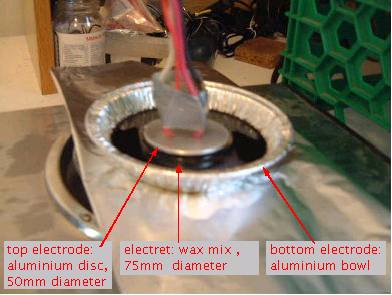
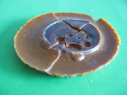
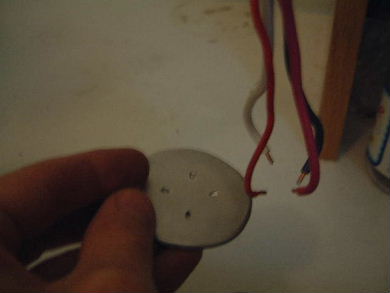
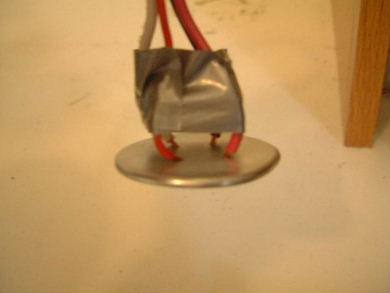
Just how you make the top electrode is up to you. It will have to be something that you can put in place after the electret material has been heated. Also, it will have to be detachable from the wires that feed it in case you find you can't easily separate the electret material from the electrode once it is ready to wrap up. This has happened to me on occasion so I ended up making a new electrode for the next electret while the old one sat wrapped up with the electret for a month.
Step 2 is to apply a high voltage across the electret. This can be dangerous if an electrical arc will cause an explosion from whatever material you are using for your electret. If that's possible then it's best to pick a different material. With wax, an arc can cause the wax to splatter, causing a burn if it hits you.
In making some electrets, I turned off the heat and turned on the voltage to 6kV. At this point the electret was still liquid. When wax is heated, its internal resistance goes down. As wax cools its internal resistance goes up. So the voltage would slowly creap up and at around 6.5kV I'd turn it back down. I had to do this repeatedly until the wax cooled sufficiently for its internal resistance to stabalize.
In the case of wax, when you turn off the heat and turn on the high voltage you want the wax to take a long time to cool.
Steps 4 and 5 were to wrap up the electrets in aluminium foil, shorting out the two sides. Wierd, but that's what you have to do if you want a long lasting electret.
Testing electrets
Don't test your electret immediately after making it. As said above in steps 4 and 5, wrap them up in aluminum foil such that the top surface is electrically connected to the bottom surface. Leave it for 3 or 4 months. During that time the polarity of the electret will reverse; the negative side will become positive and the positive side will become negative.
The first time I tested my electrets was a few months after making it. I don't recall how I tested it but the results were that they didn't work. This can happen since during that reversal process you'll find no charge. I was just unlucky and happened to test while the reversal was still happening and mistakenly thought it didn't work. Six years later I tested them again with my homemade electroscope (see photos below.) This time some of them worked, the leafs of the electroscope separated when I test both the top and bottom of the electrets. The ones that worked were the D'Addario dark rosin, Carnauba wax and Beeswax one and the Rosin from a rosin bag, Carnauba wax, and Beeswax one. The 75mm Acrylic Disks one didn't work.
Testing electret polarity reversal
When I made each electret the top was connected to the positive of the power supply and the bottom was connected to the negative or ground. That means the top of the electret would have had negative charges at its surface and the bottom would have been positively charged. After letting the electret sit for a few months, wrapped in foil with its two ends electrically connected together (shorted), these polarities are supposed to reverse. They did. Testing them now I see the top is positive and the bottom is negative. The following photos and explanation detail how I tested that.
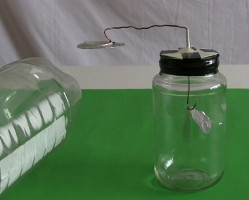
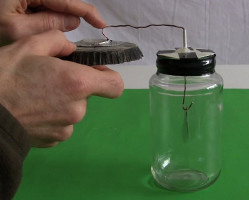

The test procedure involves inductively charging the electroscope using one end of the electret. This causes the electroscope to have the opposite charge as that end of the electret. I then bring a negatively charge object, a plastic coke bottle that has been triboelectrically charged, near the electroscope terminal. If the electroscope's leafs separate further then the electroscope is negatively charged meaning that electret's end is positively charged. If the electroscope's leafs come together then the electroscope is positively charged meaning that electret's end is negatively charged.
For detailed steps and a video for how to do the above polarity testing see this "How to determine whether something is positively or negatively charged" section on my electroscope page.
Important note regarding testing electrets
I found that as soon as you expose either end of the electret to air, it begins to lose its surface charge. After around 15 seconds the electret influences the electroscope significantly less. If you then wrap it up in foil again with both ends electrically connected together, this surface charge will fix itself after a few days and you'll be able to use it again.
References
1. Stong, C.L. How to make an electret. Scientific American, November 1990.
