The Copenhagen solar cooker is a very clever, lightweight, portable and
quick to set up solar cooker invented by Sharon Clausson. It is much
like a
car sunshade solar
cooker in that to adjust it you set the cooking pot down flat and
then adjust the reflectors around it. Unlike the car sunshade, the
Copenhagen is suitable for all sun angles, meaning all times of the
year and day.
You can buy a Copenhagen solar cooker for an incredibly cheap price
for one that will suit almost all your cooking needs and is of
high quality. You can purchase one from the inventor's webpage
sclaustoys.com
or from
their ebay store
. Or if you usually deal with a specific solar cooker seller,
ask if they sell them. They might.
|
Alternatively you can
make your own Copenhagen solar cooker from scratch using cardboard
and aluminum foil. The reflective panels that come
with the purchasable one are much more reflective and uniform
than a cardboard and aluminum foil one though, getting hotter
temperatures faster. They last longer. But the homemade one,
despite having only aluminum foil reflectors, does work well.
|
|
|
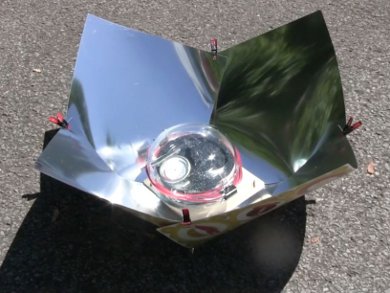
The Copenhagen solar cooker that you can buy
The remainder of this page is about the commercially available
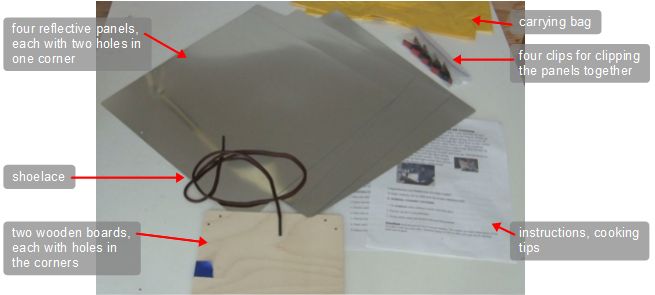
Copenhagen that you can buy. The following are what I received,
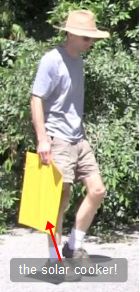
though it may vary slightly as the product evolves. Also shown
is an indication of how incredibly portable it is. Try doing that
with your kitchen stove!
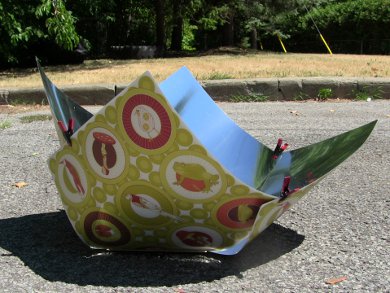
The parts I received.
 |
|
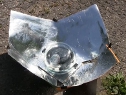
Very portable!
 |
|
Assembling the Copenhagen solar cooker
The following steps are meant to be followed along with the numberd
photos below.
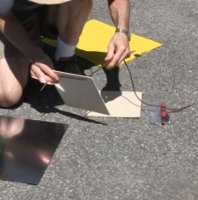
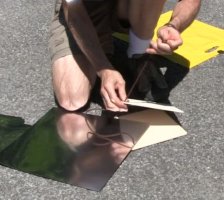
Pull the shoelace up through a
hole in one of the wooden pieces. Leave around 6 inches behind for
tying the ends of the lace together in step 9.
Pull the lace up through
a hole in one of the reflectors with the reflective side facing up.
Pull the lace up through one of
the holes in the other wooden piece. Don't worry about the other hole
in the panel you just did. We'll lace up that hole in step 8.
First hole 1st wooden piece.
 |
|
First hole in 1st panel.
 |
|
Other wooden piece.
 |
|
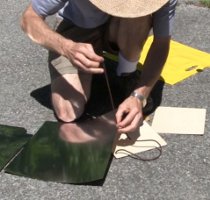
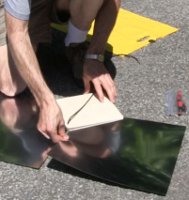
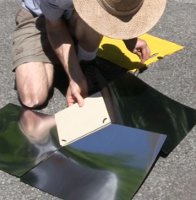
Slip the corner of another panel
between the two wooden pieces. The panel corner should be the one with
the holes in it.
Line up the holes in the two
wooden pieces with a hole in the panel and push the lace down through all
three layers.
Bring the lace up through the
next set of holes. Make sure the lace is pulled tightly everywhere.
At that point that panel is secured.
Insert the next panel and repeat
steps 5 and 6.
Slip in second panel.
 |
|
Lace holes in one corner.
 |
|
Lace other corner.
 |
|
Repeat for next panel.
 |
|
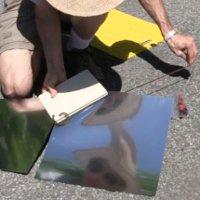
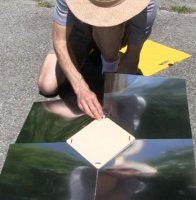
Finally all four panels are
in. The last hole should be the one you'd left behind in step 2
for the first panel you'd put in. After this you should have the two
ends of the lace on the non reflective side of the panels, the bottom
of the solar cooker.
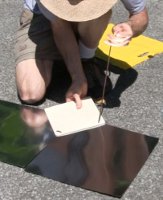
Flip the whole thing over,
make sure the lace is tight everywhere and tie the two ends together.
A simple bow will do.
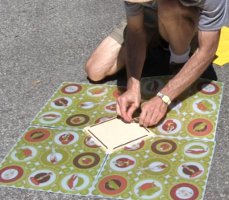
Flip it all back over being
careful not to scratch the panels.
Other hole in 1st panel.
 |
|
Tie lace ends together.
 |
|
Carefully flip over.
 |
|
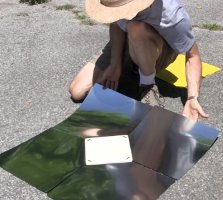
Lift the panels up and clip
adjacent ends together. Do it so that the panels all have around the
same angle but don't worry what that angle is. Adjusting the angles
to reflect the most sunlight is covered below.
Clip panels together.
 |
|
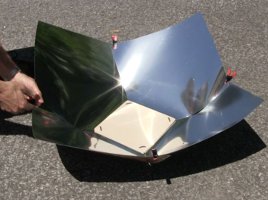
Aiming and adjusting the reflective panels
After you have the reflectors clipped together, put the cooking pot
in place. You next need to aim the solar cooker at the sun and
adjust the reflectors to better reflect the sun's light to the
cooking pot.
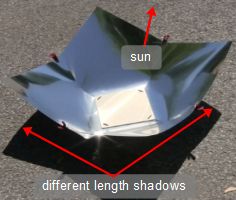
Aiming at the sun
Perhaps the easiest way to aim at the sun is to use the shadow made
by the solar cooker. Turn the solar cooker so the the upper corner of
one of the reflectors is closest to the sun. Of course that means
the upper corner of the opposite reflector will be farthest from
the sun (see photo below.)
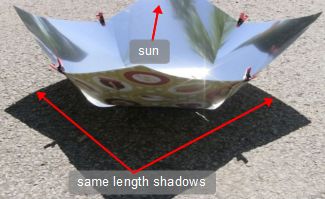
Look straight down at the one farthest from the sun and you should
see a shadow. If the cooker is not facing the sun the shadow you
see should be lopsided. Turn the cooker until it's no longer lopsided.
Lopsided shadow. Bad.
 |
|
Less lopsided shadow. Good!
 |
|
You can repeat this step after you've adjusted the reflectors better
as in the following subsection.
For more see this page
all about lining up
solar cookers with the sun for more on that.
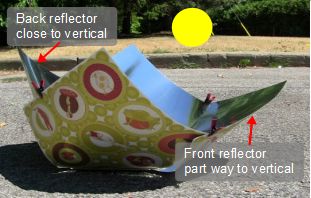
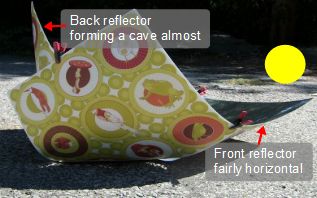
Adjusting the reflective panels
The reflectors are adjusted by moving the clips and changing how
much the adjacent reflectors overlap each other. The photos show
how to adjust the reflectors for the different extremes in sun
positions from morning to midday to late afternoon or evening.
Just how high the sun is depends on the time of year and what
latitude you're at (how far you are from the equator.)
The side reflectors should form a smooth curve from the front to back
reflectors.
High sun - midday.
 |
|
Low sun - morning/late afternoon or evening.
 |
|
The video below goes through another, more precise method for doing this.
For more indepth general understanding see
this page about
designing reflectors for solar cookers which is essentially what
you're doing while you adjust these very flexible reflectors.
Copenhagen solar cooker video
This is a video I made showing much of what is above but with
additional details on adjusting the panels and a bit about cooking
pots.