DIY elevation/azimuth shade finder tool for solar site surveys
This is a simple to make and easy to use tool for finding out when your solar panels/collectors or whatever... will be shaded at any time of the year. The end result is a chart is called a Sun Chart because it really shows you when you'll have sun. You make this chart by using the tool to gather elevation and azimuth information for your surroundings. In the Sun Chart, the elevation is on the Y-axis and the azimuth is on the X-axis. This design originally evolved from an approach I saw on Gary Reysa's site here.
Click here to see how a Sun Chart works to show you when your solar application will be shaded at any time of the year.
If you got here from watching the video, briefly, here are the links:
- Get a Sun Chart.
- Download azimuth and elevation gage.
If anyone hasn't watched the video, it's included at the bottom of this page.
What are elevation and azimuth
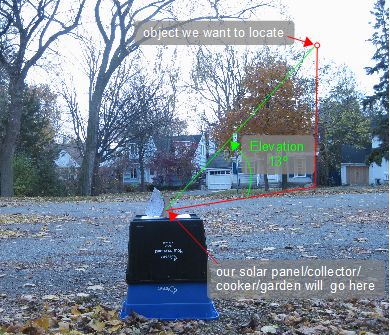
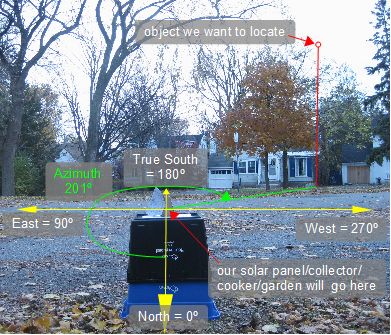
The following diagrams show how elevation and azimuth work. Elevation is the angle up from the ground to an object. So elevation shows where the object is vertically, 13° in the diagram below-left. Azimuth shows where an object is in the horizontal plane. Basically your panel/collector becomes the center of a circle. Directly north of it is 0°, east is 90°, true south is 180° and west is 270°. For azimuth, imagine a line going from the panel to a point directly below the object. The angle made by this imaginary line relative to north is the azimuth, 201° in the diagram below-right.
Note that the diagram on the right refers to "True" South. This is not the same as the south that a compass needle points to. Click here to see a page talking about true south and how to find it.
How to make a tool for determining elevation and azimuth
This is a tool I made to determine elevation and azimuth.
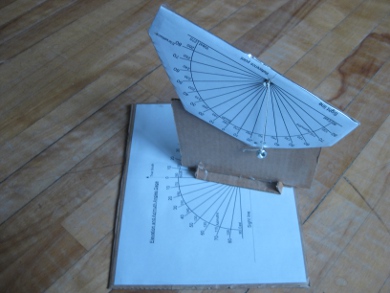
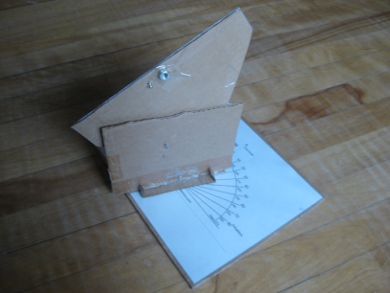
The first step is click here to download this elevation/azimuth gage. It looks like this:
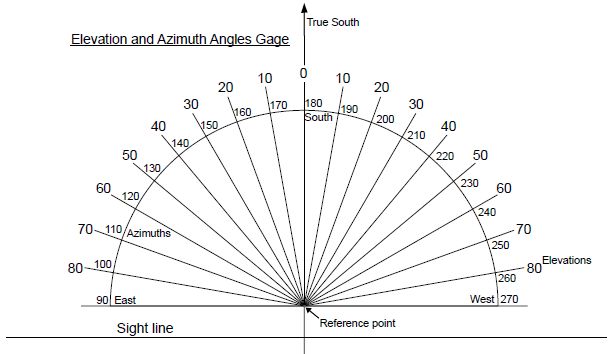
Print two copies - one for the elevation and one for the azimuth. Then tape/glue/paste each one to a piece of cardboard to give them a solid backing as shown below.
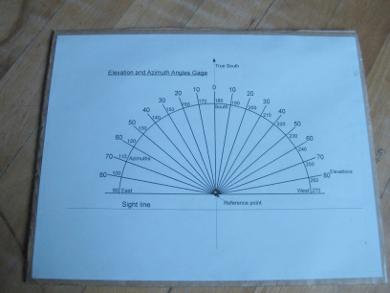
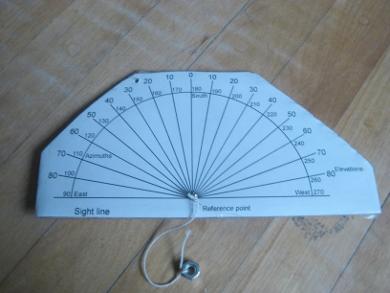
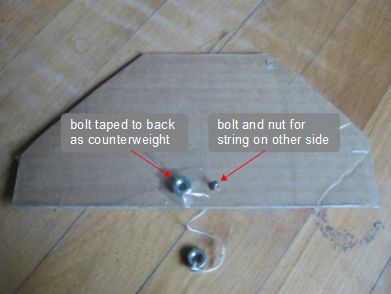
As shown above, you'll want to make a small hole where it says "Reference point" and push a small bolt through it. This will be for hanging a string and weight from. You could just push the string through the hole and knot it on the back side but using a bolt allows you to hang the string out away from the gage. Tie a weight, a nut for example, to the loose end of the string so that the string hangs down on its own as you can see one of the photos of the finished result above.
I also taped another weight, a nut, too the back, as you can see in the above-right photo, to counter the weight of the string hanging on the other side.
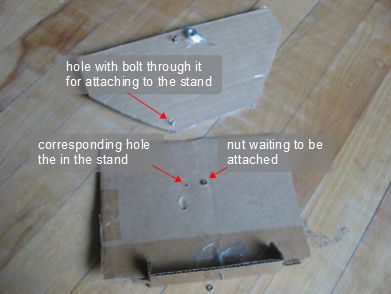
Next is to make a stand out of another piece of cardboard (photos below.) Then make a hole in the azimuth gage where it says "Reference point". This will be the point that the stand rotates around. By rotating it you indicate the azimuth angle.
This stand serves two purposes: one is to visually line up with a shading object so you can determine the azimuth angle, and the other is to hold up the elevation gage.
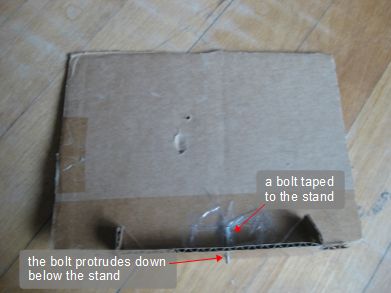
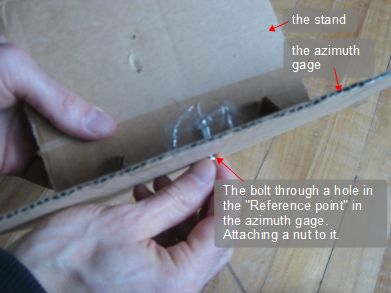
Next, a hole is made in the elevation gage near the top of the gage as you can see in the photo below and a corresponding hole is made near the top of the stand. The holes are then lined up and a bolt is pushed through and fixed in place with a nut.
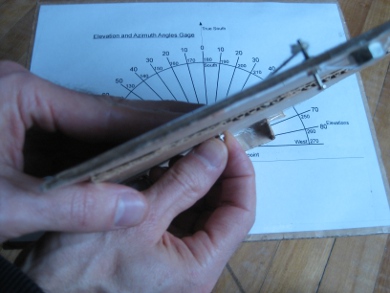
And you're done. A more sturdy one can probably be made out of wood but this worked for me.
How to use the elevation/azimuth tool
Download and print out this Sun Chart availble from the University of Oregon's website.
Step 1. Put the tool on a stable, flat base wherever you want your panel/collector or whatever to be.
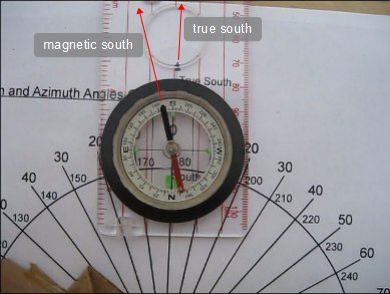
Step 2. Line it up with true south as shown below-left. True south is where the geographic south pole is located, not what a compass needle points to. If you aren't familiar with this then see this page about how to find true south.
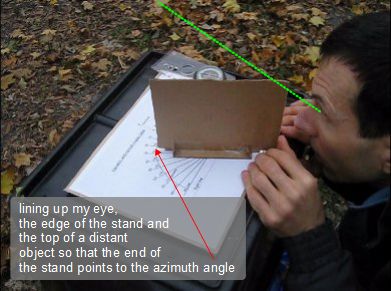
Step 3. To take your first reading, starting with the east (for example) rotate the stand such that one end of it is lined up with 90° angle on the azimuth gage. The azimuth angles are the inner numbers.
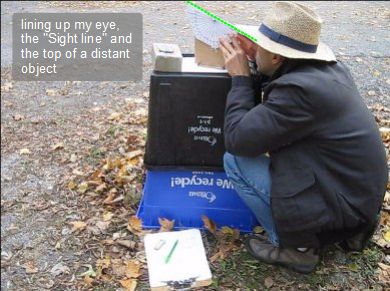
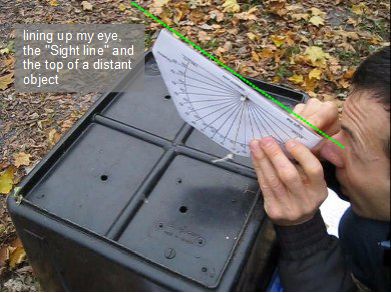
Step 4. Then as shown in the photo above-right tilt the elevation gage with the string hanging down freely until your eye, the "Sight line" on the elevation gage and the "top" of an object are all lined up. The top of the object represents the area of the object below the top. So only the elevation of the top is needed.
Step 5. As shown below, note the elevation angle that the string indicates on the elevation gage. The elevation angles are the outer numbers. Also note the azimuth angle that the end of the stand points to (90° for the east-most) on the azimuth gage. Find the point on the Sun Chart that corresponds to these two angles and make a mark. I also write down the angles in a table in case I want to redo the chart later.
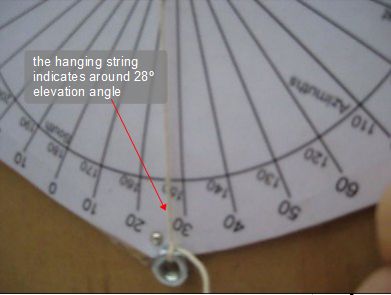
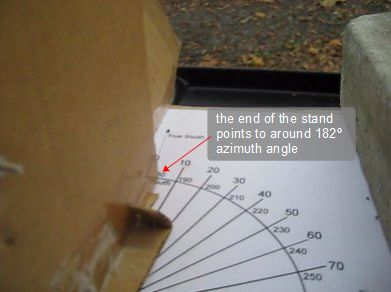
Step 6. Rotate the stand a little clockwise (since we started with the east) such that it lines up with the top of the next logical object or another part of the same object. What's logical? If the object has a horizontal top or a vertical edge then it's only necessary to take readings of the two ends. If an object has a very irregularly shaped top then you'll have to take many readings to accurately illustrate the shape on the Sun Chart.
Go back to step 4 and keep repeating this process until you've rotated the stand all the way to the west. So you'll have recorded various azimuth angles ranging from 90° (east) up to 270° (west) along with corresponding elevation angles.
A simplified version of this elevation/azimuth tool
You can simplify construction of this tool a little by keeping the azimuth gage and the elevation gage separate and using them separately as shown in the photos below. But while that speeds up construction a little it slows down measurement time a little (and is nowhere near as cool!)
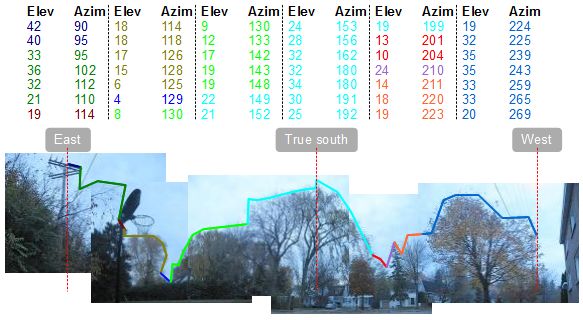
Results for where I often do potted gardening
Here are the results for a location where I frequently plant a potted garden and am toying with the idea of experimenting with a year round, compost-heated mini-greenhouse.
Interpreting the elevation/azimuth Sun Chart
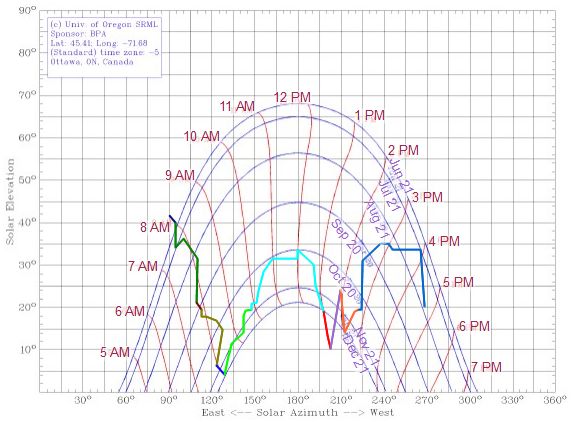
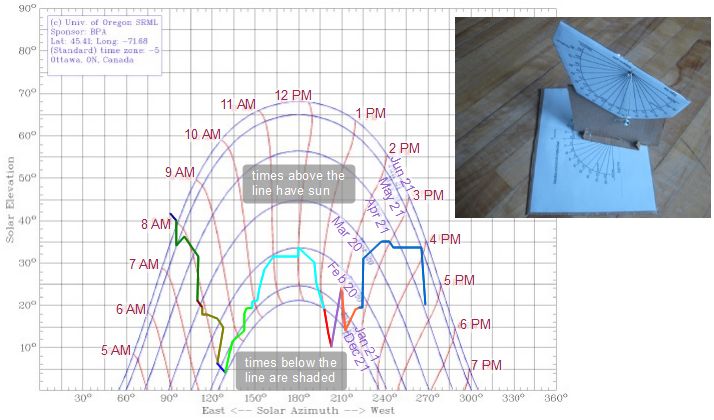
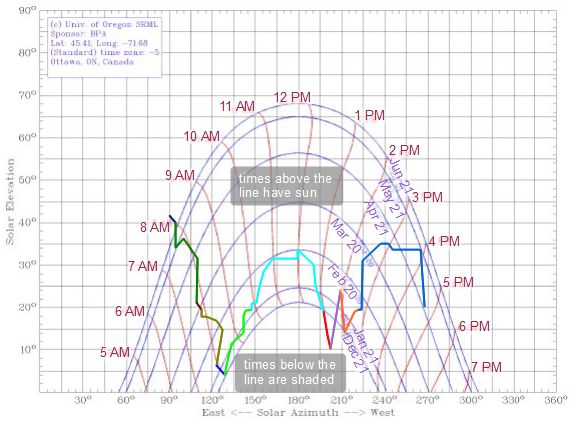
The purple curvey lines in the chart above represent different days of the year. June 21st is the day when the sun is highest in the sky and is represented by the topmost purple line. May 21st is the next line in. So everything between those two lines represents the time between May 21st and June 21st.
The red curvey lines represent the time of day.
The multicolored line is the plot I made using my elevation and azimuth data (see the table above.) Everything below the line is shaded. Everything above the line has sun.
Looking at May 21st to June 21st, you can see that the location where I made the measurements from is no longer shaded after around 7:45 AM to 8:00 AM. Contrast that with April 21st to May 21st where shading ends around 8:00 AM but begins again between 3:30 PM and 4:00 PM. And the period from December 21st to January 21st is hopelessly shaded pretty much all the time.
But what about July, August, September, October and November? On December 21st the arc that the sun makes across the sky is at its lowest. After that it gradually gets higher, peeking on June 21st. From June 21st to December 21st, including our missing months, the sun's arc simply reverses direction, getting lower each day.
So we can simply change the dates on the Sun Chart to account for the missing months, as I've done manually below. Now we can see that November 21st to December 21st is also hopelessly shaded all day.
