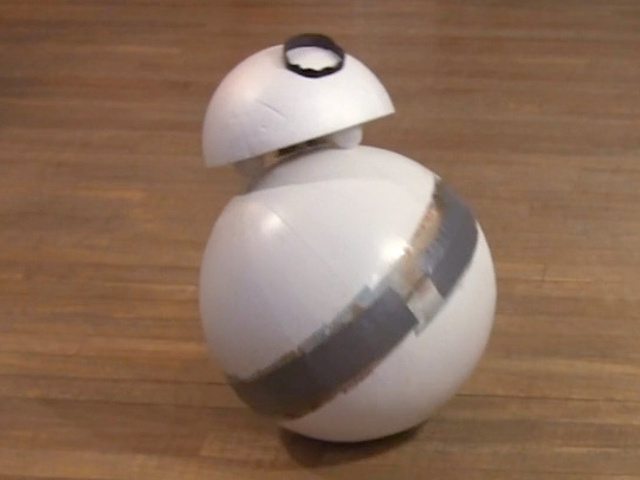
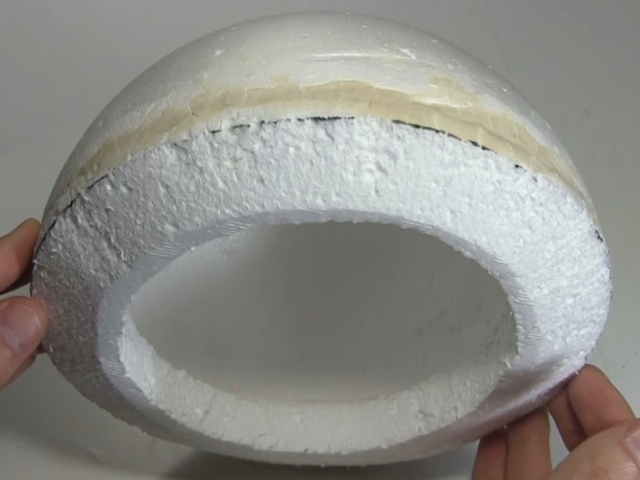
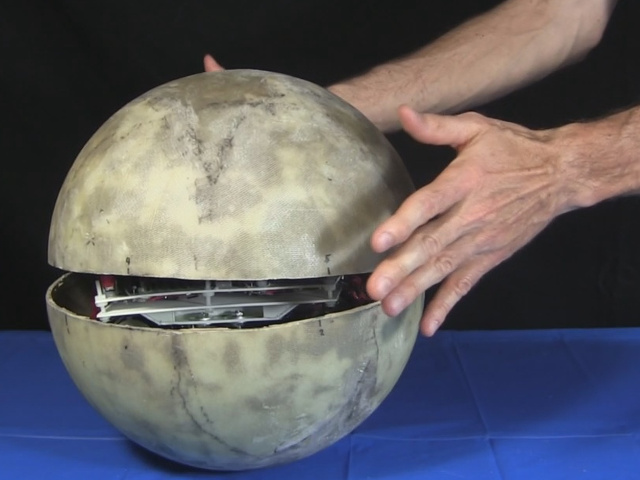
BB-8 (v2) dome/head
BB-8's head (also called the dome) is held on using magnets. Magnets inside the ball attract magnets attached to the underside of the head. This page shows how I made all that.
There are also videos at the bottom of this page that go through most of it. However, some of what's in the first video has been redone in the second video, namely the head support. This page, however, ignores the order in which things were done and shows only the steps that lead up to the latest version.
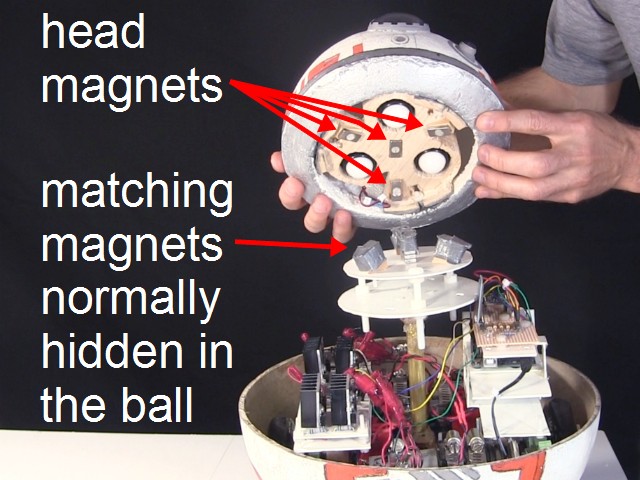
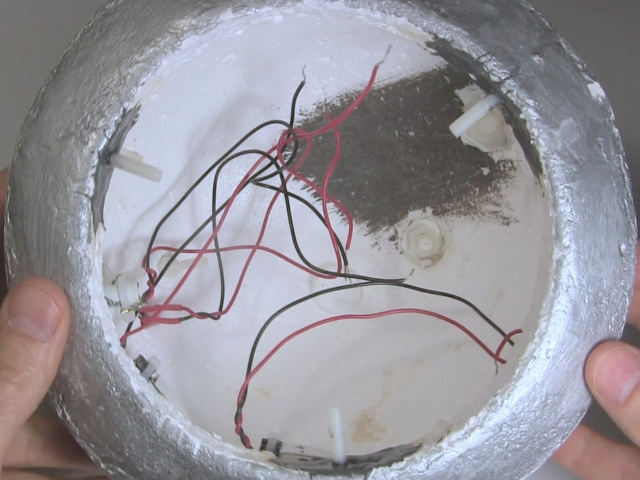
Here's how BB-8's magnets work. The magnets inside the ball are mounted on a pole or tube which is attached to the drive system. While the drive system is in the bottom of the ball, that pole keeps the magnets at the top of the ball where they can attract the head magnets, keeping the head also at the top of the ball.
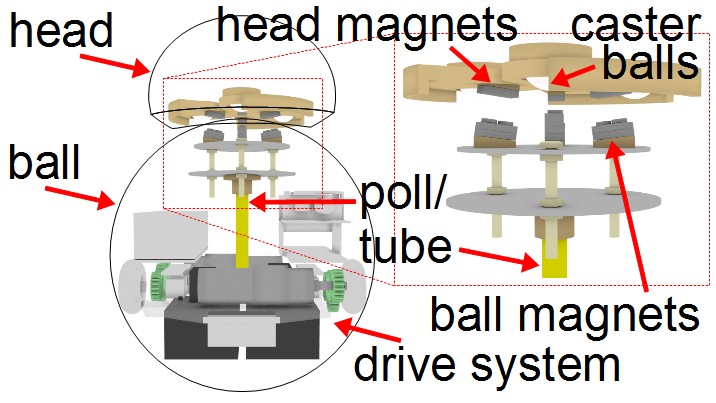
To do all this, two things are needed: a head support structure for the magnets attached to the bottom of the head and an internal support structure for the magnets inside the ball.
Making BB-8's head support structure
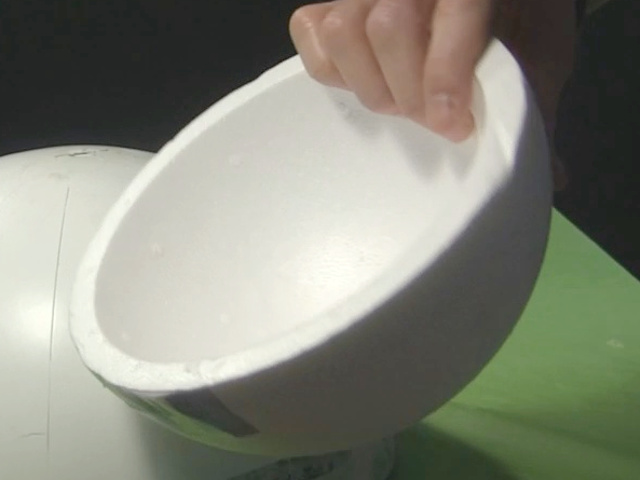
As shown below, the head is made from an 8" styrofoam hemisphere bought from an art store called Michaels, along with a styrofoam cone added below that. You can see more about that on the page about detailing, lighting and painting BB-8. The casters used are the lightest weighing, easy rolling ones I could find, have 1" diameter plastic balls, and are from Pololu. The magnets are neodymium magnets purchased from eBay. Since the whole head has to be as lightweight as possible I used balsa wood for the base. Nylon nuts and bolts hold the head support to the head. All of that is detailed below.

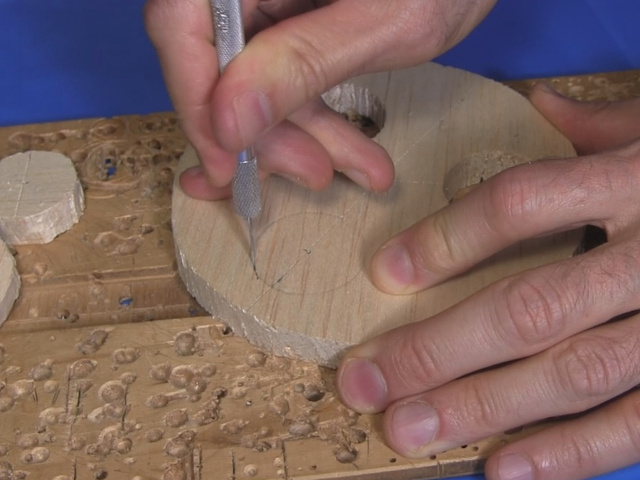
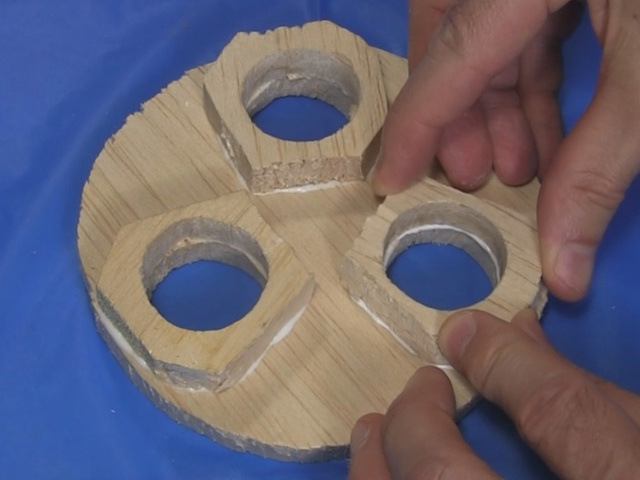
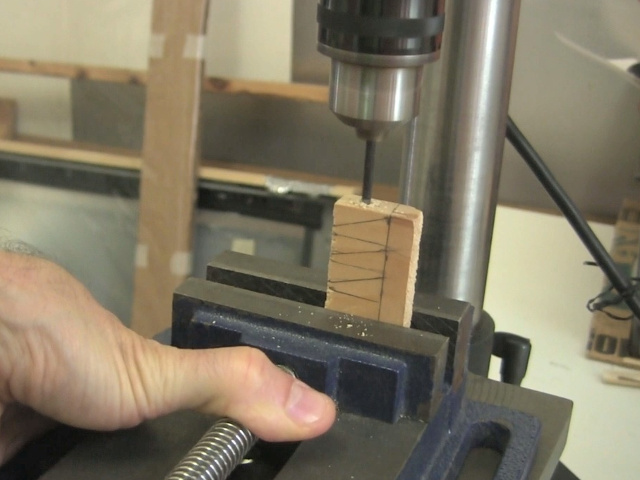
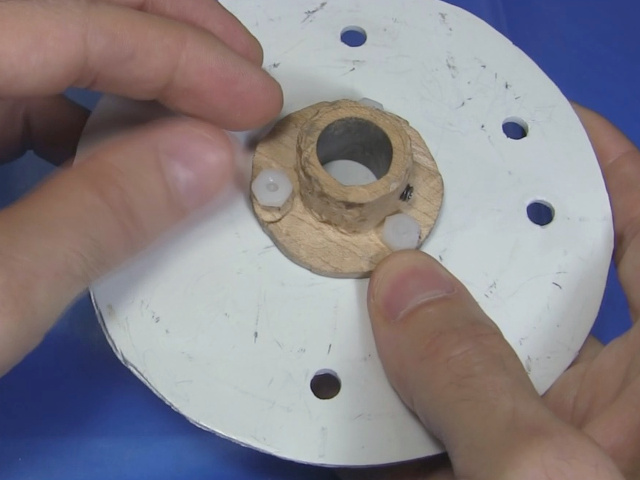
A shown below, I start out by cutting a circular disk out of 1/2" thick balsa wood for the base. Blasa wood is a very lightweight wood.
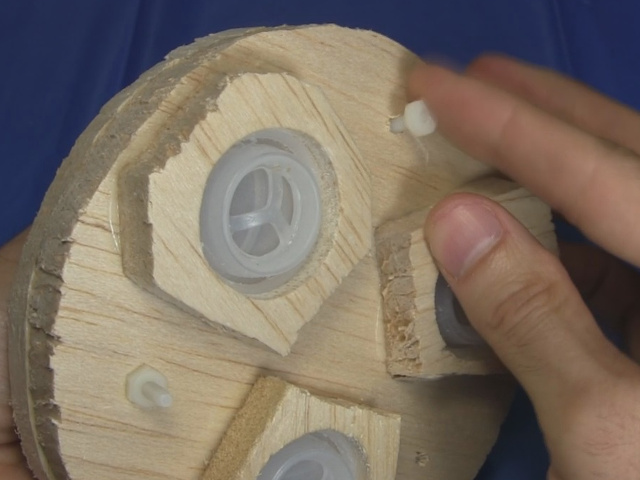
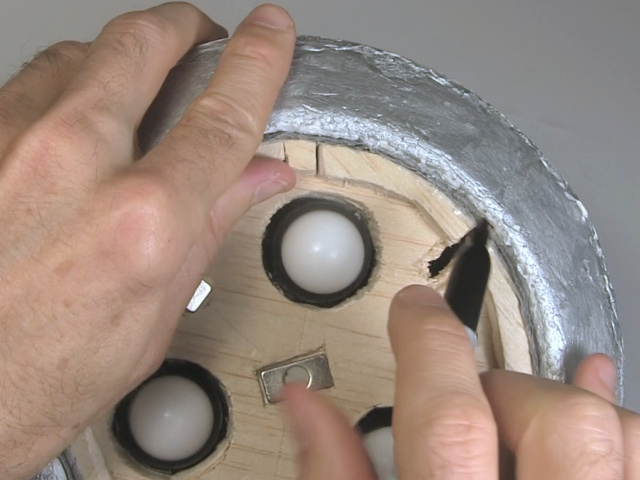
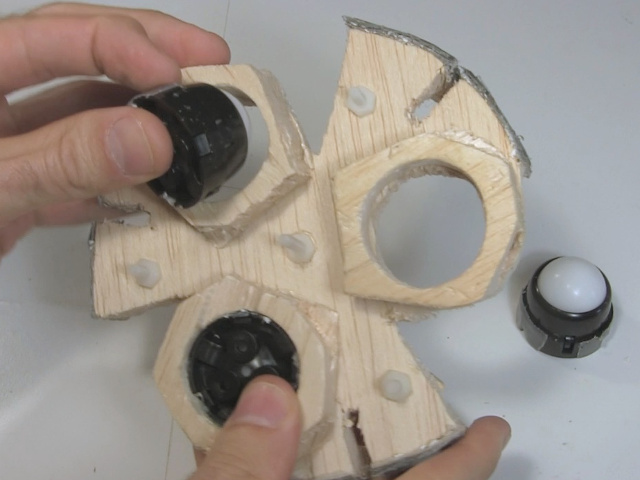
For a while my casters were deoderant balls taken from deoderants but I found that they didn't roll when the head was pulled down by the internal magnets. But at this point in the construction I was still using them and you can see me using them to lay out the positions of things on the base, and then cutting holes for them.
I find that I need more vertical support for the casters so I add more balsa wood on top. This part is hidden inside the head.
I also find that the 1/2" thick balsa base isn't high enough to grip well in the head so I add an extra 1/2" thick lip all around. This part is visible from below the head.
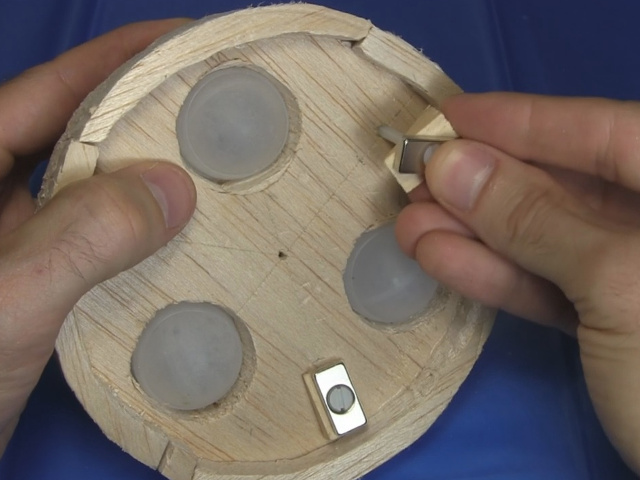
And here it is with the casters pushed into the holes. They're a tight fit so no extra support is needed to keep them there.

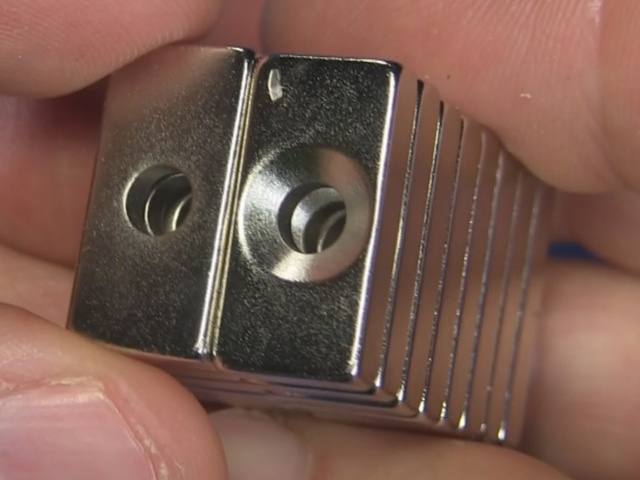
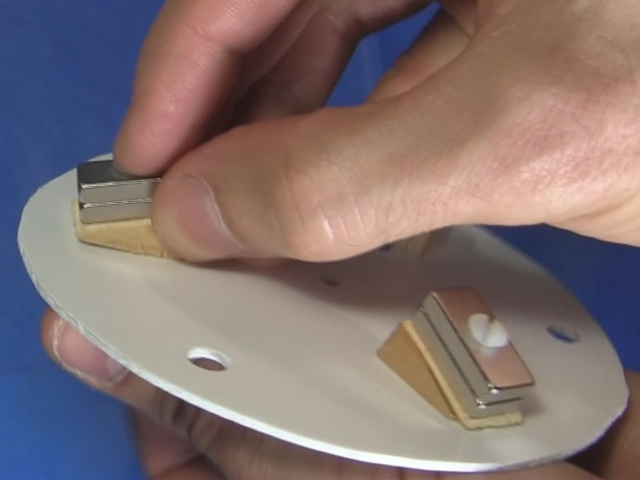
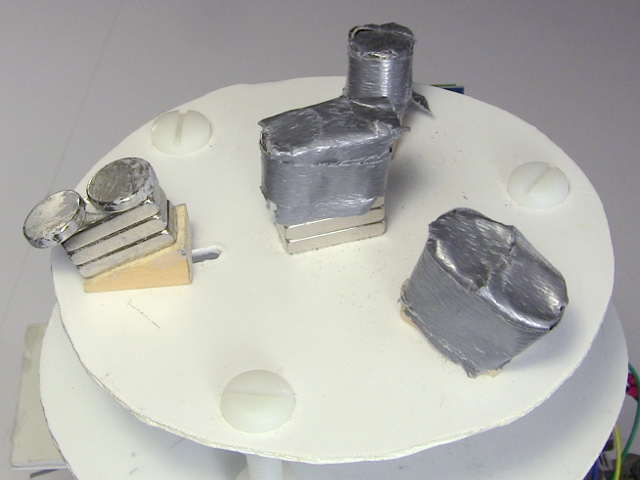
I purchased 20 of the magnets shown below on eBay. They're neodymium, 20mm x 10mm x 4mm with holes in them. I'd previously tried using magnets without holes and found that they were a pain to attach.
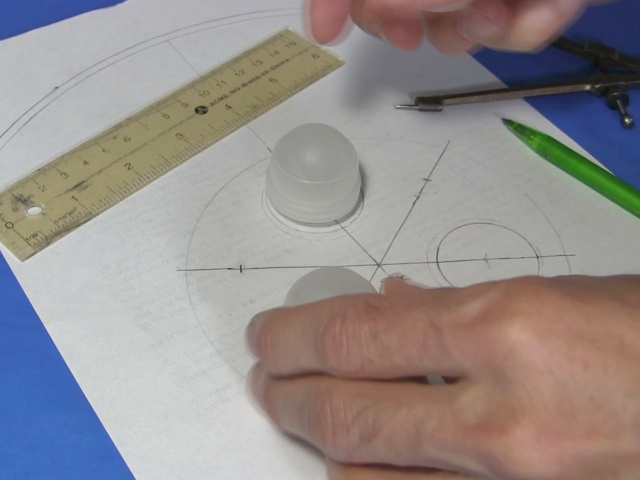
I then planned on paper where they could fit in the head while keeping in mind what that would look like for the corresponding magnets on the internal support inside the ball. Notice that on paper, the magnets are mounted on an angle on the head support. That's so that they can face the magnets inside the ball straight on.
To have them mounted on an angle, I start by making some wooden wedges, first by drawing them on wood and drilling a hole through all of them at the same time.
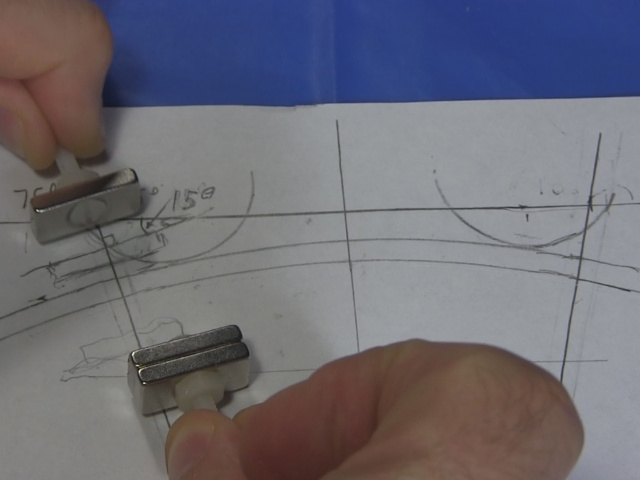
Then I cut the wedges out using my tabletop scroll saw. I then position them on the base and drill matching holes in the base. After putting lightweight nylon bolt from Home Depot through the magnets, I put the bolts through the wedges too and then through the base as well.
Nylon nuts on the other side of the base hold them in place.
At first, the head support is held in the head by being a tight fit. But every time I put it in and removed it again, it wore away at the styrofoam on the rim of the head, making the hole grow bigger and bigger. So I kept adding duct tape around the head support to make it bigger too.
Below you can see the base so far in the head.
Note that the remaining photos for making the head support were taken much later when I realized I wanted to make a better way of attaching the head support to the head than just having a tight fit. I also decided to make the base lighter so that the head would stay on BB-8's ball better.
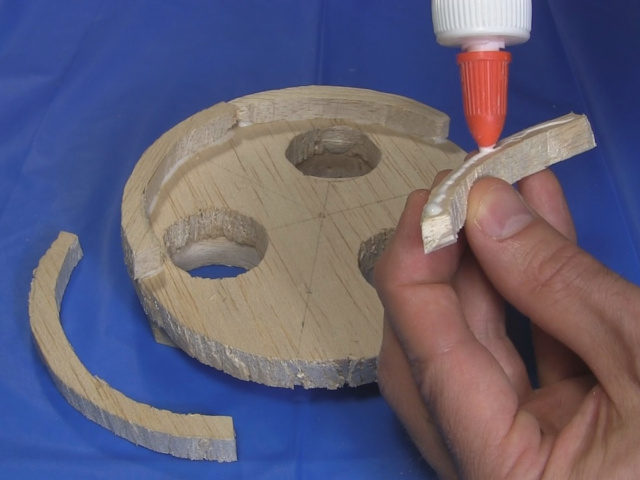
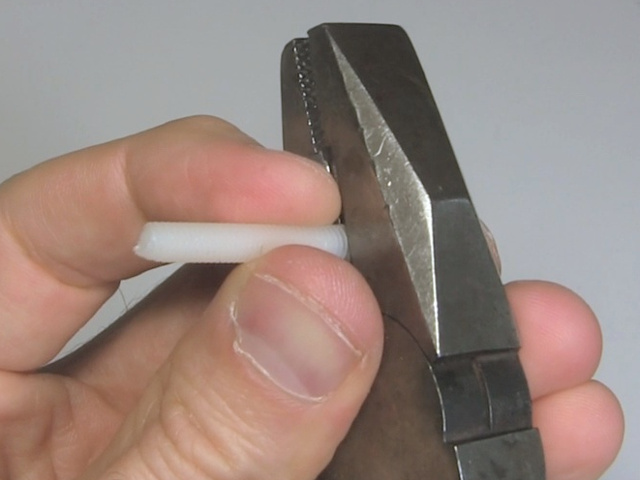
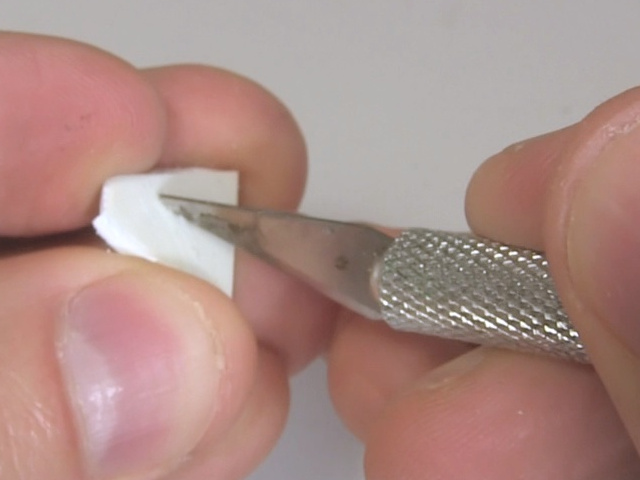
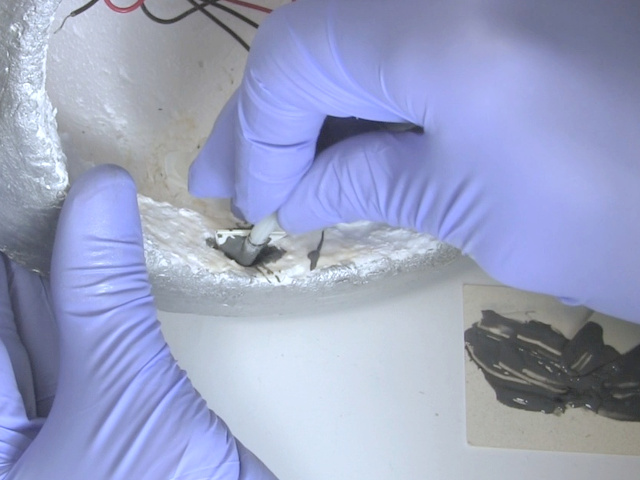
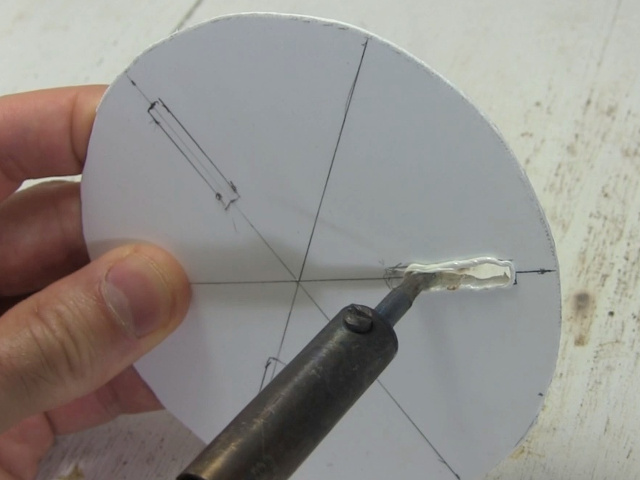
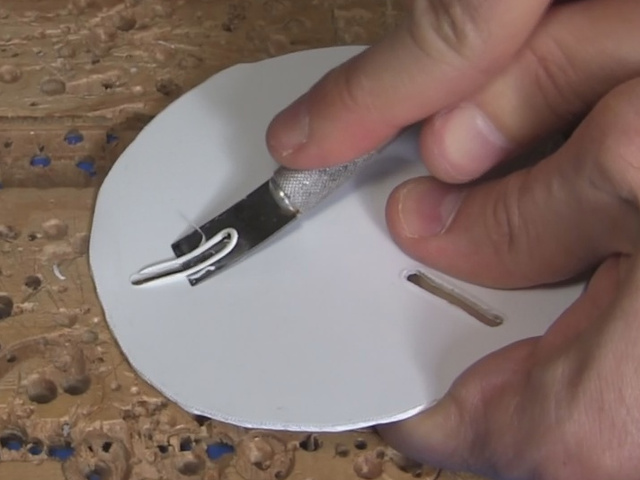
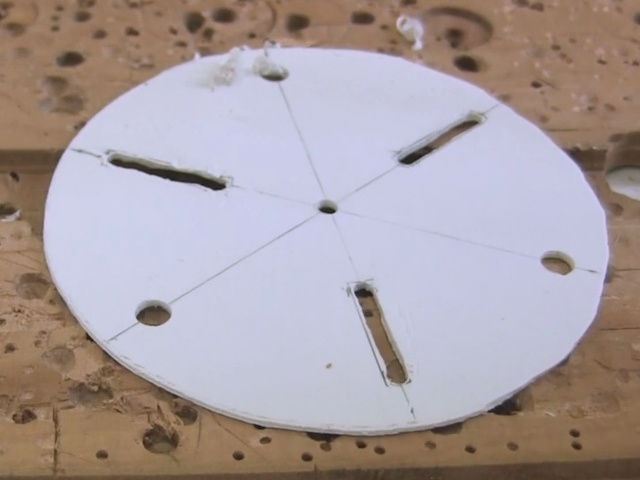
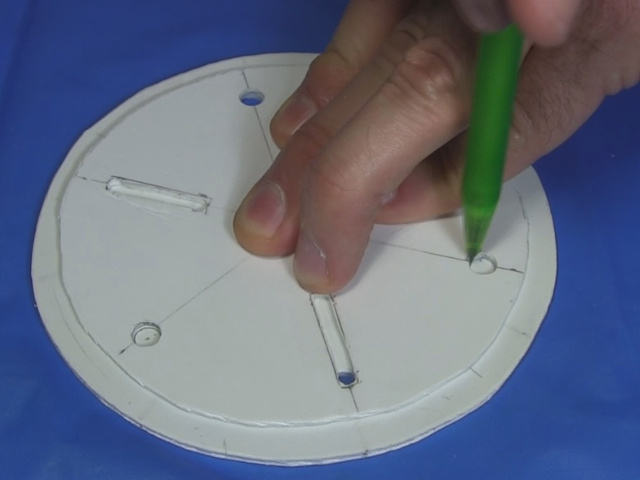
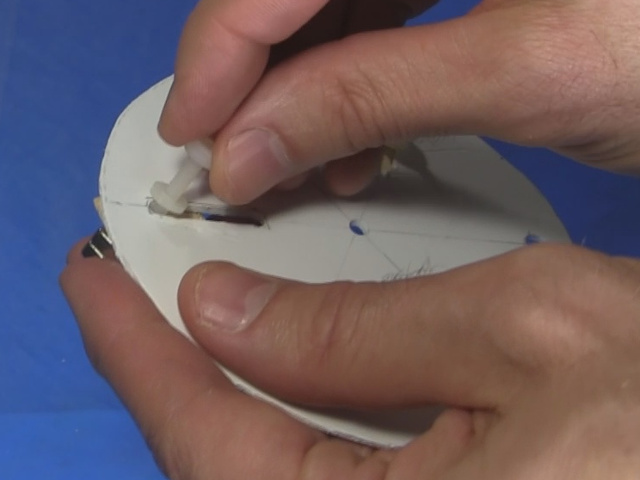
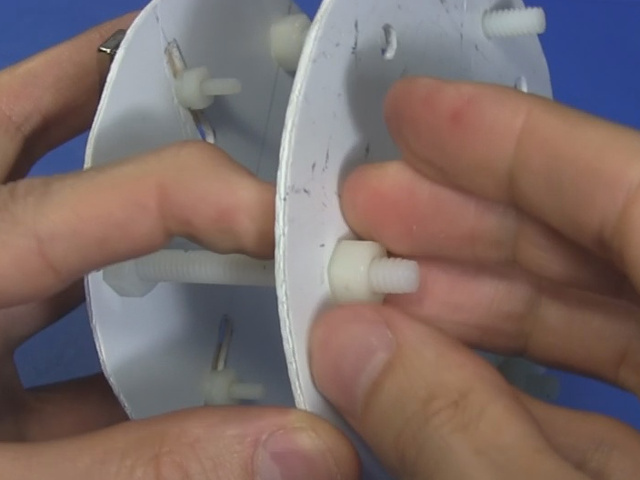
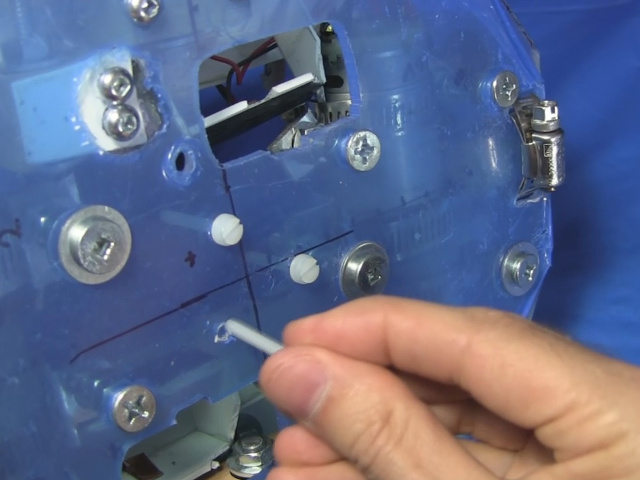
For a new way of attaching the head support to the head, I start by cutting three slots around the base. I then transfer the locations of those slots to the head. Next, I cut the heads off of three nylon bolts. These bolts will be epoxied to the head.
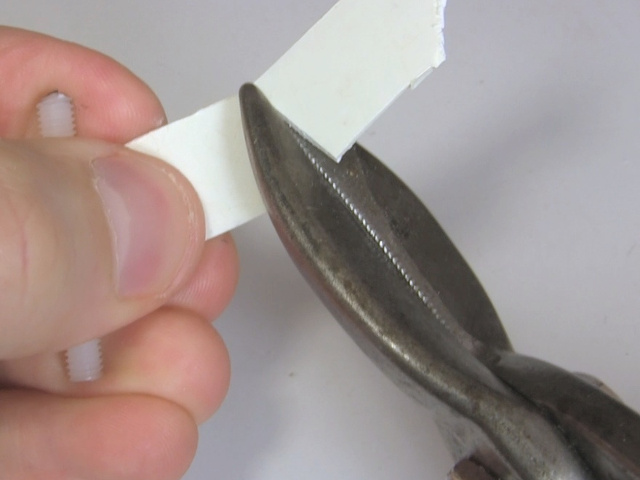
To make sure the bolts will remain in the head and not come loose when nuts are screwed onto them, I cut some wedges out of plastic from a hobby store and roughen them in preparation for epoxying.
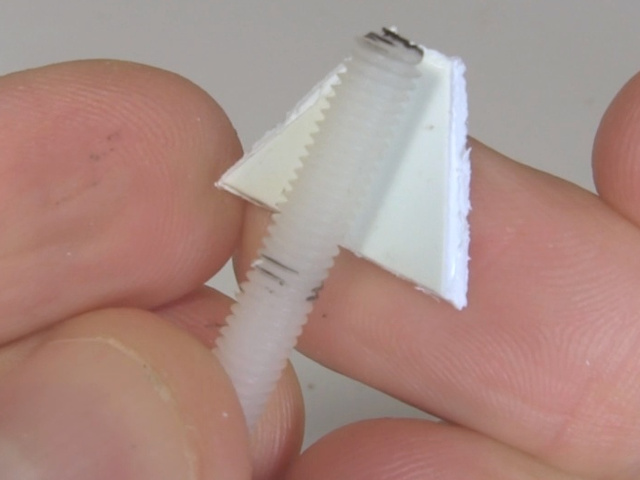
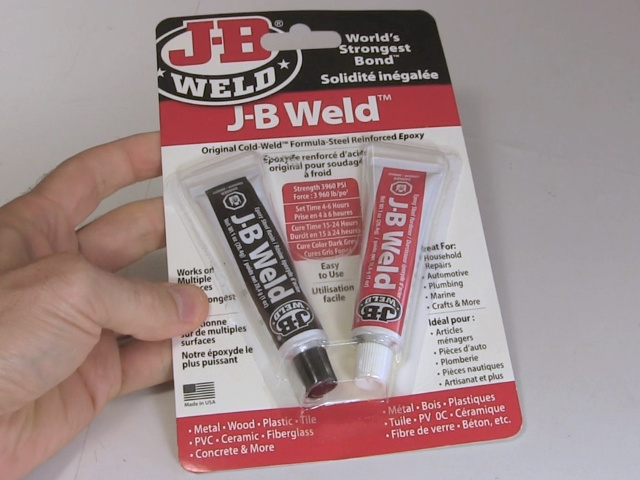
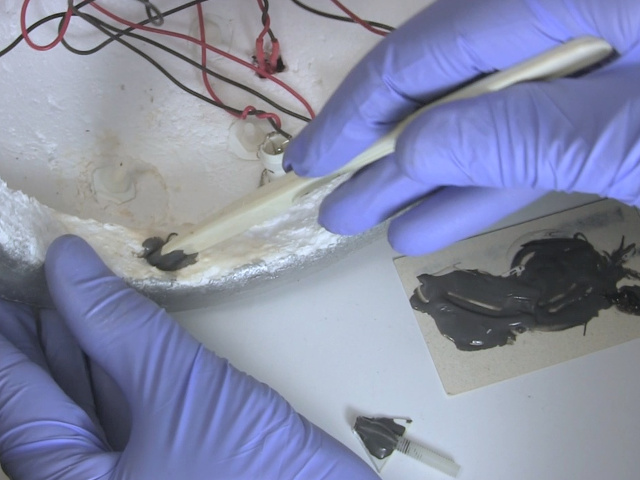
The epoxy I use is J-B Weld from a hardware store since it's amazingly strong. I use it to epoxy the cut ends of the bolts to the plastic wedges. I then make holes in the head for those wedges and bolts.
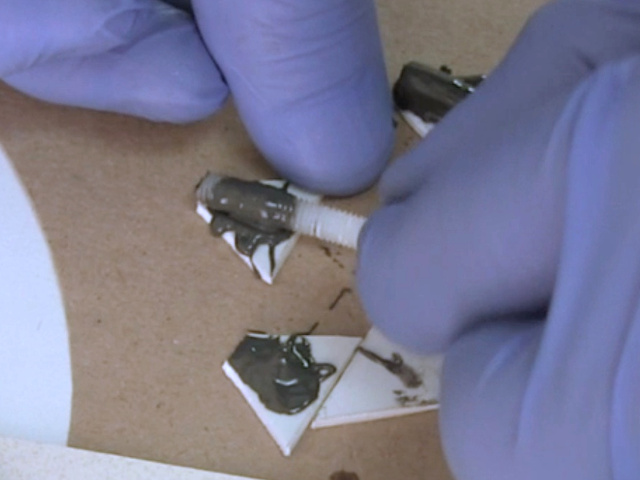
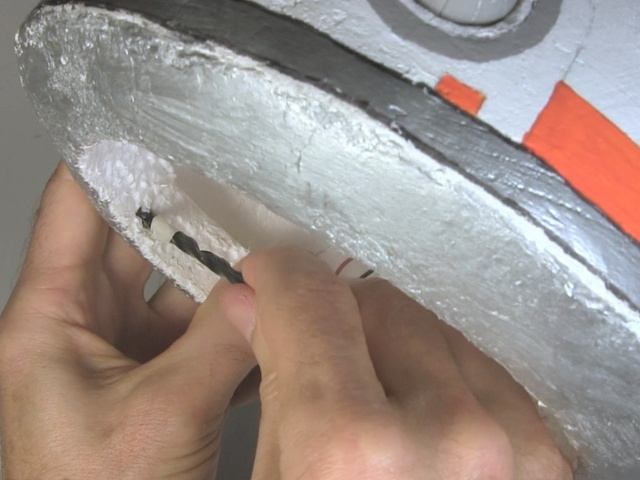
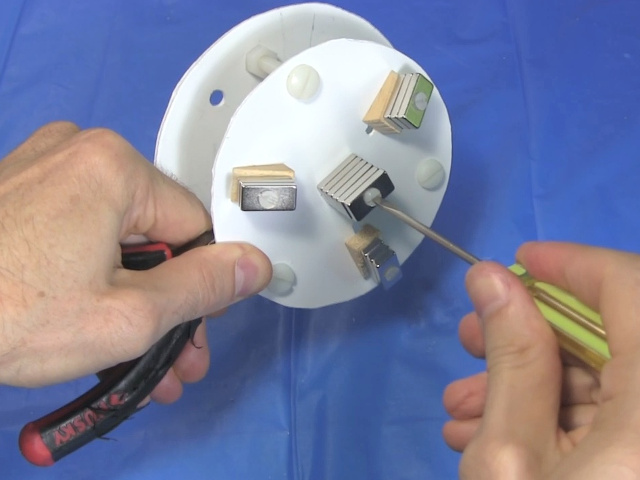
I put a generous amount of J-B Weld into the holes, and then insert the bolts. The result after 24 hours of hardening is shown below.
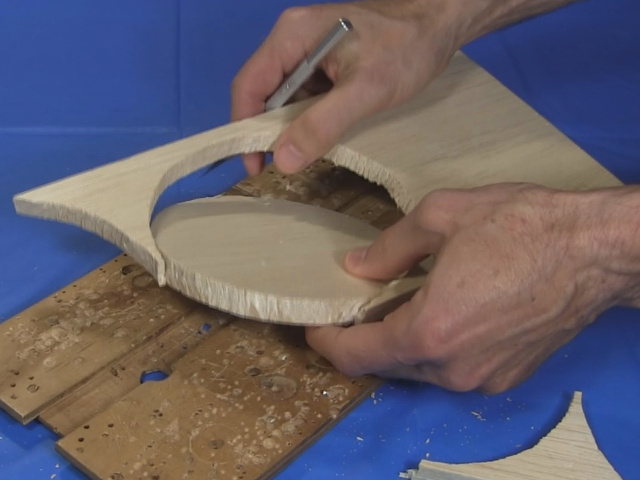
To make the overall head even lighter, you can see below how I've trimmed away as much of the balsa wood base as I can without weakening it.
As I said at the start, the casters used are the lightest weighing, easy rolling ones I could find, have 1" diameter plastic balls, and are from Pololu. I did have to add a little duct tape around the circumference of their black casing to make for a snug fit.
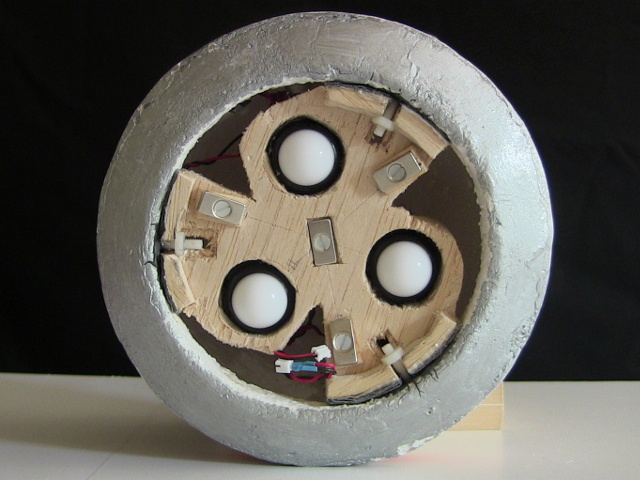
Below you can see the finished result with the head support slid into place around the bolts, and the nylon nuts tightened onto them, holding the head firmly in place. A possible future enhancement would be to somehow harden the balsa wood lip where the nuts press against the balsa wood, since frequent tigthening can wear away at the balsa wood, but so far that doesn't seem to be a problem.
Making BB-8's internal magnet support structure
Next came making the internal support, the part with magnets on it that goes inside the ball and is kept near the top to attract the head's magnets to the ball.
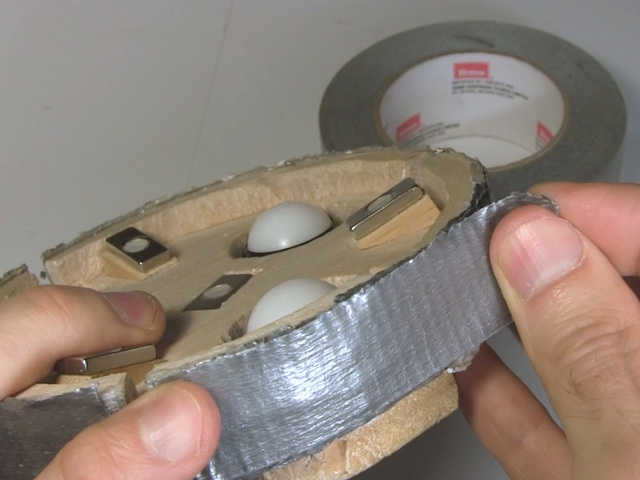
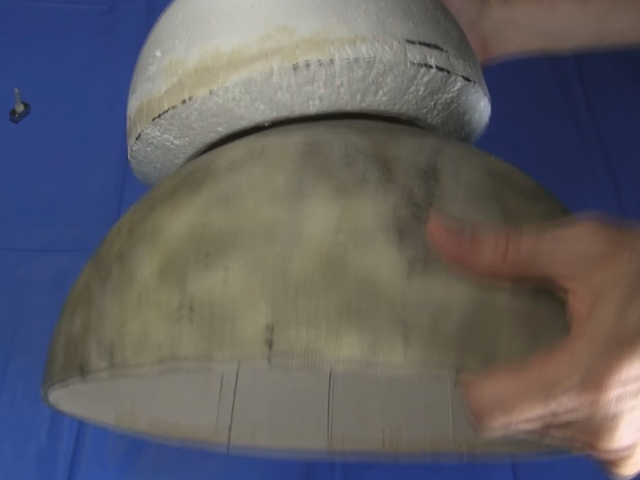
As shown below, I start by holding the head, with its head support and magnets, against the ball. Then I turn it over and put more magnets inside the ball. These are attracted the the head magnets on the other side. that gives me the rough spacing that these magnets should be.
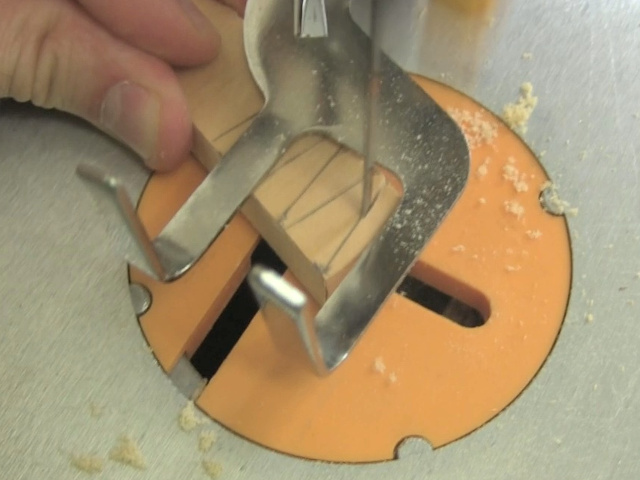
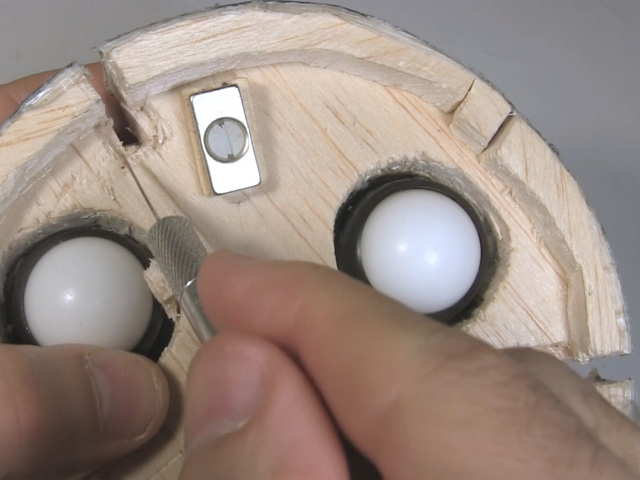
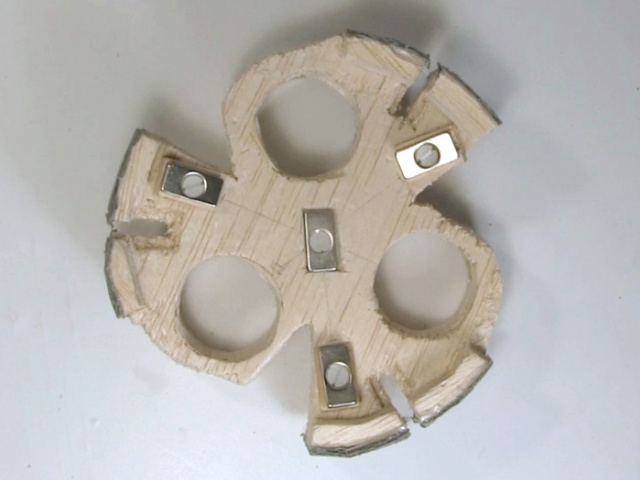
I then cut a disk from a piece of plastic from a hobby store and mark it up as shown below. The slots which I've marked, and one of which I'm melting out, are where the magnets will be attached. Using slots makes their radial position adjustable.
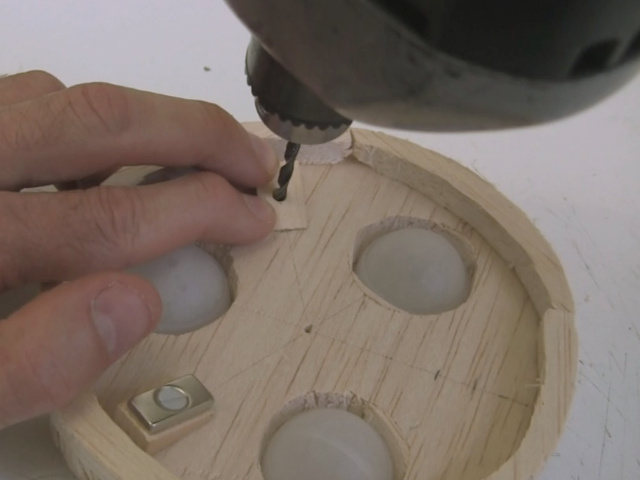
After melting the slots I then clean them up. The finsihed disk is shown below. I drill a hole in the center for a central stack of magnets and three other holes for making the height of the magnets adjustable, but more on that later.
I then transfer the locations of the three support holes to another plastic disk. We'll call that the bottom disk.
I attach a wooden hub that I'd made for another project to what'll be the bottom face of that bottom disk.
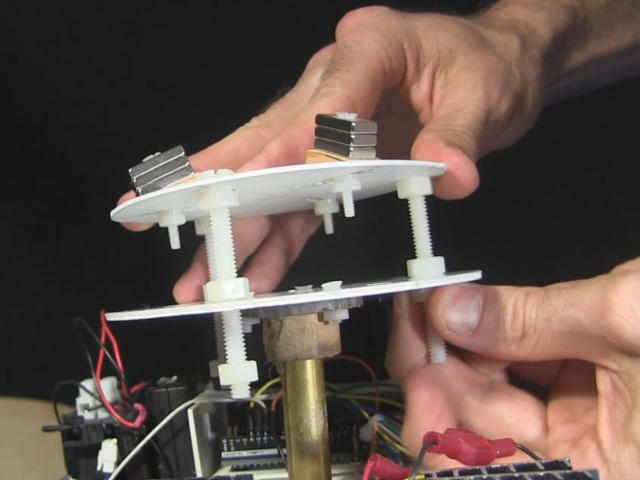
Then back to the top disk, I attach the magnets to the top face. Notice that I'm using more of the wooden wedges I'd made above.
Notice also that I'm using nylon nuts and bolts for everything since this will all be near the top of the ball and that has to be as lightweight as possible to minimize wobble.
Next comes the center magnets. And later, making quick improvements at a Makerfaire, I add some disk magnets on top. Since these don't have holes in them for bolting on, I used duct tape.
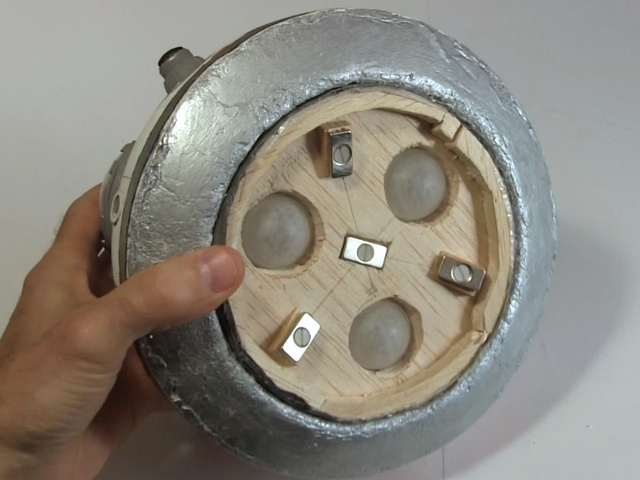
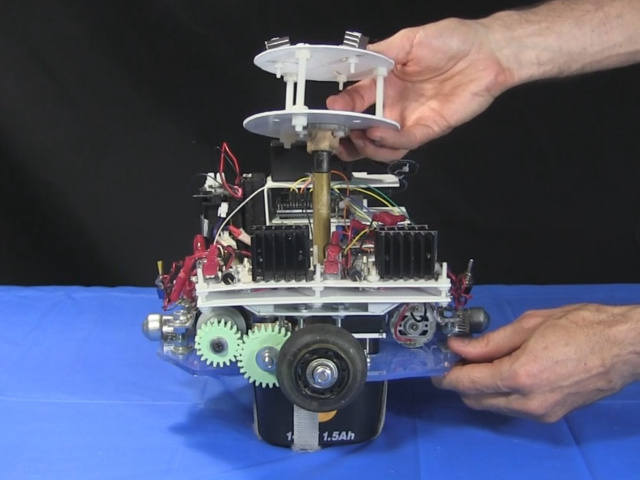
Finally, I bolt the bottom and top disks together.
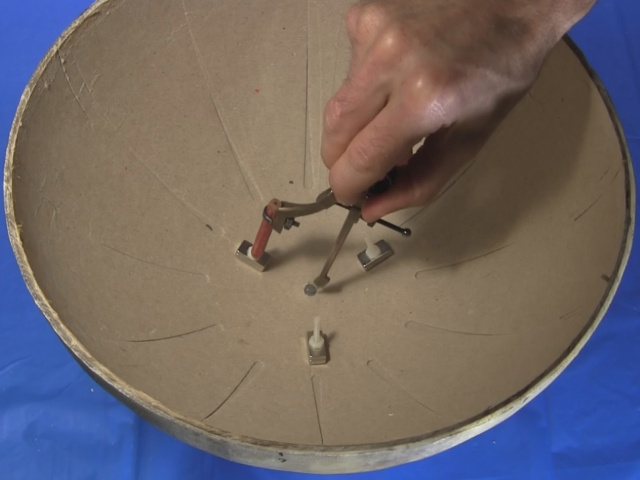
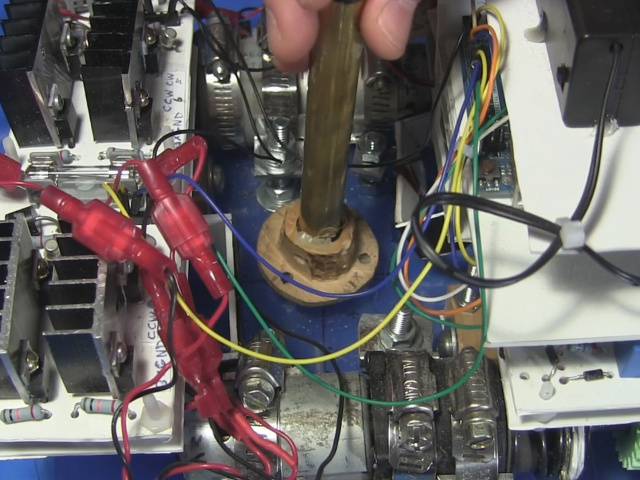
I then drill three holes in the drive system plate. That's for the pole that the internal support system will be sitting on. For that pole I take a hollow, lightweight, brass tube from a hobby store and put another of those wooden hubs from an old project on one end of it. Some black electrical tape ensures a snug fit. I lower that onto the drive system plate and bolt it in place.
I then put the internal support on the other end of that brass tube, again with electrical tape around the tube to make it snug. Note that I also add plenty of hot glue to further help hold both hubs to the brass tube.
But after putting the whole thing in one hemisphere of the ball and then lowering the other hemisphere on top, I find that the magnets are much too high, and the two hemispheres don't meet.
So I lower the top disk by adjusting the nuts, as shown below. Now you can understand why the internal support is made up of two disks.
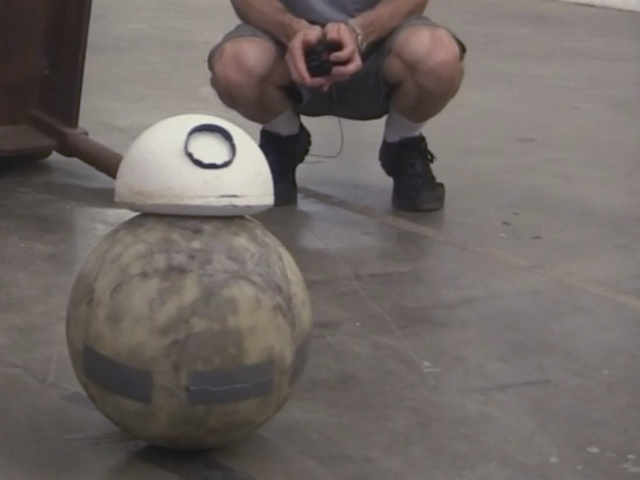
But at this point it's ready to go wandering around a local makerspace to the delight of everyone watching.
Video - Making BB-8 (v2) - Reattaching the Head - Part 3
The following video is called reattaching the head because there was an earlier version of BB-8's head support and internal support that was quite different. But even then, the second video below (Improving the Head - Part 7) has some stuff regarding the head support that is an improvement over what was done in this video.
Video - Making BB-8 (v2) - Improving the Head - Part 7
I wanted to change the casters under the head to ones that roll better. I also change the way the head support attaches to the head. But at the same time I wanted to make the head weigh less so that it stays on better. Somehow I managed to do all that and this video shows how.
