Detailing, adding LEDs to and painting BB-8 (v2)
This page shows how I added details to my BB-8's head, added LEDs to the head and painted both the head and the ball. There is far too much to fit every detail on a webpage so I've included a long video below of every step of doing all this work but included plenty of information below for anyone who doesn't want to watch the video or just wants a quick reference.

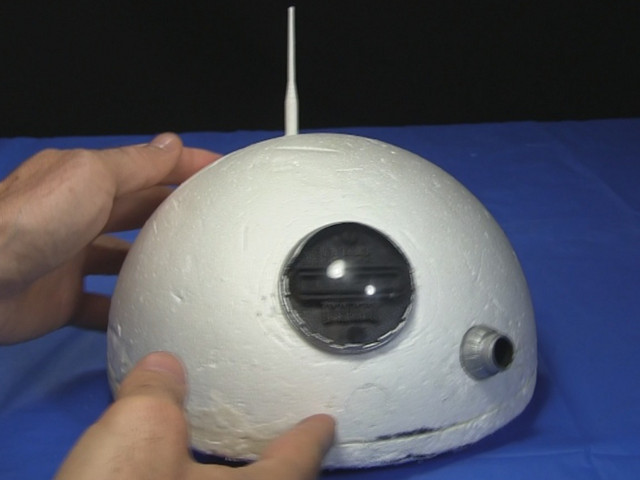
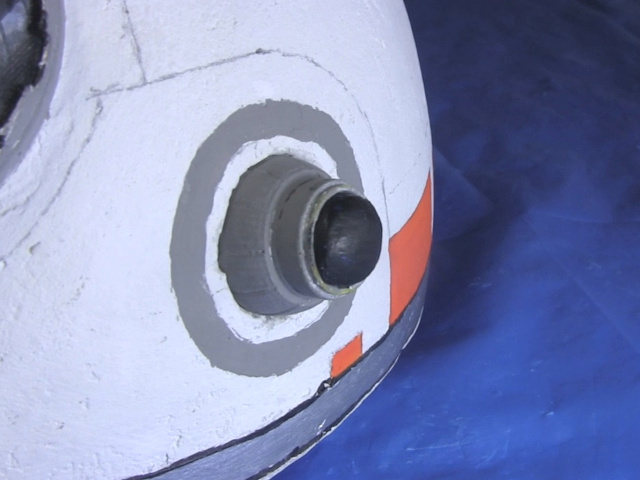
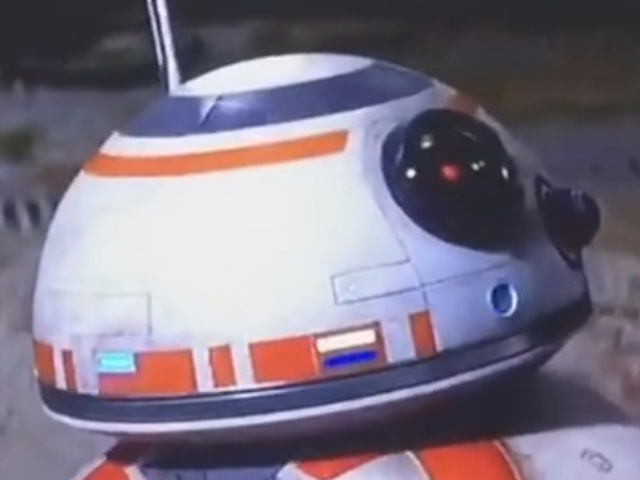
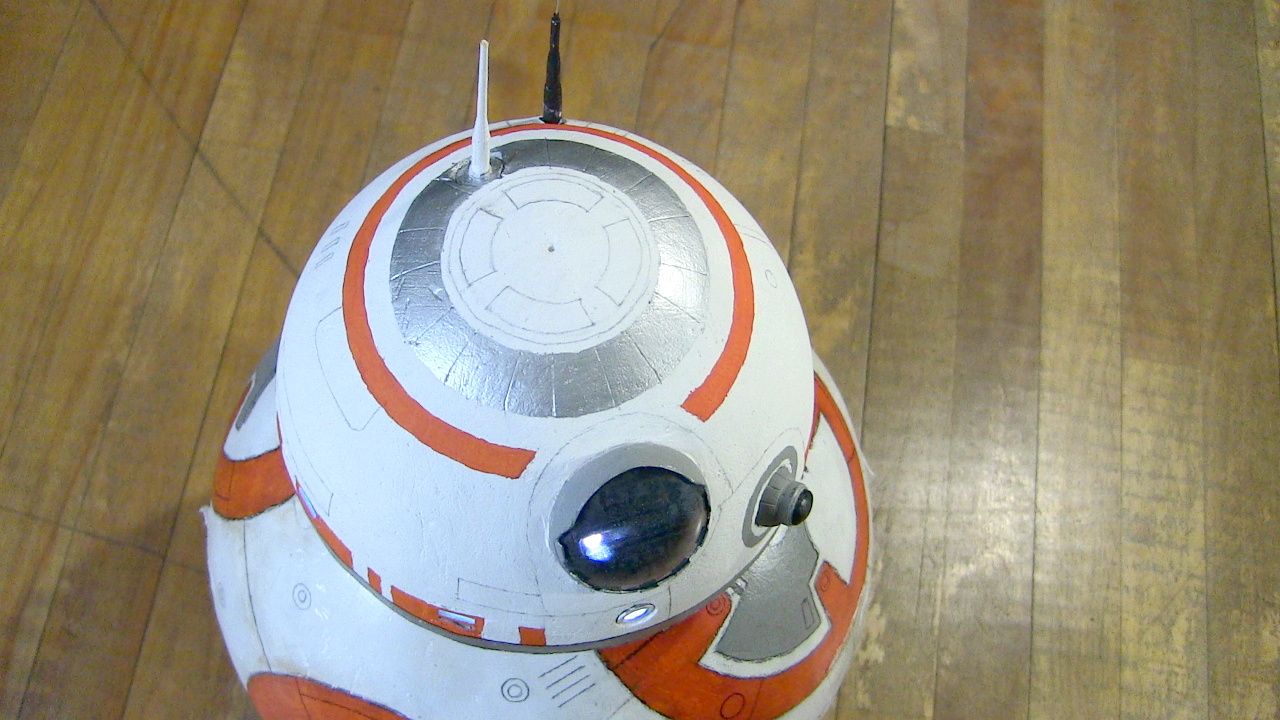
BB-8's head radar eye, holo projector and antennas
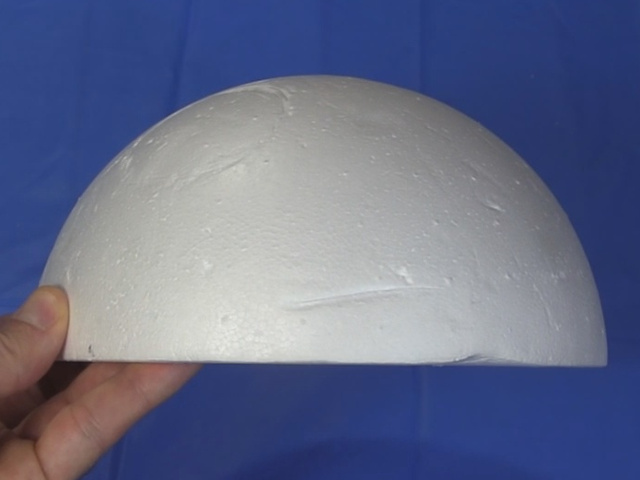
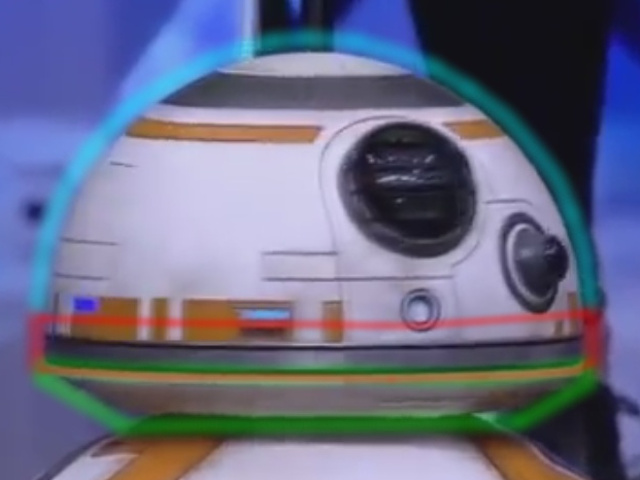
BB-8's head is more than just a hemisphere (half sphere) with an upside down cone below it. It actually has a bit of a cylinder below the hemisphere, and then the cone. As you can see in the photo below, I added a styrofoam piece for this.
For the radar eye, the holo projector and one of the antenna I designed them in Blender, a free 3D modelling and animation software, exported them as STL files, and 3D printed them. The files are all below. I painted them with white Gesso for oil and acrylic as a primer and then painted them with acrylic paint from a dollar store as needed.
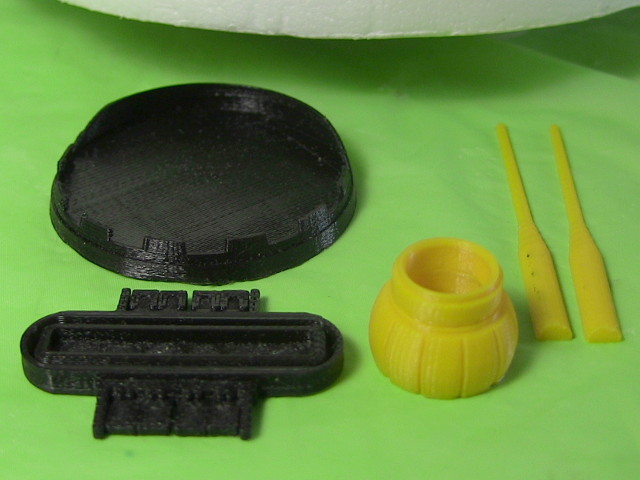
Here are both the STL files for 3D printing and the original Blender file, in case you want to modify them or scale them to a different size.
bb8_v2_head_parts.blend - 3.65MB, Blender 2.71 file
bb8_radar_eye_base.stl - 291KB
bb8_radar_eye_center_piece.stl - 210KB
bb8_holo_projector.stl - 159KB
bb8_antenna_half.stl - 13KB
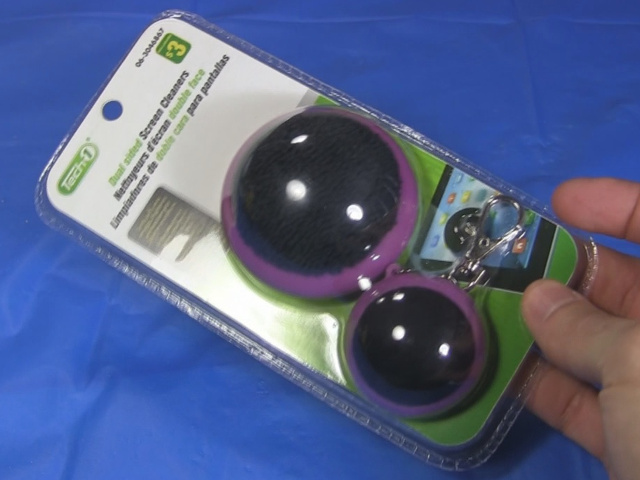
For the lens covering the radar eye (see the above photo), I found some packaging from a dollar store for a screen cleaner product that was just the right size (see below). I simply cut what I needed from the plastic packaging.
I couldn't find a good lens for the holo projector, so I stuck some balse wood in the projector and sanded it to shape, and then painted it black along with some Krylon clear spray paint for added protection and glossiness.
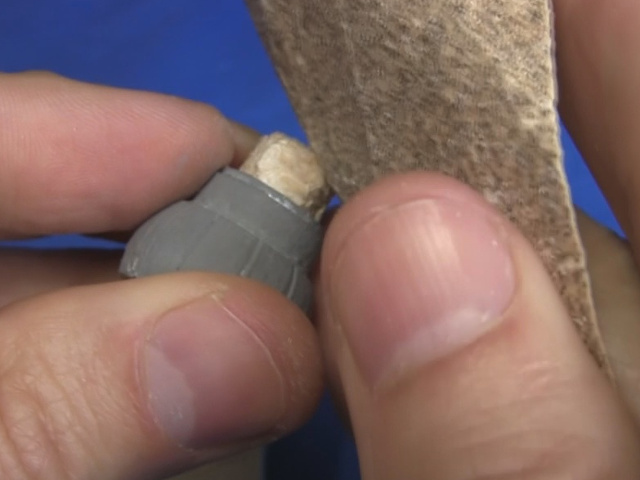
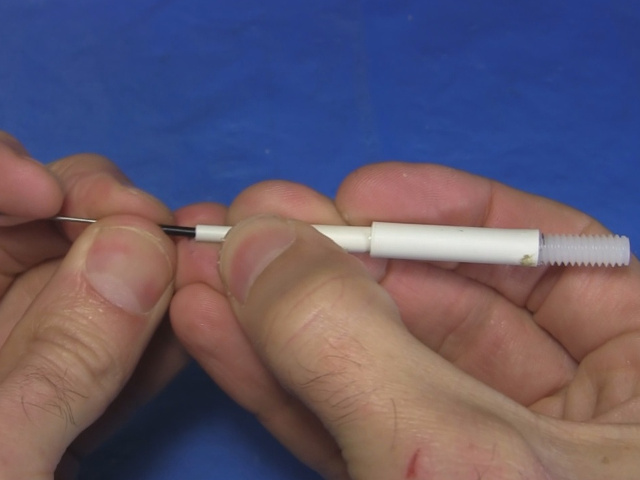
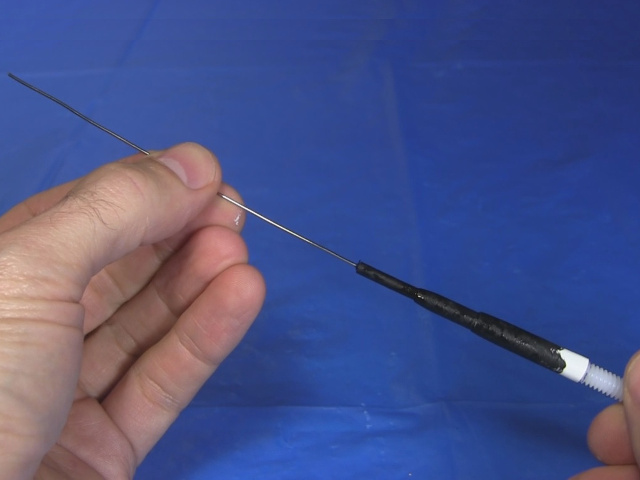
The remaining antenna, the taller one with a wire, was done entirely from scratch. For the base I cut the head off a nylon bolt and superglued the threaded part into a plastic tube from a hobby store. I then nested two smaller diameter tubes in that one and sanded the result to make a cone shape. For the wire I used some steel wire with some insulation taken from an electrical wire on the end to make it a snug fit in the smallest tube. Then I painted it.
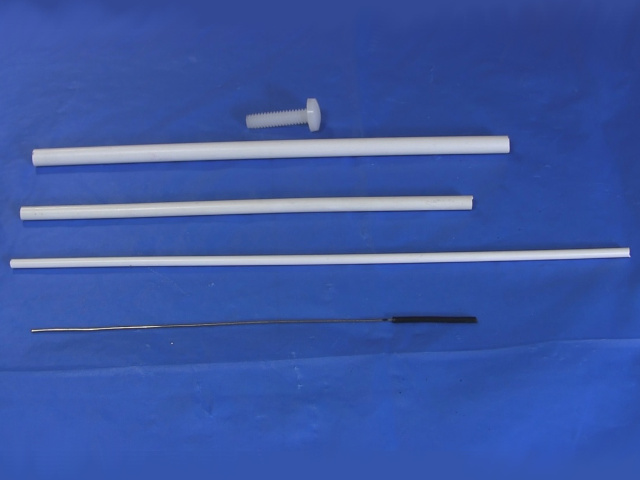
For attaching things to the head I used nylon bolts, since they don't weigh much, and simply bolted them to the head.
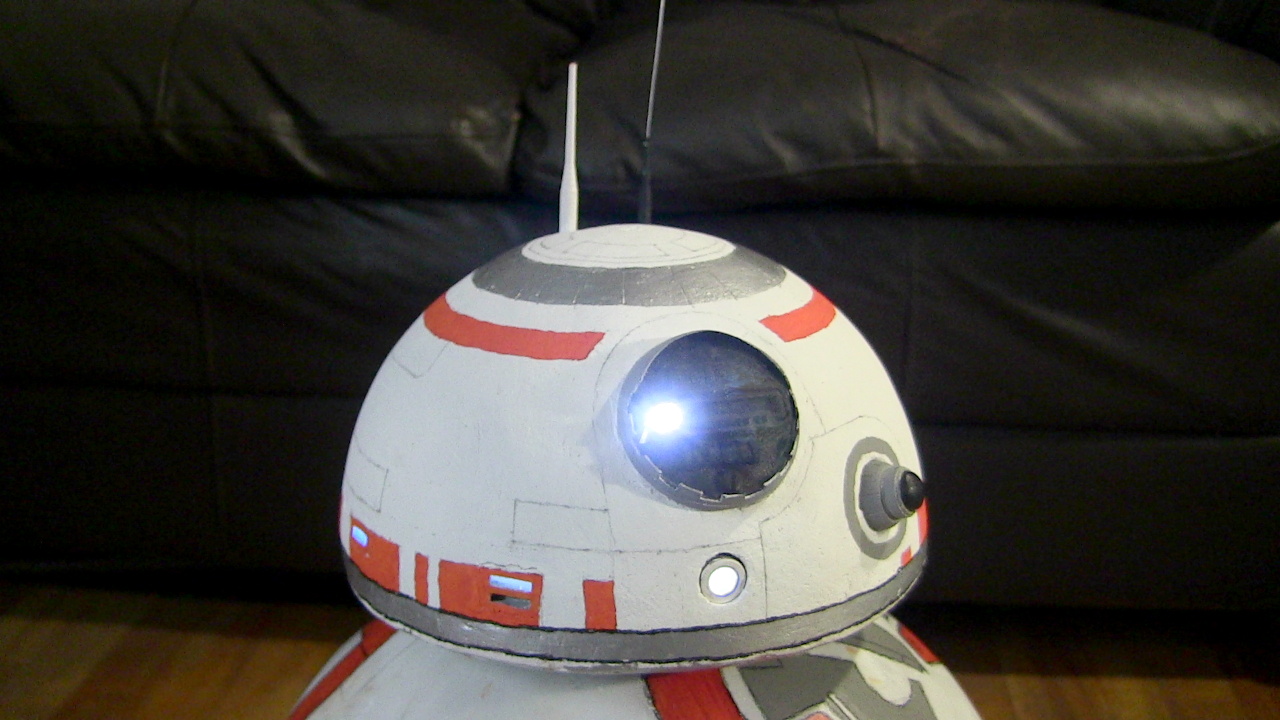
LEDs for BB-8's head
BB-8's head has various lights. The ones I added were the round one just below the radar eye, the two rectangular lights to the left of center, and the light in the radar eye itself.
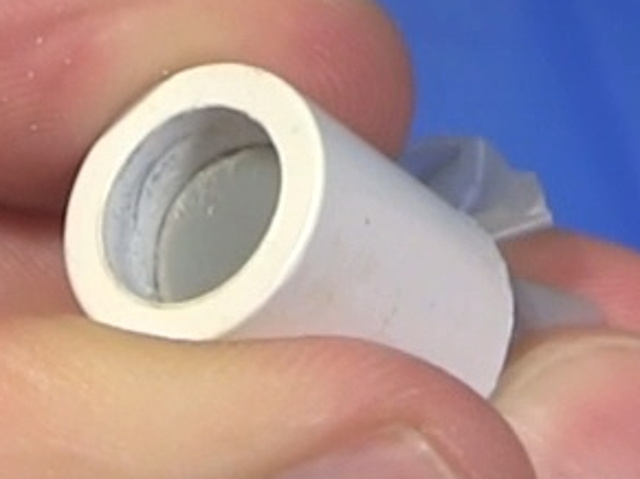
For the round one just below the radar eye, I found a pen cap that was just the right size and drilled the end out to make a cylinder. I then found a plastic tube from a hobby store that fit a little loosely inside the pen and used it to push a piece of grey plastic bag almost all the way to the exposed end of the pen cap. That acts as the lens or diffusor that you see. I stuck an LED into the other end of the tube and held it on with a tie strap.
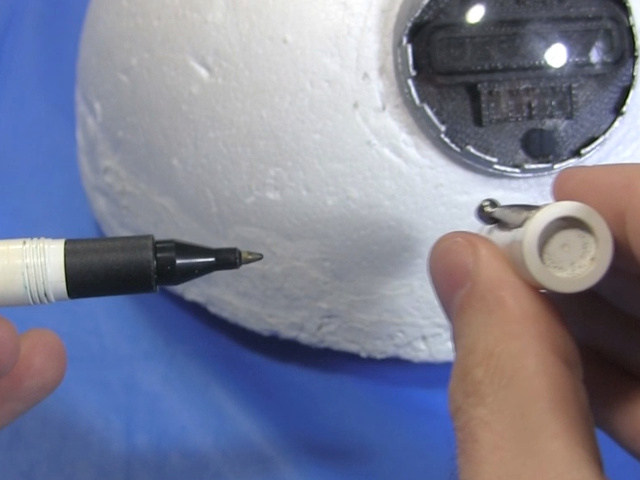

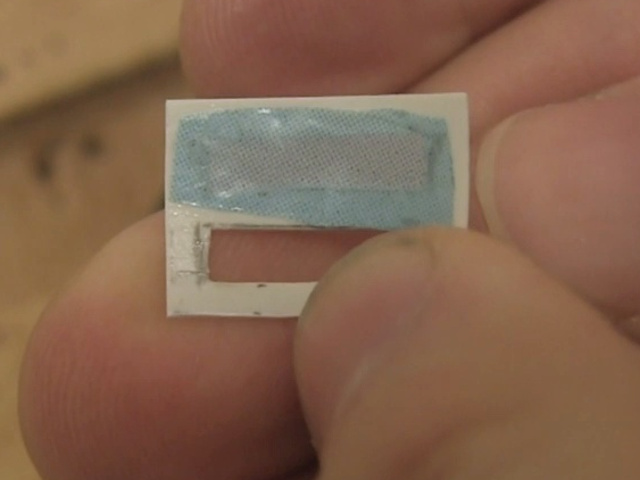
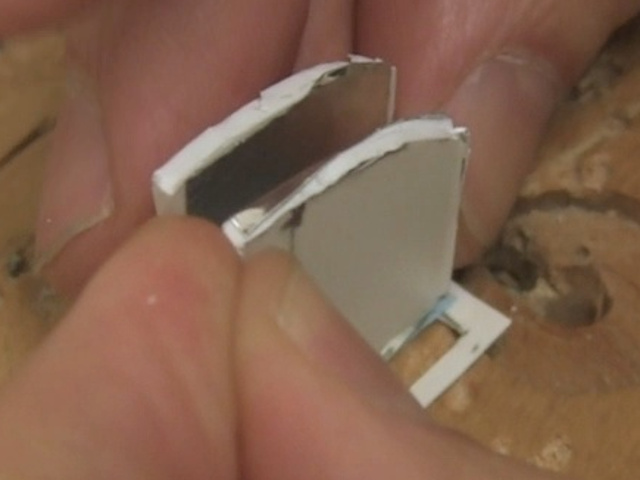
For the rectangular lights I found plastic material of two different shades of blue from food packaging and glued them to some thin plastic from a hobby store cut to shape. I then made sort of boxes for them, taping aluminum tape to the inside to make them internally reflective. Then I attached an LED inside to the other end of each box, holding it in place with a tie strap.

In the movie, Star Wars: The Force Awakens, only one red light appears lit in the radar eye. When I made my 3D printed one I made sure there was room for up to six LED's side-by-side. Oddly, the six holes I'd designed in were filled in by the printer. But it was easy to drill a hole and attach some screws for mounting an LED. To hold it in place, I simply ran an insulated wire from screw to screw, with the middle of the wire pressing against the LED, holding it in the hole (the hole is sized such that the LED won't go all the way through the hole).
The LED should be red but I had white only. I tried putting red packaging material in front of it, but the light was too dim. I tried coloring the LED with a red marker but it still appeared white from straight on.

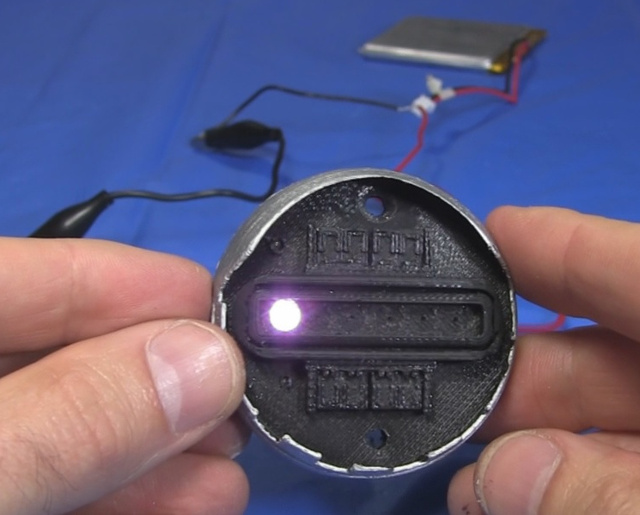
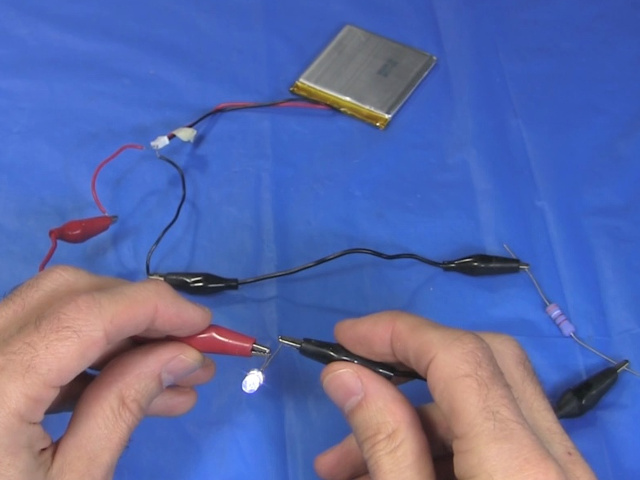
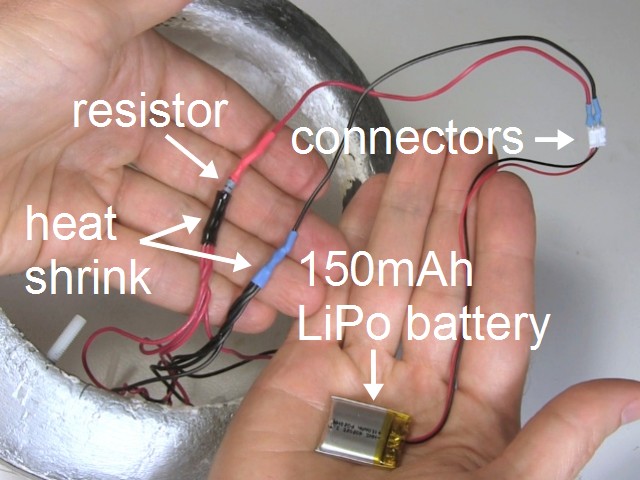
The LEDs were all powered by a single lithium polymer 3.7V, 150mAh battery with all the LEDs connected in parallel. A resistor was put in series with that. The LEDs were rated for 20mA maximum, so using ohms law, R=V/I, R=3.7V/0.02A, R=185 ohms. That means to limit the current I'd need a resistor that was at least 185 ohms. To play it safe I used a 220 ohm resistor.
Originally I used a 2000mAh battery but I wanted a lighter one so that the head would be lighter overall and stay on better. From testing I found that the LEDs were bright enough with only a 5mA current draw. 150mAh / 5 mAh would give me a roughly 30 hour run time, which is plenty.
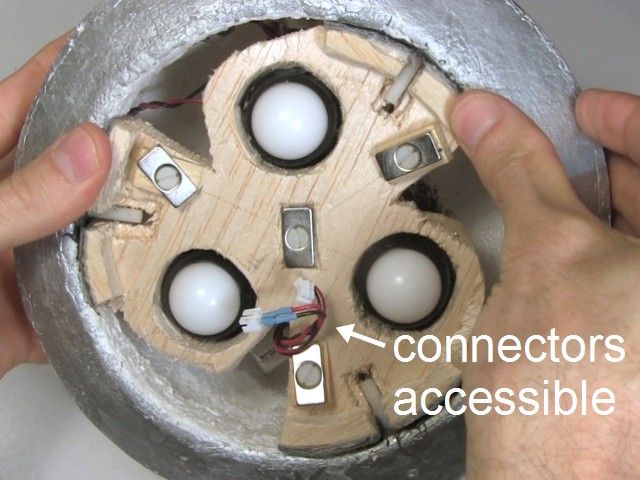
To keep things light, I simple soldered the resistor inline with the positive wires going from the LEDs to a 2-pin JST PH connector. The JST connector was purchased from ebay and is so that I can plug and unplug from the LiPo battery, which also has a JST connector. Heat shrink was put over all solder connections.
That was all then just put into the head and the head support put in place. Notice that I let the two connectors stick out a bit so that I can easily plug and unplug the LEDs from the battery as needed.
Painting BB-8's head
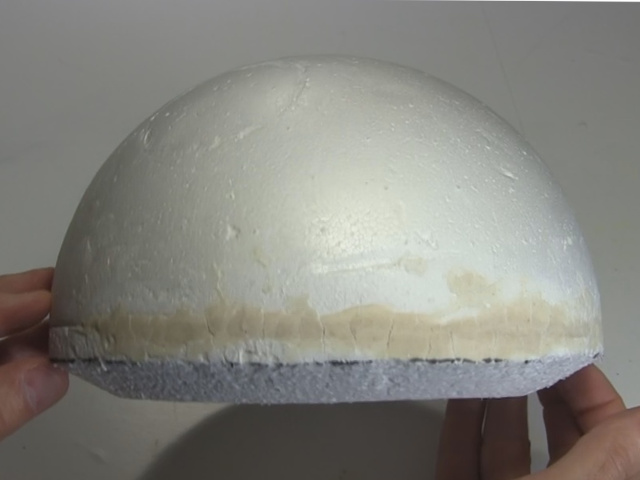
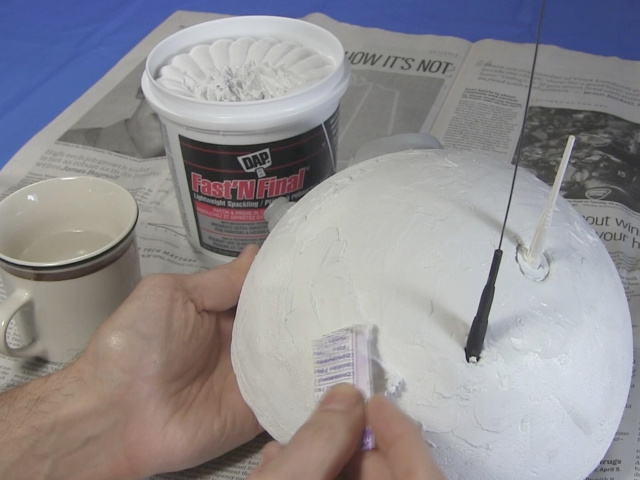
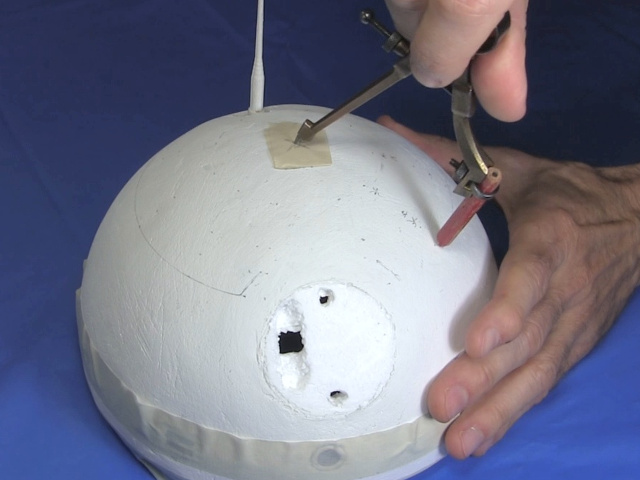
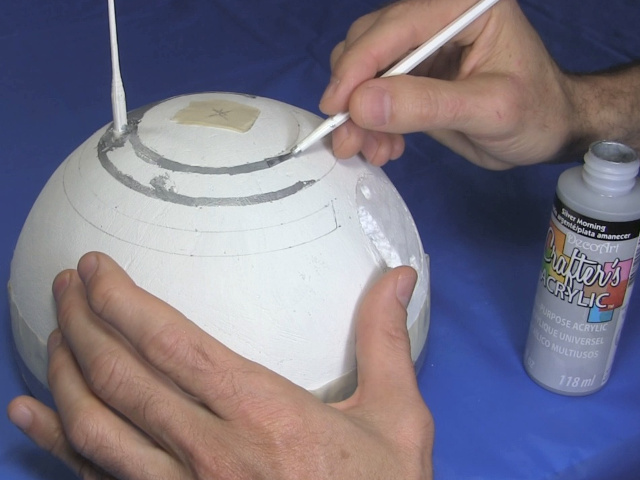
Before painting the head, I had to smoothen it. To do that I covered it completely in lightweight spackle, a material found in hardware stores and normally used for covering drywall when making walls in a house. Make sure you get the lightweight type. Sanding it afterward was easy. I should have worked harder to get it perfectly smooth, with no imperfections but I had a tight deadline to get it ready for a Maker Faire. I then painted it in a white Gesso for oil and acrylic, followed by acrylic paints for the colors, black marker for a thick black line around the silver ring at the base, and pencil for the other lines.
For some of the dimensions I measured and calculated them using the same method I outline on my page about BB-8's dimensions. For other's I just did rough guesses to match photos mostly taken from the Star Wars Celebration Anaheim 2015 panel video.
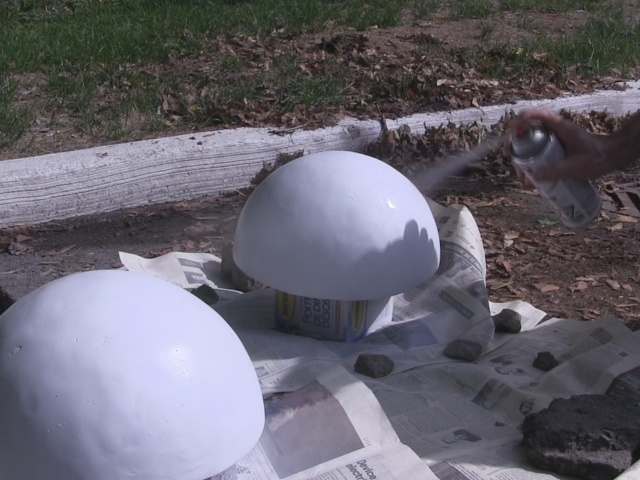
Painting BB-8's ball
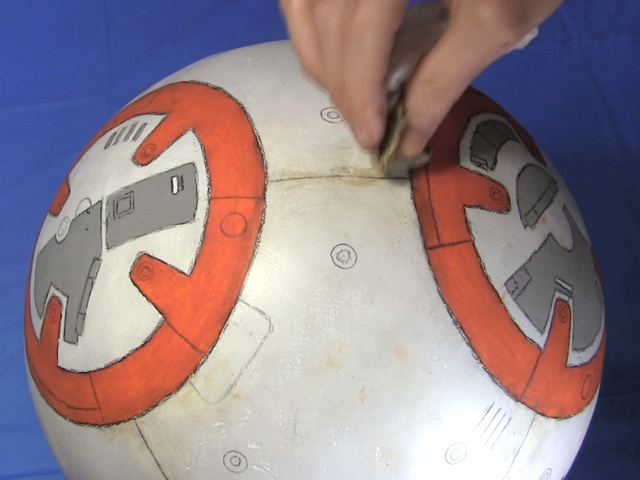
To paint the ball I first painted with a few coats Krylon white primer spray paint. Then I drew the circles on, painted them, again with acrylic paint from a dollar store, and used a black colored pencil to draw dark outlines around the circles' edges, as well as for all the other details. I used grey acrylic paint for the parts inside the circles. To find out just what to draw inside the circle, I used templates from a document provided by the BB-8 Builders Club (T&M BB-8 Parts File: Instruction Guide to 3D Printing, Assembling, Finishing, & Events).
Weathering was done by mixing acrylic paints and lots of water to get a brown color and then sponging that on some of the lines using a paper towel and then partially cleaning it off using another wettened paper towel.
That was followed by a few coats of Krylon clear paint to protect it all.

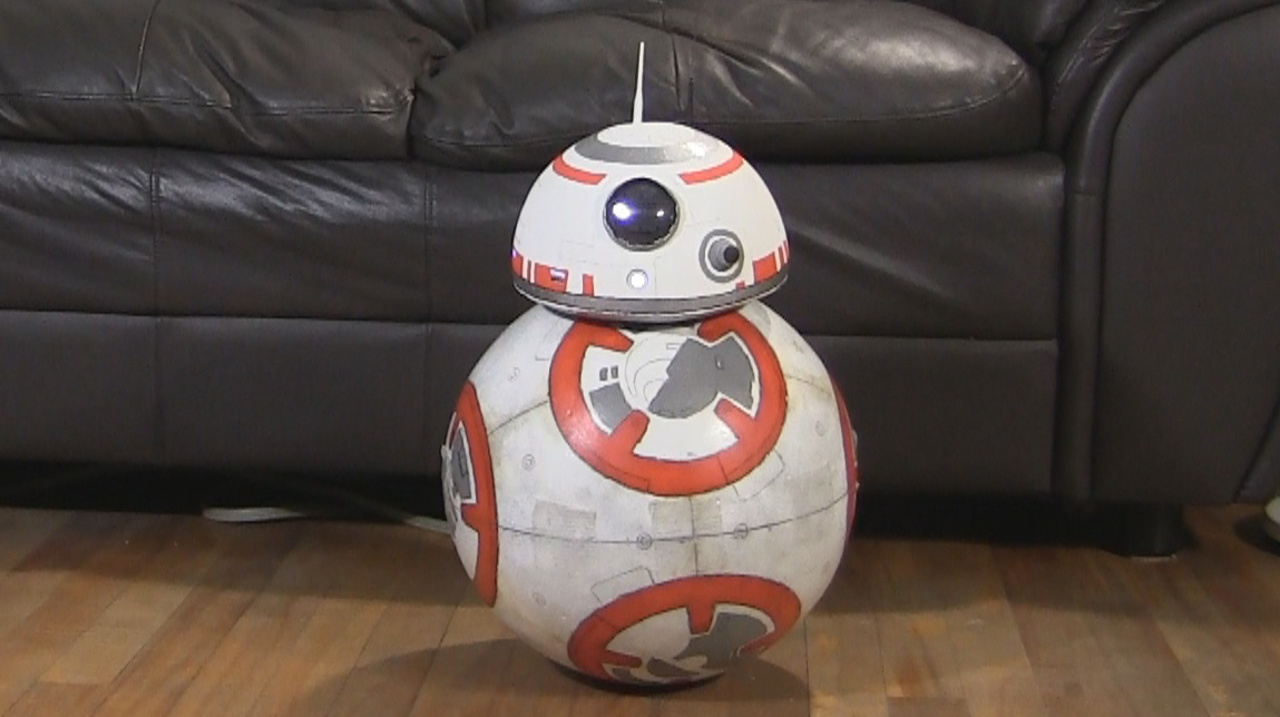
BB-8 - painted, detailed and with LEDs lit
Here are some photos.
Video - Making BB-8 (v2) - Painting/Details/LEDs - Part 5
This video goes through all the details of painting BB-8, adding details to the head and adding LEDs inside the head.
